Table of Contents
- 1 Why These Watermelon Jello Cups Are a Summer Hit
- 2 Ingredients You’ll Need
- 3 Step-by-Step Instructions: Assembling Watermelon Jello Cups
- 4 Variations & Customizations to Try
- 5 Tips for Best Results
- 6 Serving Ideas & Best Occasions
- 7 Frequently Asked Questions (FAQs)
- 8 Nutritional Snapshot (Approximate per Serving)
- 9 Final Thoughts: A Delightful Treat for Hot Days
Why These Watermelon Jello Cups Are a Summer Hit
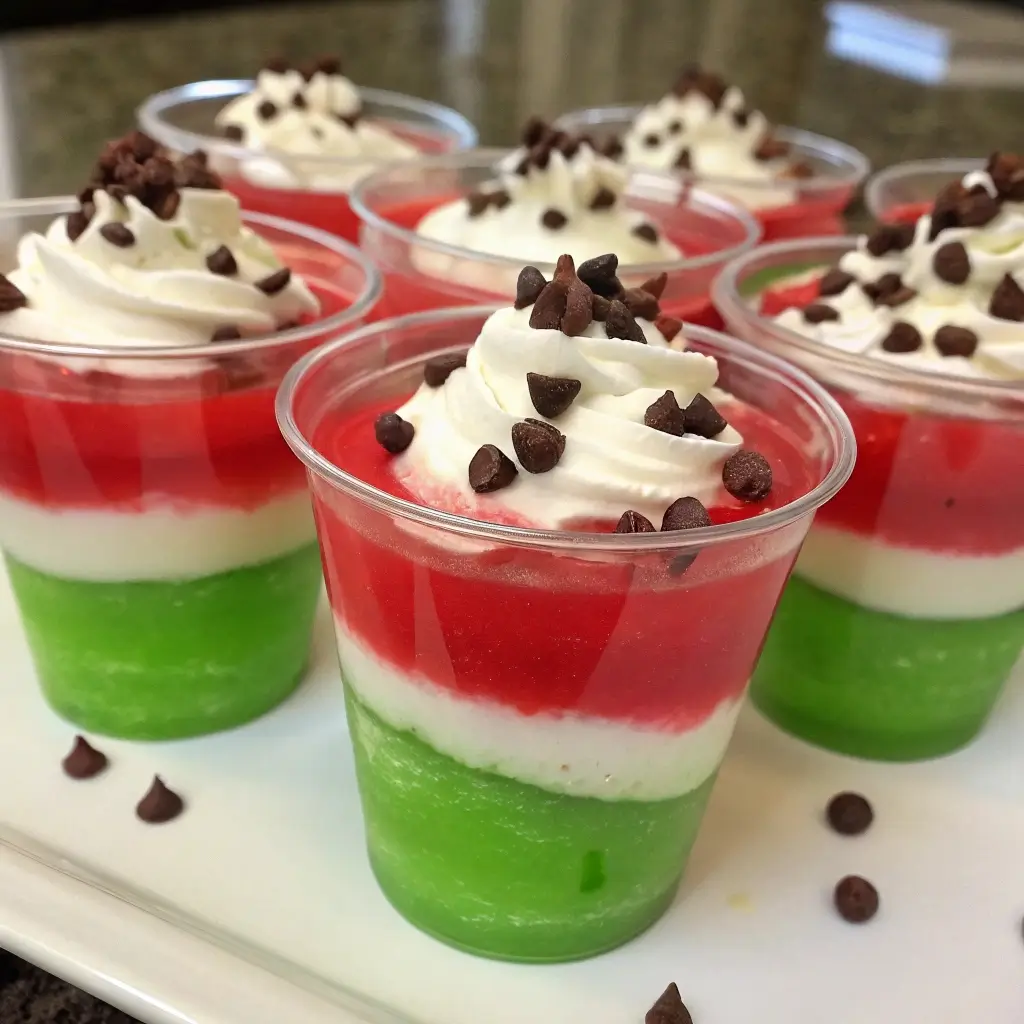
Creating layered Jello cups in watermelon colors is a surefire way to delight guests, especially kids. These cups are:
A visually striking, red-white-green treat evoking watermelon slices
Perfectly bite‑sized and portable for picnics or potlucks
Cold, refreshing, and hydrating—ideal for hot summer weather
Simple to make in advance
Naturally free of pork, bacon, wine, or alcohol—so everyone can enjoy
The custard-like gelatin is fun to eat, the whipped topping adds creamy contrast, and the mini chocolate chips mimic watermelon seeds—cute, colorful, and completely kid-friendly.
Ingredients You’ll Need
🧊 For the Red “Watermelon” Layer:
1 (6‑oz) package red-flavored gelatin (e.g. cherry, strawberry, fruit punch)
1 cup boiling water
½ cup cold water
🍈 For the Green “Rind” Layer:
1 (3‑oz) package lime-flavored gelatin
½ cup boiling water
½ cup cold water
🍨 For the Whipped Topping:
1½ cups cold whipping cream or pre‑made whipped topping
2 tablespoons powdered sugar
1 teaspoon vanilla extract
🌱 For Garnish:
Mini chocolate chips for “seed” decoration
Optional: sprigs of fresh mint or green sugar crystals for rim garnish
Step-by-Step Instructions: Assembling Watermelon Jello Cups
Step 1: Prep the Red Layer
In a mixing bowl, dissolve 6‑oz red gelatin packet in 1 cup boiling water.
Once fully dissolved, stir in ½ cup cold water.
Carefully pour about ¼ cup into each clear plastic cup or jar—this forms the red “meat” of the watermelon.
Place cups in the refrigerator for 30–45 minutes, or until the layer is just set (not wobbly, but firm enough to support the green layer).
Step 2: Make the Green Layer
In a separate bowl, dissolve the lime gelatin in ½ cup boiling water.
Add ½ cup cold water and stir to combine.
Once the red layer is set but still tacky, gently pour or spoon about 2–3 tablespoons of green gelatin along the rim of each cup to create a rind effect, or pour a thin layer across the top depending on cup shape.
Chill again for another 20–30 minutes until the green layer is firm.
Step 3: Whip the Cream
In a chilled bowl, whisk the cold whipping cream, powdered sugar, and vanilla extract until stiff peaks form.
Keep chilled until ready to assemble the final dollop.
Step 4: Add Whipped Cream and “Seeds”
Pipe or spoon a generous dollop of whipped cream on top of each cup, covering the green rind layer.
Sprinkle mini chocolate chips onto the whipped cream to resemble watermelon seeds.
For extra flair, rim the top edge with green sugar crystals or add a small mint sprig.
Step 5: Chill Before Serving
Store completed cups in the refrigerator until serving. They’re best served cold and can be prepped up to 24 hours in advance.
Variations & Customizations to Try
Individual flag-themed cups: Alternate red gelatin with vanilla or panna cotta layers.
Fruit-enhanced version: Stir in fresh diced strawberries or watermelon cubes within the red layer before it sets.
Dairy-free version: Use coconut whipped topping or coconut cream in place of dairy whipped cream.
Sugar-free version: Replace jello with sugar-free gelatin packets and use sugar-free whipped topping.
Patriotic twist: Add a third white layer between red and green—like vanilla panna cotta or yogurt—to visually mimic an American flag slice.
Cookie crumb base: Add a thin layer of crushed sugar cookies at the bottom for added crunch.
Tips for Best Results
Pour gelatin layers slowly! Pouring down the side of the cup helps prevent disturbing the previous layer.
Chill thoroughly between layers so the colors stay distinct.
Use chilled bowls and beaters for whipped cream to get a fluffier, thicker result.
Stick to mini chocolate chips—not larger chips—to mimic real watermelon seeds and prevent sinking.
Use transparent cups to enhance the layered effect visually.
Prepare everything in advance (gelatin, cups, cream) to make assembly fast.
Serving Ideas & Best Occasions
Ideal for:
Labor Day picnic or 4th of July pool party
Children’s birthday parties—safe, sweet, and portion-controlled
Potlucks, cooking class dessert tables, or teacher appreciation treats
Afternoon snack or light dessert after grilling or summer lunch
Presentation Tips:
Serve on tiered trays to show off the layers
Offer wooden dessert spoons for a festive picnic feel
Serve alongside fresh watermelon slices, lemonades, and summer salads
Frequently Asked Questions (FAQs)
How long do these gelatin cups last?
Stay fresh in the refrigerator for up to 24 hours. After 24–36 hours, gelatin may lose some firmness and whipped topping may absorb moisture. Best served within a day.
Can I use other flavors/colors?
Yes! Choose any red and green pairings—raspberry and lime, cherry and green apple. Just maintain the watermelon visual effect.
Can I add real watermelon pieces?
Yes! Stir small diced fresh watermelon into the red layer before it sets. Make sure pieces are small and well drained to maintain firmness.
How can I keep the whipped cream from collapsing?
Use stabilized whipped cream by adding a small amount of gelatin powder or cornstarch to help it hold longer. Chill the cups until serving and assemble whipped cream as close to serving time as possible.
Are these cups kid-friendly?
Absolutely. There is no alcohol or gelatin shots—just fun, sweet, fruit-flavored gelatin, creamy toppings, and chocolate chips.
Nutritional Snapshot (Approximate per Serving)
Calories: ~150–180 kcal
Total carbs: ~20–25 g
Sugars: ~18–22 g
Fat: ~6–8 g
Protein: ~2–3 g
Fiber: ~0–1 g
Allergens: Contains dairy if made with whipped cream
(Nutrition will vary based on ingredients used, including whipped topping or sugar-free substitutions.)
Final Thoughts: A Delightful Treat for Hot Days
Watermelon Jello Cups are the epitome of summer fun in dessert form—vibrant, playful, and perfectly portable. They offer a refreshing sweet bite without being heavy, and their cute design makes them a standout on any holiday table. With minimal prep, no cooking, and flexible customization, you can serve up a crowd-pleasing treat that’s ideal for Labor Day, pool parties, classroom fun, or family barbecues.
Serve chilled, serve cute, and let these cups bring smiles all around.