Table of Contents
Introduction
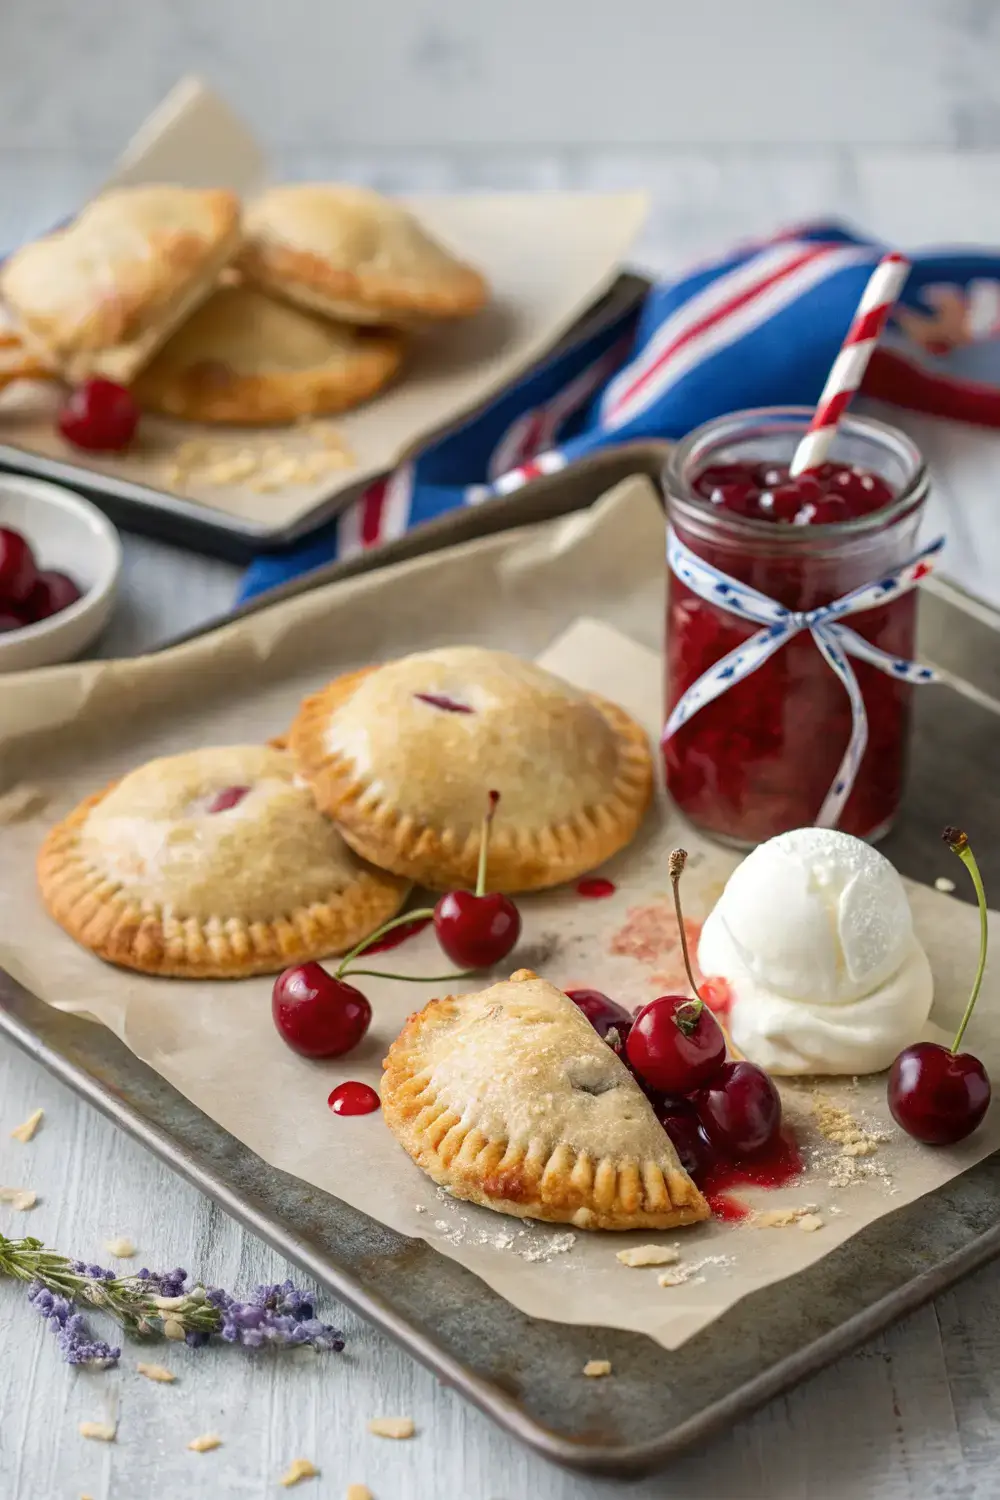
There’s something truly special about celebrating America’s independence with homemade treats that bring people together. As the summer sun shines bright and fireworks light up the night sky, what could be more quintessentially American than sharing delicious, handcrafted cherry pies with friends and family? These Sunny Side Up Cherry Hand Pies are not just a dessert—they’re an experience that captures the essence of July 4th celebrations: vibrant, sweet, and full of patriotic spirit.
Imagine the aroma of freshly baked pastry mingling with the irresistible scent of tart cherries filling your kitchen. These hand pies offer the perfect balance of flaky crust and fruity filling, with just enough sweetness to satisfy your dessert cravings without being overwhelming. Whether you’re hosting a backyard barbecue, attending a potluck, or simply enjoying a quiet evening at home, these cherry hand pies are guaranteed to become a new favorite in your recipe collection.
What makes these hand pies truly special is their versatility. The recipe is designed to accommodate various dietary needs, making it inclusive for all your guests. With a simple swap of ingredients, you can create vegan or gluten-free versions without compromising on flavor or texture. Plus, they’re incredibly easy to make, even for beginners in the kitchen. No fancy techniques or hard-to-find ingredients required—just love for baking and a desire to create something beautiful and delicious.
In this comprehensive guide, I’ll walk you through every step of creating these patriotic pastries, from selecting the perfect cherries to achieving that golden-brown crust that’s visually stunning and satisfyingly crisp. By the end of this article, you’ll have all the knowledge and confidence needed to bake these hand pies like a pro, ensuring your July 4th celebration is as sweet as it is memorable.
So, roll up your sleeves, preheat your oven, and let’s get ready to bake some patriotic hand pies that will have everyone reaching for seconds!
Ingredients for Perfect Cherry Hand Pies
Creating delicious cherry hand pies starts with gathering the right ingredients. Each component plays a crucial role in achieving that perfect balance of flavors and textures. Below, I’ve listed everything you’ll need, along with explanations for why each ingredient is important and some tips for selecting the best quality items.
For the Cherry Filling
– 2 cups fresh or frozen tart cherries, pitted: The star of our show! Tart cherries provide that perfect balance of sweetness and acidity that makes cherry desserts so irresistible. If using frozen cherries, there’s no need to thaw them first. Fresh cherries should be firm, vibrant, and free from blemishes. Don’t worry if you can’t find tart cherries—sweet cherries will work too, though you might want to reduce the added sugar slightly.
– ½ cup granulated sugar: This sweetens the filling and helps balance the tartness of the cherries. For a healthier option, you can substitute with coconut sugar or maple syrup, though this might slightly alter the flavor profile.
– ¼ cup cornstarch: This thickener is essential for creating a filling that holds its shape when baked. Corn starch provides a clear gel that won’t cloud the beautiful red color of our cherry filling. If you prefer, you can use tapioca starch or arrowroot powder as substitutes.
– 1 tablespoon lemon juice: The acidity in lemon juice brightens the cherry flavor and helps balance the sweetness. It also helps activate the cornstarch for better thickening. Freshly squeezed lemon juice is always best, but bottled will work in a pinch.
– 1 teaspoon vanilla extract: This enhances the cherry flavor and adds depth to the filling. Pure vanilla extract is recommended for the best flavor, but imitation vanilla can be used if needed.
– ½ teaspoon ground cinnamon: This warm spice complements the cherry beautifully without overpowering it. If you prefer, you can add a pinch of nutmeg or almond extract for variation.
For the Pastry
– 1 sheet (about 17.5 oz) frozen puff pastry, thawed: Puff pastry gives our hand pies that incredibly flaky, buttery texture that makes them so special. Look for all-butter puff pastry for the best flavor. For a vegan option, check for brands that use vegetable shortening instead of butter. For gluten-free, use a high-quality gluten-free puff pastry mix.
– 1 egg or 1 tablespoon plant-based milk (for egg wash): This creates a beautiful golden-brown finish on our pies. The egg wash gives a richer color, while plant-based milk works well for vegan options. You can also brush with a little melted butter for extra flavor and shine.
– 1 tablespoon coarse sugar (for sprinkling): This adds a delightful crunch and sparkle to the top of our pies. Turbinado sugar works particularly well because its larger crystals create a beautiful texture and visual appeal.
Optional Ingredients for Customization
– 1 tablespoon almond extract: Adds a lovely marzipan-like note to the cherry filling that pairs beautifully with the pastry.
– Zest of one orange: The citrus zest adds a bright note that enhances the cherry flavor.
– ¼ teaspoon salt: Balances the sweetness and enhances all the flavors in the filling. If using salted butter in your pastry, you might want to reduce this slightly.
Equipment You’ll Need
Having the right tools can make baking these cherry hand pies much easier and ensure better results. Here’s a list of equipment I recommend having on hand:
Essential Tools
– Large mixing bowl: For combining your cherry filling ingredients.
– Small saucepan: For cooking the cherry filling to the right consistency.
– Pastry brush: For applying egg wash to your pies before baking.
– Rolling pin: For rolling out the puff pastry if needed.
– Pastry cutter or pizza cutter: For cutting the pastry into perfect circles or squares.
– Fork: For crimping the edges of your hand pies.
– Baking sheet: For baking your hand pies. A parchment-lined sheet makes cleanup easier.
– Cooling rack: For allowing your hand pies to cool properly after baking.
Optional but Helpful Tools
– Cherry pitter: This makes removing pits from fresh cherries much faster and cleaner. If you don’t have one, you can use a clean hairpin or a paperclip to push the pits out.
– Parchment paper: Makes transferring your hand pies to the baking sheet much easier.
– Pastry rings or cookie cutters: If you want perfectly shaped hand pies, these can be helpful. However, you can also simply cut freehand with a knife or pizza cutter.
– Small bowl of water: For sealing the edges of your hand pies.
Step-by-Step Instructions for Cherry Hand Pies
Now that we have all our ingredients and equipment ready, let’s walk through the process of creating these delicious patriotic hand pies. Follow these steps carefully, and I’ll share tips along the way to ensure your hand pies turn out perfectly.
Step 1: Prepare Your Cherries
If you’re using fresh cherries, the first step is to pit them. This can be done with a cherry pitter, or if you don’t have one, you can carefully cut the cherries in half and remove the pits with a small knife or the tip of a vegetable peeler. If using frozen cherries, there’s no need to thaw them first—they’ll cook perfectly from frozen.
Once your cherries are pitted, place them in a large mixing bowl. Add the granulated sugar, cornstarch, lemon juice, vanilla extract, and cinnamon to the bowl. Gently stir everything together until the cherries are evenly coated. Set this mixture aside while you prepare your pastry.
Pro Tip: If you’re using frozen cherries, you might want to add them directly to the saucepan in the next step without mixing with the dry ingredients first, as frozen cherries release a lot of liquid as they thaw.
Step 2: Cook the Cherry Filling
Transfer your cherry mixture to a small saucepan. Place the saucepan over medium heat and bring the cherries to a simmer. As the cherries heat up, they’ll begin to release their juices, and the mixture will become saucy.
Once the mixture is simmering, reduce the heat to low and continue cooking for about 5-8 minutes, stirring occasionally, until the filling has thickened to a jam-like consistency. You’ll know it’s ready when you can run a spoon through the mixture and it holds its shape for a moment before slowly coming back together.
Remove the saucepan from the heat and allow the filling to cool completely. This step is crucial because hot filling can make your pastry soggy. While the filling is cooling, you can prepare your pastry.
Pro Tip: If you find your filling isn’t thickening enough after 8 minutes, you can mix an additional teaspoon of cornstarch with a tablespoon of cold water and stir it into the filling. Continue cooking for another minute or two until thickened.
Step 3: Prepare Your Pastry
Preheat your oven to 400°F (200°C). Line a baking sheet with parchment paper for easy cleanup.
Unroll your thawed puff pastry sheet on a lightly floured surface. If your pastry came in a folded sheet, gently unfold it being careful not to tear it. Puff pastry is delicate, so handle it gently.
Using a pastry cutter or pizza cutter, cut the pastry into equal-sized rectangles or circles. For standard hand pies, 4-inch squares or circles work well. You should be able to get 4-6 pieces from a standard sheet of puff pastry.
Pro Tip: If you’re having trouble rolling out the pastry or if it’s cracking, let it sit at room temperature for a few more minutes. Puff pastry that’s too cold will be difficult to work with.
Step 4: Assemble Your Hand Pies
Place a spoonful of cooled cherry filling onto one half of each pastry square or circle, leaving about a ½-inch border around the edges. Don’t overfill your hand pies, as the filling will expand during baking.
If you’re using squares, fold the pastry in half to form a triangle. If you’re using circles, fold the pastry in half to form a half-moon shape. Use your fingers to gently press the edges together to seal.
To create a beautiful crimped edge, use a fork to press firmly along the sealed edges. This not only looks professional but also helps ensure your hand pies don’t open up during baking.
Place the assembled hand pies on your prepared baking sheet, leaving about an inch of space between each one to allow for expansion during baking.
Pro Tip: If you’re concerned about your hand pies leaking during baking, you can brush a little water along the edges before crimping them with the fork. This helps create a better seal.
Step 5: Apply Egg Wash and Bake
In a small bowl, whisk together the egg (or plant-based milk) with a pinch of salt. Using a pastry brush, gently brush the tops of your hand pies with the egg wash. This will give them a beautiful golden-brown finish when baked.
Sprinkle the tops with coarse sugar, if using. This adds a delightful crunch and sparkle to your finished hand pies.
Place the baking sheet in the preheated oven and bake for 15-20 minutes, or until the pastry is puffed and golden brown. The exact baking time will depend on your oven and the size of your hand pies.
Pro Tip: For extra flaky pastry, you can place a baking sheet or aluminum foil loosely over the hand pies for the first 10 minutes of baking. This prevents the edges from browning too quickly while allowing the center to cook through.
Step 6: Cool and Serve
Remove the hand pies from the oven and transfer them to a cooling rack using a spatula. Let them cool for at least 10-15 minutes before serving. This allows the filling to set a bit more, making them easier to handle.
For an extra special treat, serve your cherry hand pies warm with a scoop of vanilla ice cream or a dollop of whipped cream. The contrast between the warm, flaky pastry and the cold, creamy ice cream is simply divine.
Pro Tip: If you plan to serve these hand pies later, allow them to cool completely before storing. This prevents condensation from making the pastry soggy.
Baking Tips and Tricks for Perfect Hand Pies
Baking beautiful hand pies isn’t just about following a recipe—it’s about understanding the techniques that make them truly special. Here are some professional tips that will help you achieve bakery-quality results every time.
Working with Puff Pastry
Puff pastry is the secret to those incredibly flaky, buttery layers that make hand pies so irresistible. However, working with puff pastry requires some special attention to ensure it performs its best.
Keep it Cold: Puff pastry contains layers of butter that need to stay cold to create those beautiful flaky layers. Work with it quickly and try to keep it refrigerated until you’re ready to use it. If the pastry becomes too warm and soft, the butter can start to melt, which will prevent proper rising during baking.
Don’t Overwork the Dough: Puff pastry is delicate and can become tough if overworked. Handle it as little as possible when cutting and assembling your hand pies. When crimping the edges, use a light touch rather than pressing too firmly.
Ventilation is Key: Always remember to vent your hand pies by cutting small slits in the tops. This allows steam to escape during baking, preventing the filling from bursting out and the pastry from becoming soggy.
Achieving the Perfect Filling Consistency
The filling is just as important as the pastry when it comes to delicious hand pies. Here’s how to ensure your cherry filling is perfect:
Cook it Thoroughly: Raw cherries release a lot of liquid, and if not cooked properly, this can make your pastry soggy. Make sure to cook your filling until it’s thick and jam-like. When you run a spoon through it, it should hold its shape for a moment before slowly coming back together.
Cool Completely: Hot filling will make your pastry soggy, so it’s crucial to let the filling cool completely before assembling your hand pies. You can speed up this process by placing it in the refrigerator for 30-60 minutes.
Don’t Overfill: It’s tempting to load up your hand pies with filling, but overfilling can cause them to burst open during baking. Leave at least a ½-inch border around the edges to allow for expansion.
Getting That Beautiful Golden-Brown Finish
The visual appeal of your hand pies is just as important as their taste. Here’s how to achieve that perfect golden-brown finish:
Egg Wash is Essential: Brushing your hand pies with an egg wash before baking creates that beautiful, glossy, golden-brown finish. If you’re making vegan hand pies, plant-based milk works as a substitute, though it won’t be as shiny.
Don’t Skip the Sugar: Sprinkling coarse sugar on top before baking not only adds a delightful crunch but also helps create a beautiful caramelized finish. Turbinado sugar works particularly well because its larger crystals create a lovely texture.
Rotate Your Baking Sheet: For even browning, rotate your baking sheet halfway through the baking time. This ensures that all sides of your hand pies get equal exposure to the heat.
Variations and Substitutions
While the classic cherry filling is absolutely delicious, there are countless ways to customize these hand pies to suit your preferences or use what you have on hand. Here are some variations and substitutions to inspire your creativity:
Different Fruit Fillings
Cherry is the traditional choice for hand pies, but other fruits work beautifully too:
– Apple Cinnamon: Use diced apples instead of cherries, with cinnamon, a pinch of nutmeg, and a tablespoon of lemon juice. Apples release more liquid than cherries, so you might need to add an extra tablespoon of cornstarch to ensure proper thickening.
– Peach Raspberry: Combine diced peaches with raspberries for a sweet-tart flavor profile. The vibrant pink color is perfect for July 4th celebrations.
– Blueberry Lemon: Use blueberries instead of cherries, with the addition of lemon zest and juice for a bright, summery flavor.
– Mixed Berry Blend: A combination of strawberries, blueberries, and raspberries creates a patriotic red, white, and blue filling when served with vanilla ice cream.
Crust Alternatives
While puff pastry is the traditional choice for hand pies, there are other options that can create different textures and flavors:
– All-Butter Pie Crust: For a more traditional pie experience, use a homemade or store-bought all-butter pie crust. This will create a sturdier crust that’s less flaky but still delicious.
– Phyllo Dough: For a lighter, crisper crust, you can use phyllo dough. Brush each layer with melted butter before assembling, and use fewer layers (about 4-5 sheets) to avoid excessive dryness.
– Shortcrust Pastry: For a tender, crumbly crust, use a shortcrust pastry. This works particularly well with sweeter fillings.
Vegan and Gluten-Free Options
The recipe is already designed to accommodate these dietary restrictions, but here are some additional tips:
Vegan Version: Use a vegan puff pastry (available in many grocery stores) and substitute the egg wash with plant-based milk. For the filling, ensure your vanilla extract is vegan (some contain dairy products).
Gluten-Free Version: Use a high-quality gluten-free puff pastry mix. These can be found in the freezer section of many grocery stores. For the filling, ensure your cornstarch is certified gluten-free (most are, but some brands may contain traces of wheat).
Serving Suggestions
While these hand pies are delicious on their own, here are some serving ideas to elevate them even further:
– Ice Cream Sandwich: Serve a warm hand pie between two scoops of vanilla ice cream for an indulgent treat.
– Whipped Cream Topping: A dollop of freshly whipped cream adds lightness and complements the rich pastry perfectly.
– Drizzle with Chocolate: For an extra decadent treat, drizzle melted chocolate over the top after baking.
– Dust with Powdered Sugar: A light dusting of powdered sugar adds sweetness and visual appeal.
Storage and Reheating Tips
These cherry hand pies are best enjoyed fresh from the oven, but they can be made ahead of time and stored properly. Here’s how to keep them tasting delicious:
Short-Term Storage
For hand pies that will be consumed within 1-2 days:
1. Allow the hand pies to cool completely to room temperature.
2. Store them in an airtight container at room temperature. If your kitchen is particularly warm, you might want to refrigerate them instead.
3. If stacking the hand pies, place a piece of parchment paper between each layer to prevent them from sticking together.
Freezing Instructions
Hand pies freeze beautifully, making them perfect for making ahead:
1. Allow the hand pies to cool completely to room temperature.
2. Place them on a baking sheet and freeze for 1-2 hours, or until solid. This step prevents them from sticking together when frozen.
3. Transfer the frozen hand pies to a freezer-safe bag or container, separating layers with parchment paper if needed.
4. Label with the date and use within 2-3 months for best quality.
To bake from frozen: Place frozen hand pies on a baking sheet and bake at 400°F (200°C) for 20-25 minutes, or until heated through and golden brown.
Reheating Methods
To enjoy your hand pies at their best:
Oven Method: Preheat your oven to 350°F (175°C). Place the hand pies on a baking sheet and bake for 10-15 minutes, or until heated through and crisp. This method helps restore the flaky texture of the pastry.
Air Fryer Method: Preheat your air fryer to 350°F (175°C). Place the hand pies in the basket and cook for 5-8 minutes, or until heated through and crisp. This method is faster and creates an extra crispy crust.
Microwave Method: While not ideal for restoring crispness, the microwave can be used for quick reheating. Place a hand pie on a microwave-safe plate and heat for 30-60 seconds, or until warm. To help prevent sogginess, you can place a paper towel underneath the hand pie to absorb excess moisture.
Common Mistakes to Avoid
Even experienced bakers can run into issues when making hand pies. Here are some common mistakes and how to avoid them:
Mistake 1: Using Cold Filling
Problem: Adding hot or even warm filling to the pastry can make it soggy and prevent proper sealing.
Solution: Always allow the filling to cool completely before assembling your hand pies. You can speed up this process by placing it in the refrigerator for 30-60 minutes.
Mistake 2: Overfilling the Pies
Problem: Putting too much filling in the hand pies can cause them to burst open during baking.
Solution: Leave at least a ½-inch border around the edges when filling your hand pies. Remember that the filling will expand during baking, so err on the side of caution.
Mistake 3: Not Venting the Pies
Problem: Without proper ventilation, steam can build up inside the hand pies and cause them to burst open.
Solution: Always cut small slits in the tops of your hand pies before baking. This allows steam to escape during cooking.
Mistake 4: Working with Warm Puff Pastry
Problem: Puff pastry that’s too warm will be difficult to work with and may not rise properly during baking.
Solution: Keep your puff pastry refrigerated until you’re ready to use it. If it becomes too warm at any point, pop it back in the refrigerator for 10-15 minutes to firm up.
Mistake 5: Skipping the Egg Wash
Problem: Without an egg wash, your hand pies may not brown evenly and might lack that beautiful, glossy finish.
Solution: Always brush your hand pies with egg wash (or plant-based milk for vegan options) before baking. This not only improves the appearance but also helps create a barrier that prevents sogginess.
Mistake 6: Not Allowing the Pies to Cool
Problem: Cutting into hot hand pies can cause the filling to run out and the pastry to become soggy.
Solution: Allow your hand pies to cool for at least 10-15 minutes before serving. This allows the filling to set a bit more, making them easier to handle and enjoy.
Frequently Asked Questions
Here are answers to some common questions about making cherry hand pies:
Q: Can I use canned cherries instead of fresh or frozen?
A: While fresh or frozen cherries work best for this recipe, you can use canned cherries in a pinch. Drain them well and pat them dry before using. You’ll also want to reduce the amount of sugar in the recipe, as canned cherries are typically already sweetened. Start with ¼ cup of sugar and adjust to taste.
Q: Why is my filling too thin even after cooking?
A: If your filling isn’t thickening properly, it could be because the cherries release a lot of liquid. You can fix this by mixing an additional teaspoon of cornstarch with a tablespoon of cold water and stirring it into the filling. Continue cooking for another minute or two until thickened.
Q: Can I make the filling the day before?
A: Absolutely! Making the filling ahead of time is actually a great idea. Simply prepare the filling as directed, allow it to cool completely, then store it in an airtight container in the refrigerator for up to 3 days. When you’re ready to assemble your hand pies, just give it a stir to ensure it’s well combined.
Q: How do I prevent my hand pies from leaking during baking?
A: There are a few things you can do to prevent leaking. First, make sure your filling is thick enough—runny filling is more likely to leak. Second, crimp the edges well with a fork to create a tight seal. Finally, be sure to vent the tops of your hand pies with small slits to allow steam to escape.
Q: Can I use a different type of sugar?
A: Yes, you can substitute granulated sugar with other types like coconut sugar or maple syrup. Keep in mind that these may slightly alter the flavor profile. For the coarse sugar on top, you can use turbinado, demerara, or even regular granulated sugar if that’s what you have on hand.
Q: How long do these hand pies stay fresh?
A: When stored at room temperature in an airtight container, these hand pies will stay fresh for 1-2 days. If you need to store them longer, you can refrigerate them for up to 5 days or freeze them for 2-3 months. For best results, reheat them in the oven or air fryer to restore the crispness of the pastry.
Conclusion
There’s something incredibly special about gathering loved ones around homemade treats, especially when those treats are as delightful and festive as these Sunny Side Up Cherry Hand Pies. The combination of flaky, buttery pastry and sweet-tart cherry filling creates a symphony of flavors and textures that’s simply irresistible.
As we’ve explored throughout this article, these hand pies are not just delicious—they’re also incredibly versatile. Whether you’re catering to vegan, gluten-free, or traditional preferences, there are simple substitutions that ensure everyone can enjoy these patriotic pastries. The easy assembly process makes them accessible even for beginner bakers, while the beautiful presentation guarantees they’ll be the star of any July 4th spread.
What I love most about this recipe is how it brings people together. The aroma of baking cherry hand pies filling your kitchen is a welcoming invitation for friends and family to gather around. The first bite—warm, flaky, and bursting with cherry goodness—creates moments of pure joy that become cherished memories.
These hand pies are more than just a dessert; they’re a celebration of summer, of togetherness, and of the simple pleasures that make life sweet. So whether you’re hosting a grand Independence Day bash or simply enjoying a quiet evening at home, I encourage you to give these cherry hand pies a try. Your taste buds—and your guests—will thank you.
As fireworks light up the night sky and laughter fills the air, may these hand pies add an extra layer of sweetness to your July 4th celebrations. Happy baking, and happy Independence Day!


