Table of Contents
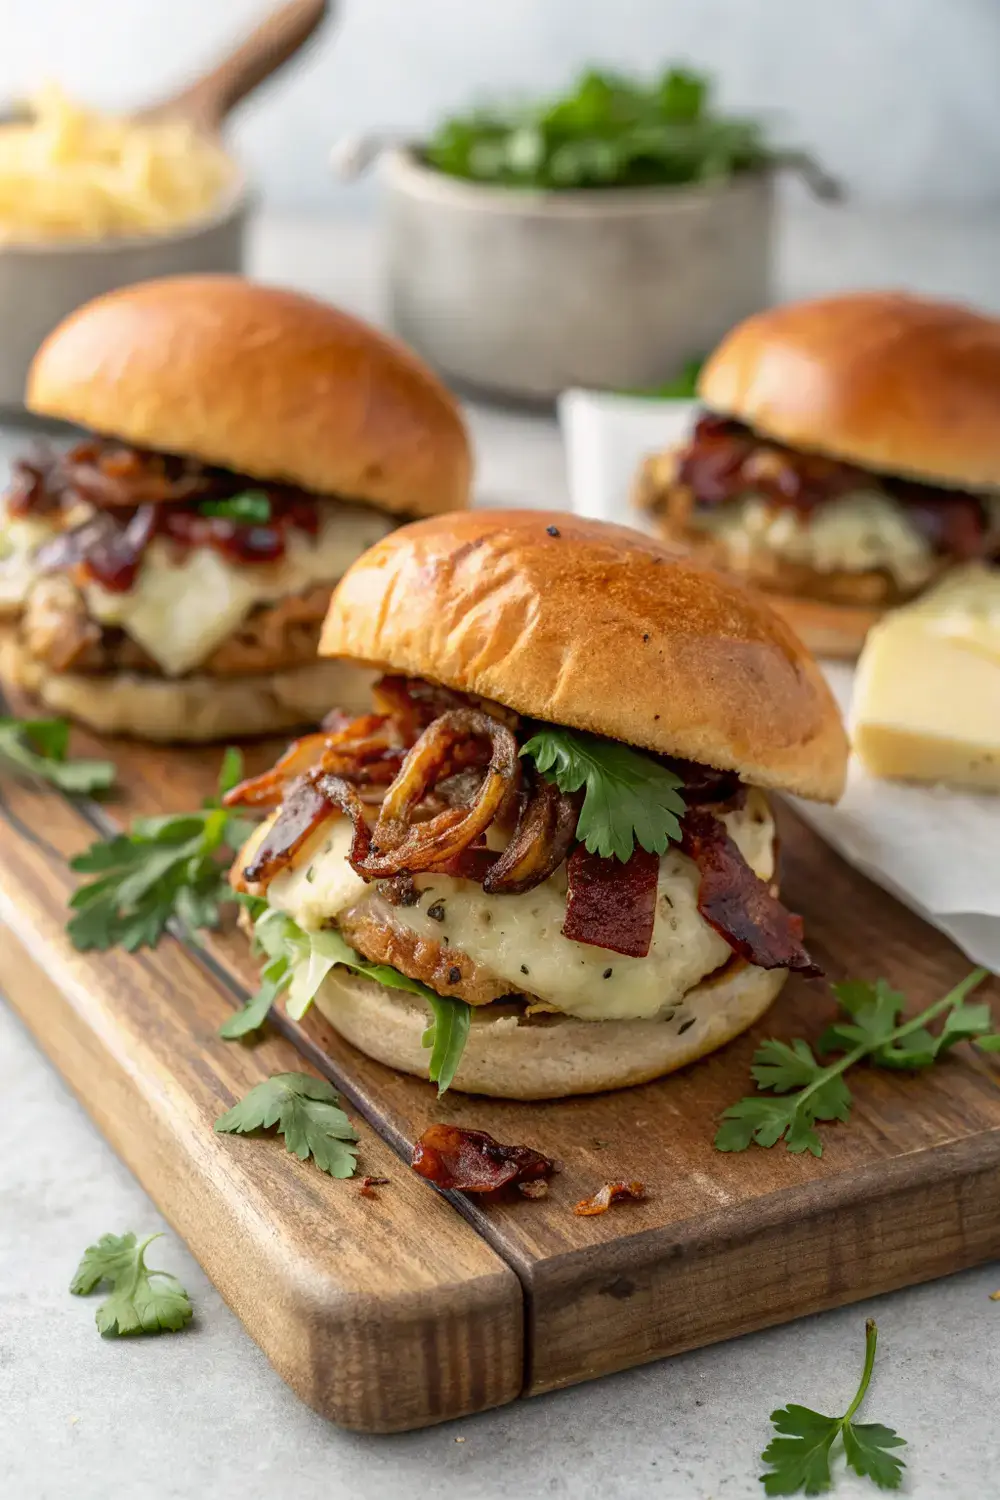
Picture this: the warm glow of a summer evening, the sizzle of the grill, and the excited chatter of family and friends gathering for the perfect backyard BBQ. Now imagine serving them these incredible loaded grilled chicken sliders that disappear faster than you can say “seconds!” These aren’t your average sliders—they’re a flavor explosion packed with juicy grilled chicken, melted pepper jack cheese, crispy turkey bacon, fresh cilantro, caramelized onions, and a generous drizzle of smoky barbecue sauce all nestled in soft, buttery brioche buns.
Whether you’re the host of the annual neighborhood block party or simply looking to elevate your weeknight dinner game, these sliders deliver restaurant-quality taste with minimal effort. The best part? They’re incredibly versatile and can be customized to please even the pickiest eaters at your table. Let’s dive into this mouthwatering recipe that’s guaranteed to become your new go-to for any gathering!
Why Your BBQ Needs These Loaded Grilled Chicken Sliders
There’s something magical about sliders that makes them perfect for any gathering. They’re the ideal finger food—easy to eat while mingling, customizable for different tastes, and portion-controlled so guests can sample multiple dishes. But these loaded grilled chicken sliders take things to a whole new level.
What makes them special? It’s the perfect harmony of flavors and textures. The smoky, charred grilled chicken provides a hearty base, while the melted pepper jack adds a creamy, slightly spicy kick. The turkey bacon offers satisfying crunch without the heaviness of traditional bacon, and the fresh cilantro brightens everything up. Sweet caramelized onions balance the savory elements, and that barbecue sauce tie-it-all-together? It’s the secret weapon that makes each bite unforgettable.
These sliders are also incredibly practical for large gatherings. You can prepare most components ahead of time, then assemble just before serving. They’re easy to transport if you’re heading to a friend’s BBQ, and they stay relatively neat to eat—no silverware required! Plus, they’re budget-friendly enough to feed a crowd without breaking the bank, making them perfect for everything from birthday parties to holiday celebrations.
Gathering Your Ingredients
Let’s talk about what you’ll need to create these show-stopping sliders. Quality ingredients make all the difference, so I’ll explain why each component matters and how to choose the best options.
For the Grilled Chicken
- Chicken breasts or thighs: 2 pounds total, boneless and skinless. Chicken breasts are leaner and hold their shape well, while thighs stay juicier during cooking. I prefer using a combination for the best of both worlds—tender meat with great texture.
- Olive oil: 2 tablespoons. This helps season the chicken and prevents it from sticking to the grill. Extra virgin olive oil adds a fruity flavor that complements the smoky notes.
- Garlic powder: 1 teaspoon. Adds depth without overpowering the natural chicken flavor.
- Onion powder: 1 teaspoon. Creates a savory foundation that pairs beautifully with the barbecue sauce.
- Paprika: 1 teaspoon, preferably smoked if available. This adds color and a subtle smokiness that enhances the grilled flavor.
- Salt and black pepper: To taste. Essential for bringing out the natural flavors of the chicken.
For the Caramelized Onions
- Yellow or white onions: 2 medium, thinly sliced. These varieties caramelize beautifully and develop a sweet, mellow flavor when cooked slowly.
- Butter: 2 tablespoons. Adds richness and helps the onions brown evenly. If you’re dairy-free, you can substitute with olive oil.
- Sugar: 1 teaspoon. This helps draw out the natural sugars in the onions, accelerating the caramelization process.
- Thyme: 1 teaspoon, fresh or dried. Adds an earthy note that complements the sweetness of the onions.
For the Turkey Bacon
- Turkey bacon: 8-10 slices, thick-cut if possible. Look for a brand that doesn’t contain excessive additives. Thick-cut bacon provides better texture and stands up well to the cooking process.
For the Cheese
- Pepper jack cheese: 8-10 slices, or about 8 ounces shredded. This semi-soft cheese has a mild to medium spice level and melts beautifully. The little flecks of red and green peppers add visual appeal.
For the Slider Assembly
- Brioche slider buns: 12-16 (depending on size). Brioche buns are ideal because they’re slightly sweet, soft, and sturdy enough to hold all the toppings without falling apart. Look for buns that aren’t overly processed.
- Barbecue sauce: About 1 cup, your favorite quality brand or homemade. This is a key flavor component, so choose one you love! Smoky, tangy, or sweet varieties all work well.
- Fresh cilantro: 1/4 cup, roughly chopped. This adds a burst of freshness that cuts through the richness of the other ingredients. If cilantro isn’t your favorite, fresh parsley or even a bit of mint can work as substitutes.
Optional Toppings
- Pickled jalapeños: For a bit of extra heat and tang.
- Avocado slices: For creaminess and healthy fats.
- Lettuce: For added crunch and freshness.
- Mayo or aioli: For extra creaminess.
Step-by-Step Instructions to Slider Perfection
Now let’s get cooking! Follow these detailed steps to create the most delicious loaded grilled chicken sliders you’ve ever tasted. I’ll include tips along the way to ensure your sliders turn out perfectly every time.
Step 1: Preparing the Chicken
Start by preparing your chicken for the grill. If using chicken breasts, they can sometimes be thick in the middle, which can lead to uneven cooking. To solve this, slice each breast horizontally into two thinner cutlets. This ensures more even cooking and reduces the cooking time.
Place the chicken in a large baking dish or zip-top bag. In a small bowl, whisk together the olive oil, garlic powder, onion powder, paprika, salt, and black pepper. Pour this mixture over the chicken, ensuring every piece is well-coated. Let it marinate for at least 30 minutes at room temperature, or up to 2 hours in the refrigerator for deeper flavor penetration.
While the chicken is marinating, you can prepare your grill. Preheat it to medium-high heat (about 375-400°F). Clean the grates thoroughly and oil them well to prevent sticking. If using a gas grill, turn off one or two burners to create indirect heat zones. This gives you more control over the cooking process.
Step 2: Grilling the Chicken
Place the chicken on the preheated grill. For the best results, don’t overcrowd the grill—leave some space between pieces for even cooking and good grill marks. Cook for 5-7 minutes per side, depending on the thickness of your chicken. You’ll know it’s time to flip when you see nice grill marks forming and the chicken releases easily from the grates.
The internal temperature should reach 165°F when checked with a meat thermometer. If you don’t have one, you can make a small cut in the thickest part of the chicken—it should be white all through with no pink remaining. Be careful not to overcook, as chicken can quickly become dry.
Once cooked, transfer the chicken to a cutting board and let it rest for 5-10 minutes. This allows the juices to redistribute throughout the meat, ensuring every bite is moist and flavorful. After resting, slice the chicken into thin strips or small pieces—about 1/2-inch thick—so they’ll fit nicely in the slider buns.
Step 3: Making the Caramelized Onions
While the chicken is resting, you can start on the caramelized onions. This is a step that requires patience, but the results are worth it! Thinly slice your onions using a sharp knife or mandoline for even slices. The thinner they are, the faster they’ll caramelize.
Melt the butter in a large skillet or Dutch oven over medium-low heat. Add the sliced onions and cook, stirring occasionally, for 5-7 minutes until they begin to soften. Then, reduce the heat to low, add the sugar and thyme, and continue cooking, stirring occasionally, for 30-40 minutes, or until the onions are deeply golden brown and sweet.
If the onions start to stick or brown too quickly, add a tablespoon of water to the pan and scrape up any browned bits from the bottom. These bits add incredible flavor to the onions. The key to good caramelization is patience—low and slow is the way to go. Once done, remove from heat and set aside.
Step 4: Cooking the Turkey Bacon
While the onions are caramelizing, you can cook the turkey bacon. Arrange the bacon in a single layer on a baking sheet lined with parchment paper or a wire rack. Bake in a preheated 400°F oven for 12-15 minutes, or until crispy. The exact time will depend on the thickness of your bacon and how crispy you like it.
Alternatively, you can cook the turkey bacon in a skillet over medium heat for 4-6 minutes per side. This method gives you more control over the crispness, but be careful not to let it burn, as turkey bacon can cook faster than pork bacon.
Once cooked, place the bacon on a paper towel-lined plate to drain excess grease. When cool enough to handle, crumble it into small pieces or leave in strips depending on your preference for the final assembly.
Step 5: Preparing the Slider Buns
While everything else is cooking, let’s prepare the buns. Slice the buns horizontally, being careful not to cut all the way through. You want them to remain attached like a hot dog bun. This creates a perfect pocket for all the delicious fillings.
Lightly brush the cut sides of the buns with melted butter or olive oil. This helps prevent them from drying out during assembly and adds a subtle richness. You can also toast the buns lightly on the grill or under the broiler if you prefer a bit of crunch. Just be careful not to burn them, as they toast quickly due to their high butter content.
Step 6: Assembling the Sliders
Now for the fun part—assembly! There are a couple of approaches you can take here. For a more formal presentation, you can assemble individual sliders. For a more casual gathering, you can create a slider “bar” where guests can build their own. Let me walk you through both methods.
Individual Slider Assembly:
Start by placing the bottom half of each bun on a serving platter. Spread a thin layer of barbecue sauce on the bottom bun. Add a slice or two of grilled chicken, followed by a few pieces of turkey bacon. Top with a slice of pepper jack cheese or a sprinkle of shredded cheese. Add a spoonful of caramelized onions, then a sprinkle of fresh cilantro. Drizzle with a bit more barbecue sauce if desired, then top with the other half of the bun.
Slider Bar Approach:
Set up stations with all the components: the buns, grilled chicken, turkey bacon, cheese, caramelized onions, cilantro, and barbecue sauce. Place small signs or labels for each component so guests know what’s available. Provide tongs or small serving spoons for the toppings. This interactive approach allows guests to customize their sliders exactly how they like them.
Step 7: Optional Final Touches
If you want to take these sliders to the next level, consider these optional final touches:
- Lightly toast the assembled sliders: Place them on a baking sheet and heat in a 350°F oven for 5-10 minutes until the cheese is melted and the buns are lightly toasted.
- Garnish with additional toppings: Pickled jalapeños, avocado slices, or a dollop of mayo can add extra flavor and texture.
- Serve with a dipping sauce: A side of extra barbecue sauce or a creamy cilantro-lime dip can be a nice touch.
- Add a pickle spear: The acidity and crunch of a pickle help cut through the richness of the sliders.
Variations and Customizations
One of the best things about this recipe is how easily it can be adapted to different tastes and dietary needs. Here are some variations you might consider:
Dietary Modifications
- Gluten-free: Use gluten-free slider buns or serve the filling over lettuce wraps for a low-carb option.
- Dairy-free: Skip the cheese or use a dairy-free alternative. Omit the butter when caramelizing onions and use olive oil instead.
- Whole30/Paleo: Skip the cheese and turkey bacon. Use compliant barbecue sauce and serve over lettuce wraps or sweet potato buns if available.
- Vegetarian: Replace the chicken with portobello mushrooms or a hearty plant-based chicken substitute. Use a vegan cheese and bacon alternative.
Flavor Variations
- Spicy Kick: Add sliced jalapeños to the assembly or mix some diced jalapeños into the barbecue sauce. You could also use pepper jack cheese with extra heat.
- Southwest Style: Replace the pepper jack with queso fresco, add some corn and black beans to the filling, and top with a scoop of avocado salsa.
- BBQ Chicken Ranch: Serve with a drizzle of ranch dressing mixed with a bit of your favorite BBQ sauce instead of plain barbecue sauce.
- Buffalo Style: Replace the barbecue sauce with buffalo sauce and top with blue cheese crumbles instead of pepper jack.
Ingredient Substitutions
- Chicken: You can use chicken thighs instead of breasts for more juiciness, or even pre-cooked rotisserie chicken to save time.
- Turkey bacon: If you can’t find turkey bacon or prefer not to use it, you can omit it or use a meatless alternative. Smoked paprika can help add that smoky flavor back.
- Cheese: Cheddar, provolone, or Monterey Jack would all work well as substitutes for pepper jack.
- Buns: Potato rolls, kaiser rolls, or even small dinner rolls can be used in place of brioche buns.
- Onions: Shallots or sweet onions like Vidalia can be used instead of yellow or white onions.
Storage and Reheating Tips
These sliders are perfect for making ahead, whether you’re prepping for a party or just want leftovers for lunch. Here’s how to store and reheat them properly:
Short-Term Storage
If you plan to eat the sliders within 24 hours, you can store them assembled in an airtight container in the refrigerator. To prevent the buns from getting soggy, place a paper towel at the bottom of the container and between layers of sliders if stacking.
Longer-Term Storage
For longer storage, it’s best to keep the components separate. Store the grilled chicken in an airtight container in the refrigerator for up to 3 days. The caramelized onions can also be stored separately for up to 3 days. The turkey bacon will keep for 2-3 days, and the cheese can be stored for up to a week.
The buns can be stored at room temperature in a bread bag or airtight container for 2-3 days, or frozen for longer storage. To freeze buns, place them in a freezer bag and squeeze out as much air as possible before sealing.
Reheating Instructions
To reheat the sliders, you have several options:
1. Oven method: Preheat to 350°F. Place the sliders on a baking sheet and cover loosely with aluminum foil. Heat for 10-15 minutes, or until warmed through and the cheese is melted.
2. Microwave method: Place sliders on a microwave-safe plate and cover with a damp paper towel. Heat on high for 30-60 seconds, or until warmed through.
3. Toaster oven method: This is often the best method for maintaining crispness. Heat at 350°F for 5-7 minutes, or until warmed through.
If you’ve stored the components separately, you can reheat them individually and assemble just before serving. This ensures the buns stay crisp and the ingredients maintain their texture.
Common Mistakes to Avoid
Even experienced cooks can run into issues when making these sliders. Here are some common mistakes to avoid:
Overcooking the Chicken
Chicken can quickly go from juicy to dry. Be sure to cook it just until it reaches 165°F internally. Using a meat thermometer is the most reliable way to ensure doneness. Remember that the chicken will continue to cook slightly after it’s removed from the grill, so pull it off when it’s about 5°F below the target temperature.
Skipping the Resting Time
Letting the chicken rest for 5-10 minutes after grilling is crucial. This allows the juices to redistribute throughout the meat, ensuring every bite is moist and flavorful. If you skip this step, the juices will run out when you cut into the chicken, leaving you with dry meat.
Rushing the Caramelized Onions
Caramelizing onions takes time and patience. Cooking them over low heat for 30-40 minutes is essential to develop their sweet, complex flavor. Rushing this process by using higher heat will result in onions that are browned but not truly caramelized.
Using the Wrong Type of Buns
Not all buns are created equal. Brioche buns are ideal for these sliders because they’re slightly sweet, soft, and sturdy enough to hold all the toppings without falling apart. Using flimsy buns or buns that are too dense can result in a disappointing eating experience.
Overloading the Sliders
It’s tempting to pile on all the delicious toppings, but overloading the sliders can make them difficult to eat and cause the buns to fall apart. Aim for a balance of ingredients that still allows the slider to be picked up and eaten with one hand.
Not Preheating the Grill
Grilling chicken on a cold grill will result in uneven cooking and sticking. Always preheat your grill to the proper temperature before adding the chicken. This ensures you get good grill marks and even cooking throughout.
Frequently Asked Questions
Let’s address some common questions about making these loaded grilled chicken sliders:
Can I make these sliders ahead of time?
Absolutely! You can prepare most components ahead of time and assemble just before serving. The grilled chicken, caramelized onions, and even the cooked turkey bacon can be stored separately in the refrigerator for up to 3 days. When you’re ready to serve, simply assemble the sliders and heat through if desired.
How do I keep the sliders from falling apart?
To prevent your sliders from falling apart, choose sturdy buns like brioche, don’t overfill them, and consider toasting the buns lightly before assembly. You can also insert small toothpicks to hold them together, just be sure to remove them before serving.
Can I use a different type of meat?
Certainly! While chicken works beautifully, you could also use thinly sliced grilled pork loin, beef ribeye, or even pulled pork. If using a different protein, adjust the cooking time and method accordingly to ensure it’s cooked properly.
What’s the best way to serve these sliders at a party?
For large gatherings, setting up a slider bar is often the best approach. Arrange all the components separately on a table with small tongs or serving spoons. This allows guests to customize their sliders and keeps the food from getting soggy from sitting assembled for too long.
Can I make these on a stovetop instead of a grill?
Yes, you can! To cook the chicken on a stovetop, use a grill pan or heavy-bottomed skillet over medium-high heat. Heat the pan until very hot, then add the chicken. Cook for 5-7 minutes per side, depending on thickness. You can also use a broiler to cook the chicken, placing it on a broiler pan about 4-6 inches from the heat source.
How spicy are these sliders with pepper jack cheese?
The spice level of pepper jack cheese can vary depending on the brand. Most have a mild to medium heat that’s pleasant but not overwhelming. If you’re concerned about spice, you can use a milder cheese like Monterey Jack or cheddar, or start with less pepper jack and add more to taste.
Bringing It All Together
There you have it—everything you need to create sizzling loaded grilled chicken sliders that will steal the show at your next family BBQ! From the perfectly grilled chicken to the sweet caramelized onions and all the delicious toppings in between, these sliders are a true crowd-pleaser.
What I love most about this recipe is how it brings people together. There’s something special about gathering around the grill, the aroma of smoky chicken filling the air, and the anticipation of those first incredible bites. Whether it’s a summer holiday, a birthday celebration, or just a casual weeknight dinner, these sliders have a way of making any occasion feel special.
The best part? You can make them your own. Add extra heat with some jalapeños, creaminess with avocado, or keep it classic with just the basics. No matter how you customize them, these sliders are sure to become a favorite in your recipe rotation.
So fire up the grill, gather your loved ones, and get ready to serve up sliders that disappear faster than you can say “seconds!” Here’s to good food, great company, and memories made around the table. Enjoy every delicious bite!


