Table of Contents
- 1 Why Make-Ahead Dishes Matter for Parties
- 2 What Makes a Make-Ahead Dip Successful
- 3 The Purpose of Each Layer
- 4 Ingredients for Make-Ahead 7 Layer Dip for Parties
- 5 Choosing the Best Dish for Make-Ahead Storage
- 6 How to Assemble the Dip for Make-Ahead Success
- 7 Refrigeration Tips for Best Results
- 8 How Far Ahead You Can Make This Dip
- 9 Serving the Dip at the Party
- 10 Best Chips and Dippers for Party Serving
- 11 Setting Up a Party-Friendly Dip Station
- 12 Scaling the Recipe for Different Party Sizes
- 13 Common Make-Ahead Mistakes to Avoid
- 14 Why This Dip Looks Party-Ready Every Time
- 15 Frequently Asked Questions
- 16 Why Make-Ahead Dips Are a Host’s Best Friend
- 17 Final Thoughts
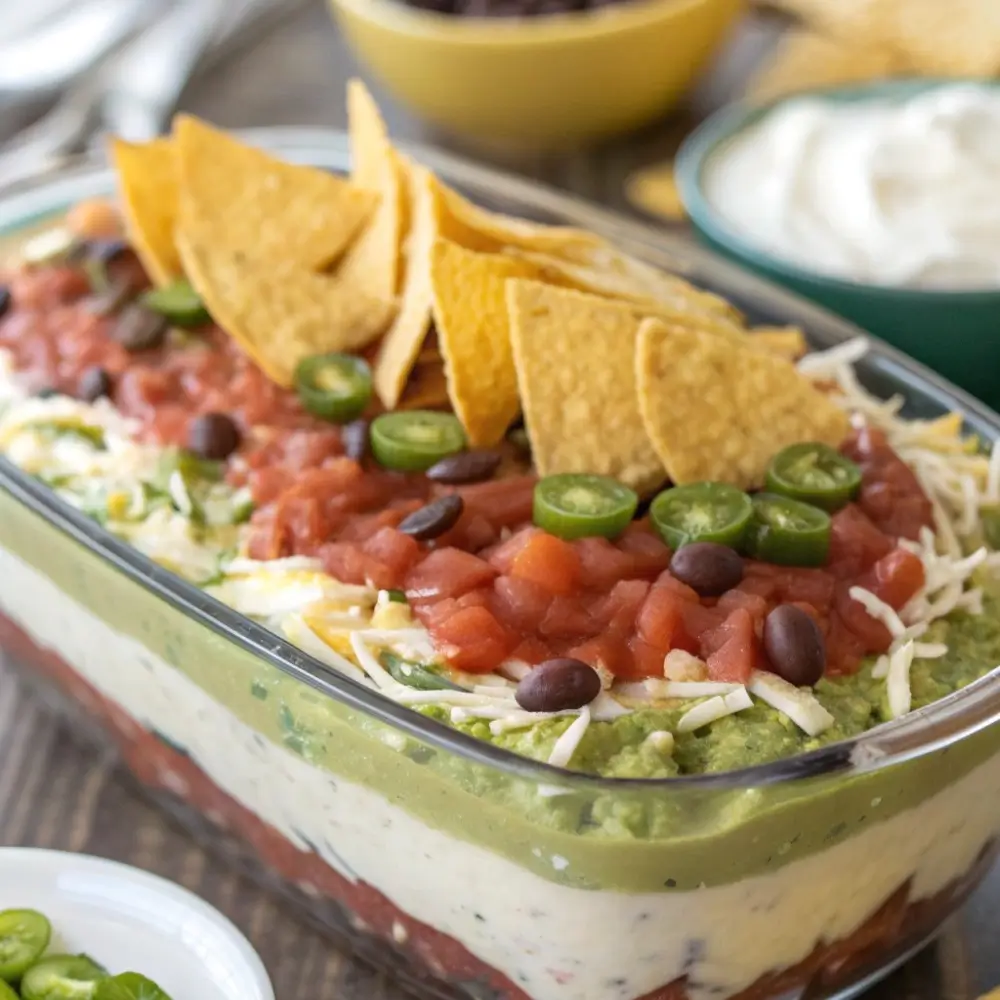
Party food should make hosting easier, not harder. When guests arrive, the last thing you want is to be stuck in the kitchen assembling dishes or fixing something that didn’t hold up as planned. That’s why this make-ahead 7 layer dip is such a reliable choice. It’s designed to be prepared in advance, stored confidently, and served exactly as intended — with clean layers, bold flavor, and an inviting look that lasts.
This dip isn’t just convenient. It’s built to stay beautiful. Each layer holds its place without bleeding, sliding, or becoming watery. When it’s time to serve, you simply uncover it, place it on the table, and enjoy the moment with your guests. No last-minute stress, no rushing, no distractions.
Perfect for parties of all sizes, this 7 layer dip fits seamlessly into planning-ahead hosting. It works for casual gatherings, celebrations, potlucks, and any event where sharing food brings people together.
Why Make-Ahead Dishes Matter for Parties
Good party planning is about flow. You want the space, the people, and the food to come together smoothly. Make-ahead dishes remove pressure and give you flexibility.
This 7 layer dip works so well for parties because:
It can be fully assembled ahead of time
It stores neatly in the refrigerator
It doesn’t need reheating or adjusting
It stays visually appealing for hours
It allows you to focus on guests, not food
When food is already handled, hosting feels lighter and more enjoyable.
What Makes a Make-Ahead Dip Successful
Not every dip performs well when made in advance. Some separate, some dry out, and others lose their appeal after a few hours. This recipe is built differently.
A successful make-ahead dip needs:
Thick, stable layers
Well-drained fresh ingredients
Creamy components that firm slightly when chilled
Balanced flavors that improve over time
Clean assembly that holds shape
This dip checks all those boxes.
The Purpose of Each Layer
Each layer has a role. Together, they create structure, flavor, and visual appeal that lasts from prep to party.
Layer One: The Solid Foundation
The bottom layer is the anchor. It provides structure and prevents the dip from shifting.
This layer:
Supports everything above it
Helps chips scoop cleanly
Adds hearty flavor
Stays firm when chilled
A strong base is essential for make-ahead success.
Layer Two: Creamy Balance
This layer softens bold flavors and adds smoothness. When chilled, it firms just enough to help layers stay distinct.
This layer:
Adds richness without heaviness
Smooths texture transitions
Helps ingredients adhere
It’s key to a polished look.
Layer Three: Fresh Flavor with Control
Fresh elements add brightness, but moisture must be managed carefully.
This layer:
Adds color and freshness
Keeps the dip lively
Must be thick and well-drained
When done right, it enhances the dip without compromising structure.
Layer Four: Savory Substance
This layer makes the dip filling enough for party snacking.
This layer:
Adds satisfying texture
Keeps guests fuller longer
Holds up well during refrigeration
It turns the dip into a true party snack rather than a light appetizer.
Layer Five: Crisp Texture
Crunch creates contrast and keeps the dip interesting.
This layer:
Adds freshness
Prevents the dip from feeling too soft
Maintains texture even when chilled
It’s a subtle but important layer.
Layer Six: Familiar Comfort
Cheese brings everything together.
This layer:
Adds richness
Appeals to a wide range of tastes
Enhances visual appeal
A generous but even layer works best.
Layer Seven: The Finishing Touch
The top layer is all about presentation.
This layer:
Adds color and freshness
Signals readiness to serve
Makes the dip look intentional
It completes the dish visually and flavor-wise.
Ingredients for Make-Ahead 7 Layer Dip for Parties
These ingredients are chosen specifically for stability and crowd appeal.
Main Ingredients
2½ cups seasoned mashed beans
2 cups creamy spread
2 cups thick, well-drained salsa
1½ cups seasoned cooked chicken or hearty vegetable mixture
1½ cups finely chopped crisp vegetables
2 cups shredded cheese
¾ cup fresh chopped herbs or vegetables for topping
These quantities comfortably serve a medium to large party.
Choosing the Best Dish for Make-Ahead Storage
The right dish helps with both storage and presentation.
Best options include:
Clear glass dishes to showcase layers
Dishes with straight sides for clean layering
Containers that fit easily in the refrigerator
Clear dishes allow you to see that layers are holding perfectly before serving.
How to Assemble the Dip for Make-Ahead Success
Careful assembly ensures the dip looks just as good at serving time as it did when made.
Step One: Spread the Base Layer
Evenly spread the seasoned mashed beans across the bottom of the dish. Smooth the surface completely.
Step Two: Add the Creamy Layer
Gently spread the creamy layer over the beans. Take care not to mix layers.
Step Three: Add the Fresh Layer
Spoon the thick, well-drained salsa evenly across the surface. Spread lightly.
Step Four: Add the Savory Layer
Distribute the seasoned chicken or vegetable mixture evenly. Press lightly to stabilize.
Step Five: Add the Crunch Layer
Sprinkle chopped vegetables evenly across the dip.
Step Six: Add the Cheese Layer
Cover the entire surface with shredded cheese.
Step Seven: Finish with the Top Layer
Add fresh herbs or vegetables for color and freshness.
Refrigeration Tips for Best Results
Refrigeration is what allows this dip to shine.
For best results:
Cover tightly to prevent drying
Chill for at least one hour before serving
Store on a flat shelf
Keep away from strong refrigerator odors
Chilling allows layers to set and flavors to blend.
How Far Ahead You Can Make This Dip
This dip is designed for flexibility.
Best made 8 to 24 hours in advance
Can be prepared the night before
Holds structure and flavor beautifully
Final toppings can be refreshed before serving
It’s ideal for planned events.
Serving the Dip at the Party
When it’s time to serve, there’s very little to do.
Remove from refrigerator
Uncover carefully
Wipe dish edges if needed
Place directly on the table
No warming or resting required.
Best Chips and Dippers for Party Serving
Choose dippers that hold up well.
Great options include:
Thick tortilla chips
Scoop-style chips
Pita chips
Crisp vegetable sticks
Offering multiple options helps accommodate preferences.
Setting Up a Party-Friendly Dip Station
A thoughtful setup makes serving easier.
Place dip at the center
Surround with multiple chip bowls
Add napkins nearby
Leave space for guests to gather
This prevents crowding and keeps things moving.
Scaling the Recipe for Different Party Sizes
This recipe adapts easily.
Small party: halve the ingredients
Medium party: use as written
Large party: double and use two dishes
Multiple dishes help spread guests out.
Common Make-Ahead Mistakes to Avoid
Avoid these to ensure success:
Using watery ingredients
Skipping drainage steps
Overmixing layers
Leaving dip uncovered in the fridge
Small steps make a big difference.
Why This Dip Looks Party-Ready Every Time
This 7 layer dip looks party-ready because it’s built with intention. Each layer is placed with care, each ingredient chosen for stability, and the overall result feels polished without being fussy.
It’s impressive without trying too hard.
Frequently Asked Questions
Can this dip really be made the day before?
Yes, it’s designed specifically for make-ahead preparation.
Does refrigeration improve the dip?
Yes, it helps layers set and flavors blend.
Can it sit out during the party?
It holds up well for several hours when kept cool.
What’s the best way to store leftovers?
Cover tightly and refrigerate for up to two days.
Can the layers be customized?
Yes, as long as ingredients remain thick and well-drained.
Why Make-Ahead Dips Are a Host’s Best Friend
Make-ahead dips allow you to plan once and relax later. They reduce stress, save time, and ensure your food is ready when guests arrive.
This 7 layer dip is a perfect example of how thoughtful preparation leads to better hosting.
Final Thoughts
This make-ahead 7 layer dip for parties is everything a host could want. It’s reliable, visually appealing, and built to be prepared ahead without sacrificing quality. Each layer stays exactly where it belongs, creating a dip that looks just as good at serving time as it did when you made it.
When food is handled early and thoughtfully, you’re free to enjoy the party — and that’s what hosting should be about.