Table of Contents
- 1 Why Black Eyed Peas Are Perfect for Meal Prep
- 2 Ingredients
- 3 Preparing the Black Eyed Peas
- 4 Preparing the Vegetables
- 5 Choosing a Grain Base
- 6 Assembling the Meal Prep Bowls
- 7 Flavor Variations for Different Weeks
- 8 Why These Bowls Work So Well for Lunch
- 9 Tips for Perfect Meal Prep Every Time
- 10 Health Benefits of These Meal Prep Bowls
- 11 Frequently Asked Questions
- 12 Why This Meal Prep Recipe Is a Game Changer
Preparing nutritious meals for the week doesn’t have to be complicated, time-consuming, or expensive. With the right ingredients and a thoughtful approach to flavor, meal prep can become something you look forward to—not a chore. These Healthy Black Eyed Peas Meal Prep Bowls are designed to give you satisfying, balanced meals that store beautifully, reheat well, and keep you full without leaving you sluggish.
Packed with plant-based protein, fiber, colorful vegetables, and simple seasonings, these bowls create a delicious and nourishing foundation for a busy week. Whether you’re a student trying to stay energized through classes, a professional with limited lunch breaks, or someone who simply wants healthier grab-and-go meals, these meal prep bowls help you stay on track effortlessly.
Black eyed peas are the star of this dish. Their creamy texture, earthy flavor, and exceptional nutrient profile make them perfect for building hearty, wholesome meals. Combined with roasted or sautéed vegetables, grains, and light seasonings, they transform into a complete, satisfying lunch option that feels just as comforting on Friday as it did on Monday.
Why Black Eyed Peas Are Perfect for Meal Prep
Black eyed peas are an underrated powerhouse when it comes to meal planning. They hold their shape during storage, absorb flavors beautifully, and provide stable energy throughout the day.
Long-Lasting Freshness
Unlike delicate vegetables or watery dishes, black eyed peas maintain their texture and quality for several days, making them excellent for meal prep.
Nutritional Benefits
High in plant-based protein
Rich in soluble and insoluble fiber
Full of iron, magnesium, folate, and potassium
Low in fat and naturally cholesterol-free
Easy to Flavor
Their mild taste makes them ideal for absorbing herbs, spices, sauces, and broths, meaning they stay flavorful even after reheating.
Affordable and Accessible
Canned or dried black eyed peas are budget-friendly and widely available, making this recipe accessible to almost anyone.
Ingredients
Black Eyed Peas Base
3 cups cooked black eyed peas (or 2 cans, drained and rinsed)
1 tablespoon olive oil
1 medium onion, diced
2 cloves garlic, minced
1 teaspoon smoked paprika
½ teaspoon cumin
½ teaspoon dried thyme
Salt and black pepper to taste
½ cup vegetable broth
Roasted or Sautéed Vegetables
Choose 3–4 of the following:
1 red bell pepper, diced
1 yellow or green bell pepper, diced
1 medium zucchini, sliced
1 cup broccoli florets
1 cup cauliflower florets
1 cup cherry tomatoes, halved
2 medium carrots, sliced
1 cup spinach or kale
Grain or Base Option
Choose one:
3 cups cooked brown rice
3 cups cooked quinoa
3 cups couscous
3 cups wild rice
3 cups cauliflower rice (for low-carb bowls)
Optional Add-Ins
Fresh parsley or cilantro
Lemon or lime wedges
Avocado (add right before eating)
Red pepper flakes
Olive oil drizzle
Tahini dressing
Hummus spoonful
These options make your meal prep flexible, customizable, and delicious all week.
Preparing the Black Eyed Peas
Step 1: Cook or Rinse Peas
If using dried peas, soak them for 4 hours and simmer until tender. Canned peas should be rinsed well to remove excess sodium.
Step 2: Sauté the Aromatics
Heat olive oil in a large skillet or pot. Add the diced onion and cook until it softens. Add minced garlic and stir until fragrant.
Step 3: Add Seasonings
Sprinkle in smoked paprika, cumin, thyme, salt, and pepper. These spices give warmth, depth, and character to the black eyed peas.
Step 4: Add Peas and Broth
Stir in the black eyed peas and vegetable broth. Simmer for 8–10 minutes, letting the peas absorb the flavors.
Step 5: Reduce and Thicken
Allow the broth to simmer down until the peas become lightly saucy and coated with seasonings.
Remove from heat and let cool before assembling.
This seasoned base becomes the flavorful heart of your meal prep bowls.
Preparing the Vegetables
You can roast or sauté your vegetables depending on preference and available time.
Roasting Option
Preheat oven to 400°F (200°C).
Spread diced vegetables on a baking sheet.
Drizzle with olive oil, add salt and pepper, and toss.
Roast for 20–25 minutes until tender and lightly caramelized.
Sautéing Option
Heat a tablespoon of olive oil in a skillet.
Add vegetables starting with the ones that take longest (carrots, broccoli).
Stir frequently until cooked through and lightly browned.
Season with salt, pepper, and optional herbs.
Roasted vegetables tend to bring deeper flavor, while sautéed vegetables give the bowls a lighter, fresher feel.
Choosing a Grain Base
Grains help create a balanced meal by adding complex carbohydrates and more fiber.
Best Options
Brown rice for a classic, hearty base
Quinoa for high protein and light texture
Wild rice for nuttiness
Couscous for a quick, soft, fluffy base
Cauliflower rice for low-carb needs
Cook your grain of choice according to package instructions and let it cool before assembling bowls.
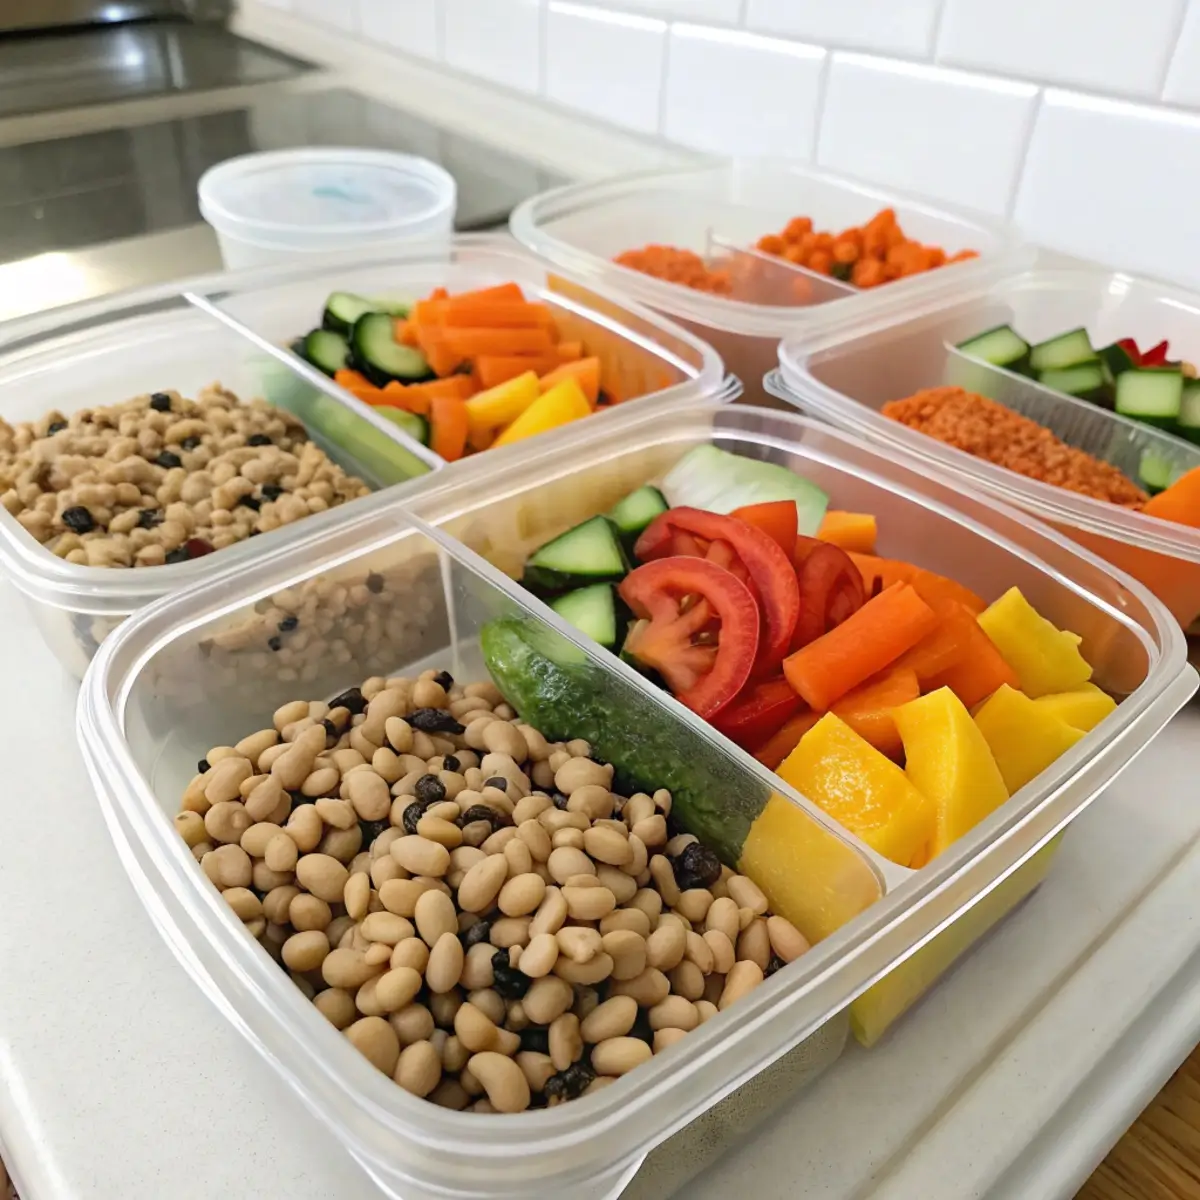
Assembling the Meal Prep Bowls
Assembly is one of the most satisfying parts of meal prep.
Step-by-Step Assembly
Lay out your containers (preferably 4–6 for weekly meals).
Add a layer of grains or greens to the bottom of each container.
Spoon in a generous portion of the seasoned black eyed peas.
Add roasted or sautéed vegetables to the remaining space.
Garnish with fresh herbs if desired.
Let the containers cool before sealing.
Store in the refrigerator for 4–5 days.
Storage Tips
Do not add avocado until serving.
Keep sauces or dressings in separate small containers.
Add fresh greens only on the day you plan to eat them.
Use airtight glass containers for best reheating results.
Flavor Variations for Different Weeks
One of the best things about meal prepping black eyed peas bowls is the endless customization. You can prepare a new bowl every week without ever getting tired of it.
Mediterranean-Style Bowls
Add cucumbers, cherry tomatoes, olives, and oregano
Serve with lemon tahini dressing
Southwest Bowls
Add corn, diced tomatoes, cilantro, and lime
Season with chili powder
Herb-Rich Bowls
Use parsley, chives, dill, and lemon zest
Add sautéed kale for extra greens
Hearty Winter Bowls
Include roasted sweet potato, carrots, and broccoli
Sprinkle with smoked paprika
Fresh Summer Bowls
Add fresh herbs, cherry tomatoes, and light vinaigrette
These variations give you flexibility throughout the year.
Why These Bowls Work So Well for Lunch
Balanced Nutrition
Each container offers plant protein, fiber, healthy fats, and vitamins.
Easy Reheating
Black eyed peas stay tender without becoming mushy.
Flavor Retention
Seasonings meld beautifully over time, intensifying flavor.
Budget-Friendly
The ingredients are simple, inexpensive, and accessible.
Convenience
Ready-to-eat containers save time, reduce stress, and help you avoid unhealthy meals.
Meal prep becomes far easier when each bowl feels satisfying, nourishing, and flavorful.
Tips for Perfect Meal Prep Every Time
Let all ingredients cool before sealing containers.
Keep sauces separate to avoid sogginess.
Mix grains and peas just before eating for freshest results.
Label containers to track freshness.
Rotate vegetable combinations weekly to avoid monotony.
Smart meal prep keeps both flavor and nutrition at their best.
Health Benefits of These Meal Prep Bowls
Rich in Plant-Based Protein
Black eyed peas provide excellent protein for energy and muscle support.
High in Fiber
Helps with digestion, blood sugar stability, and long-lasting fullness.
Packed with Vitamins
Roasted vegetables supply vitamins A, C, K, and antioxidants.
Balanced Macros
Grains + legumes + vegetables create complete meals.
Low in Fat
Naturally light but satisfying, without heavy oils or dairy.
This is meal prep that’s both nourishing and energizing.
Frequently Asked Questions
How long do these meal prep bowls last?
They stay fresh for 4–5 days in the refrigerator.
Can I freeze them?
Yes, but freeze without fresh greens or tomatoes.
What’s the best way to reheat?
Microwave for 1–2 minutes, adding a splash of water if needed.
Can I skip the grains?
Yes—use greens, extra vegetables, or cauliflower rice.
Can I add protein?
Absolutely. Add tofu, chickpeas, roasted tempeh, or more legumes.
Can I make it spicy?
Add red pepper flakes, cayenne, or diced jalapeños.
Are these bowls vegan?
Yes, they are naturally plant-based.
Are they filling enough for lunch?
Yes—thanks to high fiber, protein, and hearty vegetables.
Why This Meal Prep Recipe Is a Game Changer
This meal prep routine helps you save time, eat healthier, and stay energized throughout the week. With minimal ingredients and simple prep steps, you get multiple servings of nourishing, satisfying food ready to go. Meal prepping doesn’t have to be complicated or boring—and this recipe proves it.