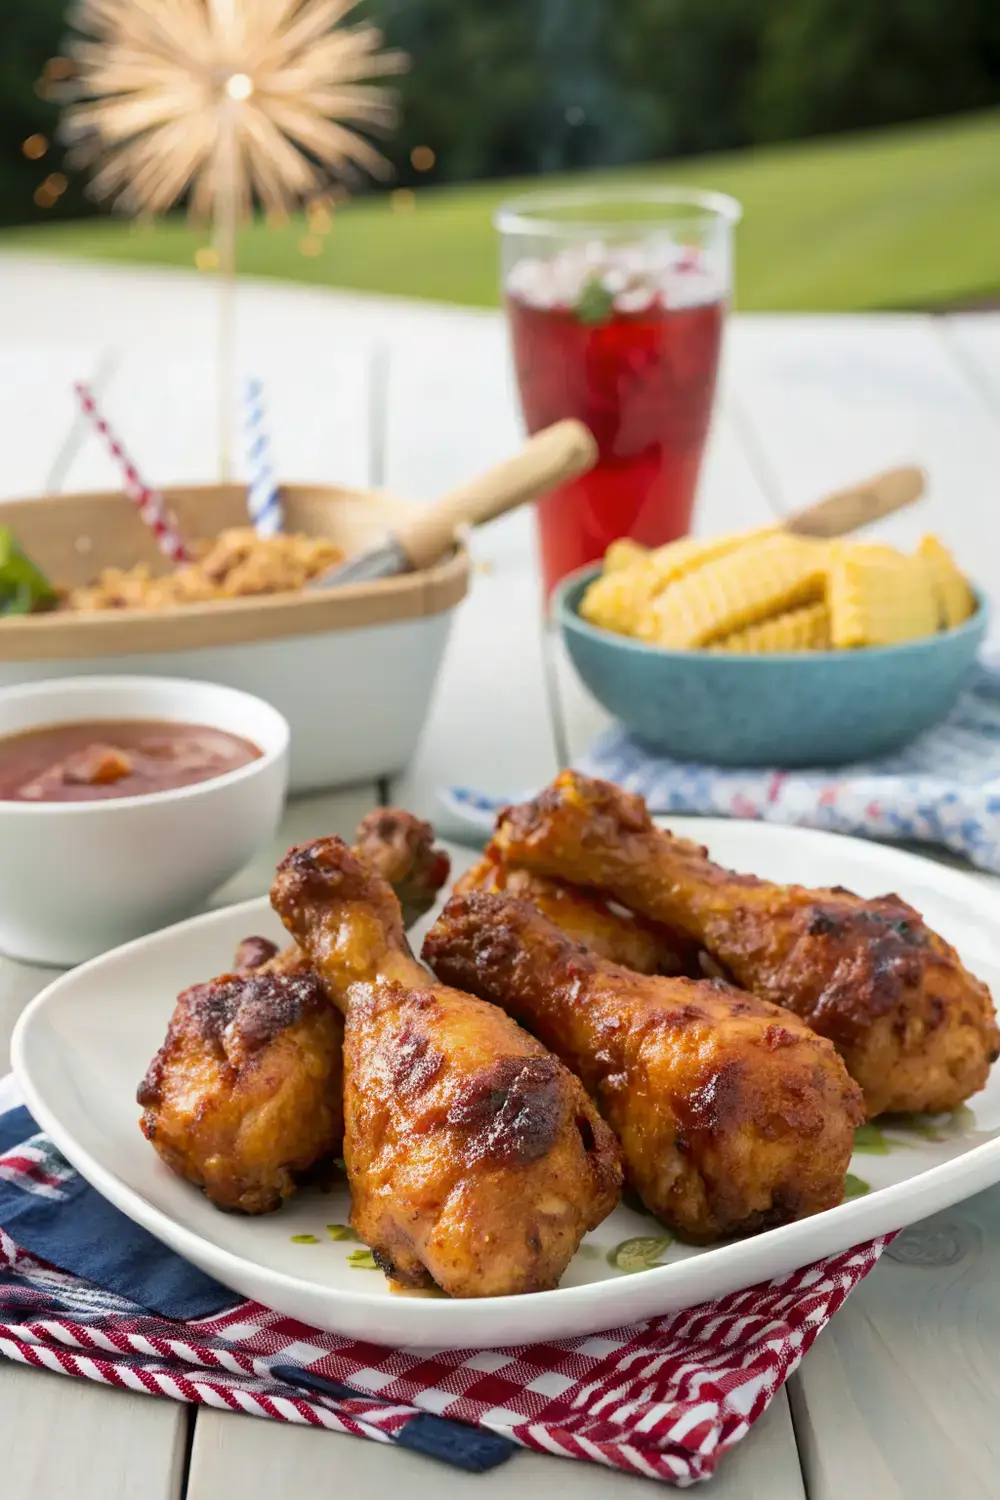
Introduction: The Star of Your Independence Day Spread
There’s something undeniably festive about firing up the grill on a hot July afternoon. The sizzle of meat, the aroma of smoky charcoal, and the laughter of friends and family gathering in the backyard—it’s the heart of summer celebration. While burgers and hot dogs are classics, there’s one dish that consistently steals the show with its finger-licking goodness and crowd-pleasing appeal: BBQ chicken drumsticks.
These aren’t just any grilled chicken legs. This recipe transforms humble drumsticks into a masterpiece of sweet, spicy, and smoky flavors. Imagine juicy, tender meat encased in a sticky, caramelized glaze that’s both bold and balanced. The secret lies in a simple yet dynamic sauce built from kitchen staples—honey for sweetness, Dijon mustard for tang and depth, fresh garlic for pungency, and a splash of apple cider vinegar to cut through the richness and add a bright, fruity note.
Perfect for feeding a hungry crowd, these drumsticks pair effortlessly with all your favorite picnic sides like creamy potato salad, buttery corn on the cob, and a crisp coleslaw. Best of all, they come together in under 30 minutes of active prep, leaving you plenty of time to enjoy the party. Whether you’re a grilling novice or a seasoned pitmaster, this step-by-step guide will walk you through achieving that authentic, smoky flavor and picture-perfect finish. Get ready to make your 4th of July feast truly unforgettable.
Why This Recipe Works for Your 4th of July Party
- Crowd-Pleasing & Portable: Drumsticks are the ultimate finger food. No utensils required, minimal mess, and everyone loves them. They’re easy to grab and enjoy while mingling.
- Grill-Friendly: They cook relatively quickly over direct heat and are very forgiving, making them ideal for a busy backyard cook.
- Visually Appealing: That deep, glossy, caramelized sauce is a showstopper on the picnic table, especially next to a spread of red, white, and blue desserts.
- Make-Ahead Magic: You can prep the drumsticks and sauce hours ahead, then just throw them on the grill when your guests arrive, freeing you up to socialize.
- All-Inclusive: This recipe contains no pork, bacon, or alcohol, ensuring it fits a wide range of dietary preferences and restrictions common at large gatherings.
Ingredients: The Building Blocks of Flavor
Let’s break down what you’ll need and why each component matters. Using quality ingredients makes a noticeable difference.
For the Chicken & Dry Rub
- 3 lbs (about 12-14 pieces) Chicken Drumsticks: Look for drumsticks that are similar in size for even cooking. You can ask your butcher to trim the excess skin and fat if desired, but a little fat helps keep them juicy.
- 2 tbsp Olive Oil: Helps the dry rub adhere to the chicken and promotes beautiful browning on the grill.
- 1 tbsp Smoked Paprika: This is non-negotiable for that classic BBQ flavor. It adds a sweet, smoky depth that regular paprika can’t match.
- 1 tsp Garlic Powder: Provides a consistent, savory garlic flavor that permeates the meat.
- 1 tsp Onion Powder: Adds a subtle sweetness and aromatic backbone.
- 1 tsp Kosher Salt: Enhances all the other flavors. Use kosher salt, not table salt, as it’s less dense.
- ½ tsp Black Pepper: Freshly cracked is best for a more vibrant flavor.
For the Sweet & Spicy BBQ Sauce
- ½ cup Honey: The primary sweetener. Use a good-quality, runny honey for easy mixing. It will caramelize beautifully on the grill.
- ¼ cup Dijon Mustard: The star of the sauce. It provides a complex, tangy sharpness that balances the honey’s sweetness and helps emulsify the sauce.
- 3 cloves Garlic, minced: Fresh garlic is key here. Mince it finely so it distributes evenly and doesn’t burn on the grill.
- 2 tbsp Apple Cider Vinegar: The “secret weapon.” It adds essential acidity to cut through the fat and sweetness, creating a well-rounded, tangy finish.
- 1 tbsp Worcestershire Sauce: (Note: Contains anchovies, but is generally considered acceptable for non-pork diets. Omit if serving vegetarians). It adds a savory, umami depth often described as “meaty.”
- 1 tsp Chili Powder: For a gentle, earthy heat. Adjust to your crowd’s preference.
- ½ tsp Cayenne Pepper (optional): For those who like a noticeable kick. Start with ¼ tsp if you’re sensitive to spice.
- ¼ cup Ketchup: Provides a familiar tomato base and helps thicken the sauce.
- 2 tbsp Unsalted Butter: Stirred in at the end, it adds a luxurious richness and glossy sheen to the sauce.
—
Equipment You’ll Need
- Grill (Charcoal or Gas): For that authentic smoky flavor. If using charcoal, set it up for two-zone cooking (hot coals on one side, empty space on the other).
- Tongs: Long-handled tongs for safe flipping.
- Basting Brush: A silicone brush is ideal for applying the sauce.
- Instant-Read Meat Thermometer: The most important tool. Ensures your chicken is safely cooked to 165°F (74°C) without being dry.
- Two Small Bowls: One for the dry rub, one for the sauce.
- Aluminum Foil: For resting the chicken.
Step-by-Step Instructions: From Prep to Plate
Step 1: Prep the Chicken (5 minutes)
1. Pat Dry: Use paper towels to pat the chicken drumsticks completely dry. This is crucial for the skin to get crispy on the grill.
2. Oil & Season: Place the drumsticks in a large bowl. Drizzle with olive oil and toss to coat. In a small bowl, mix the smoked paprika, garlic powder, onion powder, salt, and pepper. Sprinkle this dry rub all over the chicken, turning to coat every piece evenly. Let them sit at room temperature while you prepare the sauce (about 15-20 minutes). This takes the chill off and promotes more even cooking.
Step 2: Make the BBQ Sauce (5 minutes)
1. In a medium saucepan over medium-low heat, combine the honey, Dijon mustard, minced garlic, apple cider vinegar, Worcestershire sauce (if using), chili powder, cayenne (if using), and ketchup.
2. Whisk constantly until the mixture is smooth and just begins to simmer. Do not let it boil vigorously.
3. Reduce the heat to low and let it cook for 5 minutes, stirring occasionally, to allow the flavors to meld.
4. Remove from heat and stir in the butter until melted and glossy. Set aside half of the sauce for serving at the table. You will use the other half for basting.
Step 3: Grill the Drumsticks to Perfection (15-20 minutes)
1. Preheat your grill to medium-high heat (about 375-400°F or 190-200°C). For charcoal, you should be able to hold your hand 5 inches above the grate for 4-5 seconds.
2. Clean and oil the grates well to prevent sticking.
3. Place the drumsticks on the hot side of the grill (direct heat). Close the lid and grill for 5-7 minutes per side, until they develop nice grill marks and the skin starts to crisp.
4. Move to indirect heat: Once seared, move the drumsticks to the cooler side of the grill (or reduce gas heat to low). This allows them to cook through gently without burning the outside.
5. Baste generously: Brush a layer of the reserved BBQ sauce over each drumstick. Close the lid and cook for 5 minutes.
6. Repeat basting: Turn the drumsticks, baste the other side, and cook for another 5 minutes. Continue this process—turning and basting every 5 minutes—for about 15-20 minutes total, or until the internal temperature reaches 165°F (74°C) in the thickest part, near the bone.
7. Watch for burning: The honey in the sauce can burn easily. If the drumsticks start to get too dark before they are cooked through, move them further from the heat or to a cooler part of the grill.
Step 4: Rest and Serve (5 minutes)
1. Once cooked, transfer the drumsticks to a clean platter. Tent loosely with foil and let them rest for 5-10 minutes. This allows the juices to redistribute, resulting in incredibly tender and moist meat.
2. Serve the drumsticks warm, with the reserved sauce on the side for extra dipping. Garnish with a sprinkle of fresh chopped parsley or sliced green onions for a pop of color, if desired.
Pro Tips for Grilling Success
- Don’t Skip the Dry Brine: If you have time, season the chicken with the salt and spices (without the oil) and let it sit uncovered in the refrigerator for 2-4 hours. This dries the skin even further, leading to superior crispiness.
- Control the Flame: Flare-ups from dripping fat are common. Keep a spray bottle of water handy to tame flames, but be aware it can cause steam and make the skin less crispy.
- Sauce at the End: Always apply sweet sauces like this one in the last 10-15 minutes of cooking. Adding it too early will cause the sugar to burn before the chicken is done.
- Use a Thermometer: Eyeballing is not accurate. A thermometer is your best friend for perfectly cooked, safe chicken every single time.
- Charcoal for Flavor: If you have a charcoal grill, use natural hardwood lump charcoal and consider adding a chunk of fruitwood (like apple or cherry) for an extra layer of authentic smoky flavor.
Delicious Variations & Substitutions
- For a Smokier Sauce: Add ½ teaspoon of liquid smoke to the sauce when you add the vinegar.
- For a Spicy Version: Double the cayenne pepper or add 1-2 teaspoons of your favorite hot sauce (like Frank’s RedHot) to the sauce.
- For a Sweeter Sauce: Substitute maple syrup for half of the honey.
- For a Tangier Sauce: Increase the apple cider vinegar to 3 tablespoons.
- Boneless Option: You can use boneless, skinless chicken thighs. Reduce the initial searing time to 3-4 minutes per side, then baste and cook until they reach 165°F. They will cook much faster.
- Oven Method (if no grill): Bake the seasoned drumsticks on a wire rack set over a baking sheet at 400°F (200°C) for 35-40 minutes, basting with sauce in the last 15 minutes. Finish under the broiler for 1-2 minutes to caramelize.
Storage, Reheating, and Make-Ahead Tips
- Make-Ahead: You can make the BBQ sauce up to 5 days in advance and store it in the refrigerator. You can also season the chicken with the dry rub and keep it covered in the fridge for up to 24 hours before grilling.
- Storing Leftovers: Cool leftover drumsticks completely, then store them in an airtight container in the refrigerator for up to 4 days.
- Reheating: The best way to reheat is in an oven or toaster oven at 350°F (175°C) for 10-15 minutes, or until heated through. This helps retain some crispiness. You can also microwave them, but the skin will be soft.
- Freezing: Cooked drumsticks can be frozen for up to 2 months. Thaw overnight in the refrigerator before reheating.
Common Mistakes to Avoid
1. Putting cold chicken on a hot grill: This causes the outside to cook too quickly while the inside remains cold. Let it sit out for 15-20 minutes as directed.
2. Skipping the pat-dry step: Wet chicken steams instead of sears, preventing crispy skin.
3. Using a dirty, un-oiled grill grate: The chicken will stick and tear. Always preheat and clean your grates.
4. Not using a meat thermometer: This is the #1 reason for dry, overcooked chicken. Trust the thermometer, not the time.
5. Basting too early: Applying the sugary sauce from the start guarantees a burnt exterior and undercooked interior.
6. Cutting into the chicken to check doneness: This releases all the precious juices. Use a thermometer inserted into the thickest part, avoiding the bone.
Frequently Asked Questions (FAQs)
Q1: Can I use chicken leg quarters instead of drumsticks?
Yes, absolutely. Chicken leg quarters (which include the thigh) are delicious and even more economical. They will take slightly longer to cook, so rely on your thermometer to reach 165°F in the thickest part of the thigh.
Q2: I don’t have a grill. Can I make these in the oven?
Yes. Bake the seasoned drumsticks on a rack over a baking sheet at 400°F for about 35-40 minutes, or until they reach 165°F internally. In the last 15 minutes, brush generously with the BBQ sauce every 5 minutes. For a final touch, broil for 1-2 minutes to caramelize the sauce.
Q3: Is the Worcestershire sauce necessary? I want to avoid all fish/anchovies.
The Worcestershire adds a deep, savory note, but you can omit it. To compensate, add an extra ½ teaspoon of soy sauce (or tamari for gluten-free) and an extra ¼ teaspoon of smoked paprika to the sauce for that umami boost.
Q4: How can I make this recipe gluten-free?
This recipe is almost entirely gluten-free as written. The only potential source is Worcestershire sauce, which often contains barley malt vinegar. Look for a certified gluten-free Worcestershire sauce, or simply omit it as suggested in Q3.
Q5: The sauce is too spicy for my kids. How can I tone it down?
Simply reduce or omit the cayenne pepper. You can also increase the honey by an extra tablespoon to balance the heat with more sweetness.
Q6: Can I prepare the drumsticks completely and just reheat them at the party?
You can grill them fully a day ahead, let them cool, and refrigerate. Reheat them gently in a 300°F oven for 15-20 minutes, basting with a little extra sauce to refresh them. They won’t be quite as crispy as fresh-off-the-grill, but they will still be very tasty.
Conclusion: Your New 4th of July Tradition
These Easy BBQ Chicken Drumsticks are more than just a recipe; they’re a ticket to a memorable Independence Day celebration. They deliver on every front: explosive flavor, stunning presentation, and the unbeatable satisfaction of grilling your own feast. The sweet heat of the honey-mustard glaze, the smoky char from the grill, and the incredibly juicy meat inside will have your guests coming back for seconds (and maybe thirds!).
By following these detailed steps and pro tips, you’ll sidestep common pitfalls and achieve grilling glory, even if it’s your first time. Pair them with your favorite summer sides, pour some cold lemonade, and enjoy the fireworks—both in the sky and on your plate.
This 4th of July, skip the stress and embrace the sizzle. Fire up that grill, gather your loved ones, and get ready to create a new, delicious tradition. Happy grilling, and happy Independence Day!