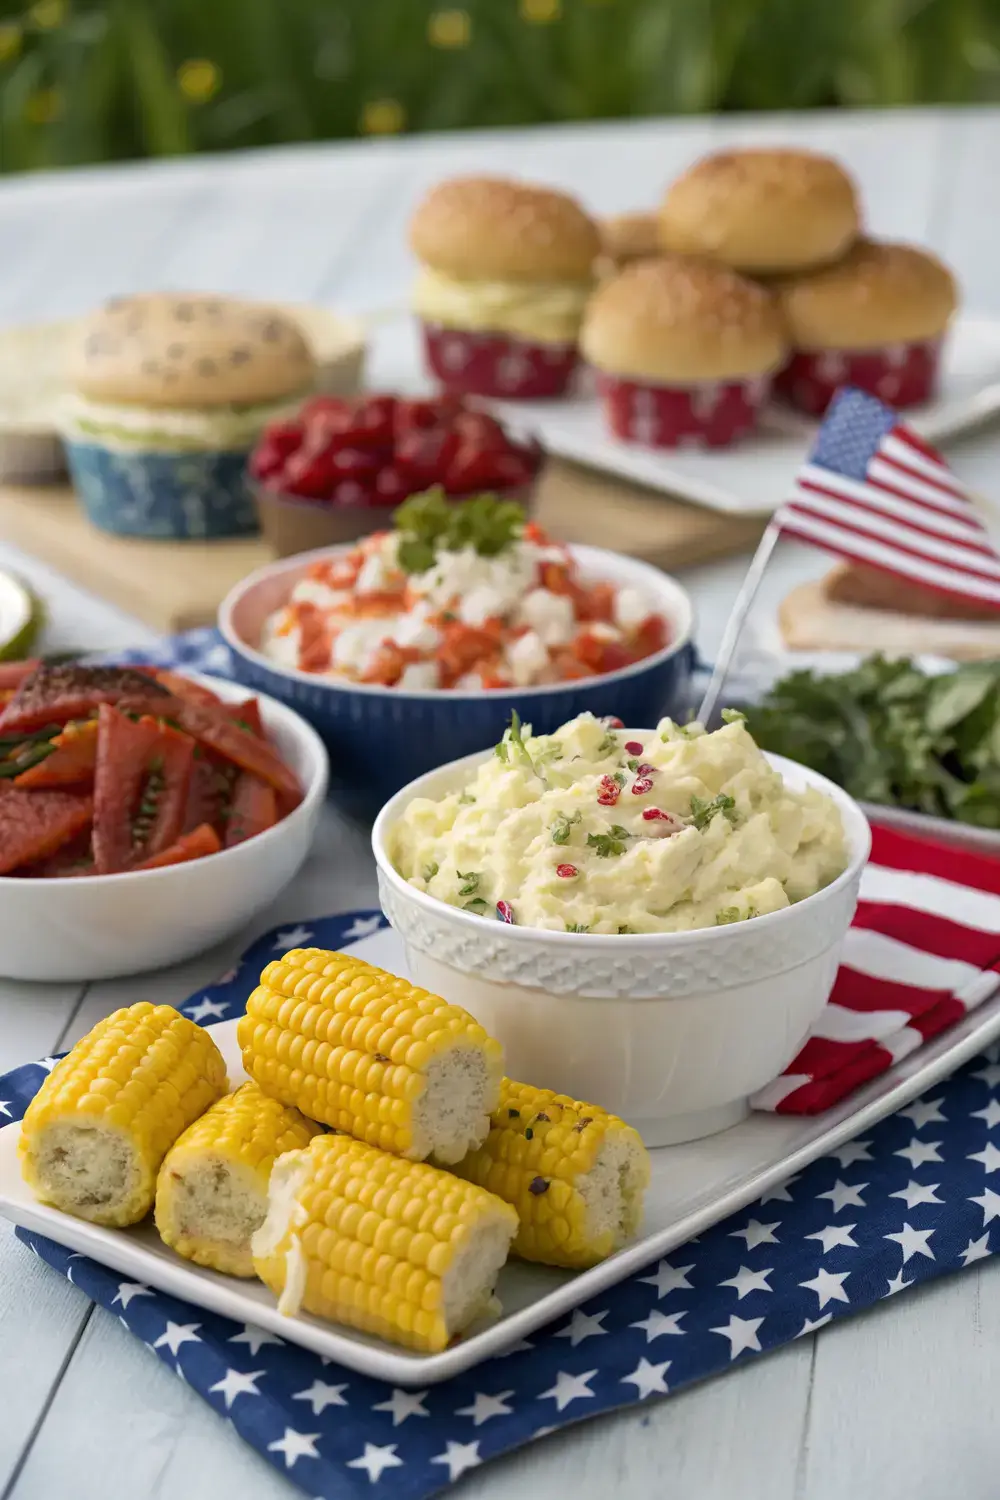
Introduction: Celebrate Independence Day with Delicious, Crowd‑Pleasing Sides
Summer is finally here, and the scent of a grill heating up is the unofficial soundtrack of July 4th. While the stars‑and‑stripes‑themed burgers and hot dogs often steal the spotlight, it’s the side dishes that truly turn a backyard gathering into a memorable feast. A well‑chosen lineup of salads, vegetables, and sweet bites adds color, texture, and flavor that keep guests reaching for seconds.
Whether you’re a seasoned host or a first‑time cook, the recipes below are designed to be easy, forgiving, and downright tasty. Each dish celebrates classic Americana while staying flexible enough for personal twists—think extra herbs, a dash of heat, or a gluten‑free swap. The result? A vibrant, red‑white‑blue spread that looks as good on the Pinterest board as it does on the picnic table.
Grab a large bowl, your favorite serving platters, and let’s dive into the ultimate collection of 4th of July side dishes that will make your summer BBQ the talk of the neighborhood.
1. Creamy Classic Potato Salad
Why It Works
Potato salad is a timeless BBQ staple. Its cool, creamy texture balances the heat of grilled meats, while the tangy mustard‑vinegar dressing cuts through the richness. The recipe uses a simple mayonnaise base, so you can adjust the richness to your liking.
Ingredients
- 2 lb (about 900 g) Yukon Gold potatoes – waxy potatoes hold their shape after cooking.
- ½ cup (120 ml) full‑fat mayonnaise – gives a velvety mouthfeel.
- ¼ cup (60 ml) sour cream – adds a subtle tang.
- 2 Tbsp Dijon mustard – brightens the flavor.
- 2 Tbsp apple cider vinegar – a fresh, mild acidity.
- 1 small red onion, finely diced – gives a sweet bite.
- 3 celery stalks, thinly sliced – crunch and fresh herbal notes.
- ¼ cup fresh parsley, chopped – for color and aroma.
- Salt & freshly ground black pepper, to taste.
Step‑by‑Step Instructions
- Boil the potatoes. Cut potatoes into 1‑inch cubes for even cooking. Place in a large pot, cover with cold water, add a pinch of salt, and bring to a boil. Reduce to a simmer and cook 10‑12 minutes, until fork‑tender.
- Cool and drain. Drain the potatoes and spread them on a baking sheet to cool quickly. This prevents them from becoming mushy when mixed with the dressing.
- Make the dressing. In a bowl, whisk together mayonnaise, sour cream, Dijon, and apple cider vinegar. Season with salt and pepper.
- Combine. Toss the warm potatoes with the dressing, red onion, celery, and parsley. The warmth helps the potatoes absorb the flavors.
- Chill. Cover the bowl and refrigerate for at least 1 hour before serving. This step is crucial for a cohesive flavor.
Tips & Tricks
- For a lighter version, swap half the mayo with Greek yogurt.
- Adding a teaspoon of smoked paprika gives a subtle smoky note that pairs beautifully with grilled ribs.
- Don’t over‑mix; a gentle toss keeps the potatoes from breaking apart.
Variations & Substitutions
- Gluten‑free: All ingredients are naturally gluten‑free.
- Vegan: Use plant‑based mayo and dairy‑free sour cream.
- Herb twist: Incorporate dill or chives for a fresh, garden‑style flavor.
Storage & Reheating
Store in an airtight container in the refrigerator for up to 3 days. Potato salad is best served cold; reheating is not recommended as it can become grainy.
Common Mistakes to Avoid
- Using waxy potatoes that fall apart too easily.
- Skipping the chilling step—this results in a harsh, unbalanced taste.
- Over‑seasoning the dressing before the potatoes have had time to absorb it.
2. Tangy Classic Coleslaw
Why It Works
Coleslaw’s crisp cabbage offers a refreshing crunch that cuts through rich barbecue flavors. The sweet‑tangy vinaigrette in this recipe is lighter than a traditional mayo‑based slaw, making it perfect for a sunny July afternoon.
Ingredients
- ½ head green cabbage, finely shredded (about 4 cups).
- ½ head red cabbage, shredded (adds color).
- 2 large carrots, grated.
- ¼ cup red onion, thinly sliced.
- ¼ cup apple cider vinegar.
- 2 Tbsp honey (or maple syrup for a vegan alternative).
- 1 Tbsp Dijon mustard.
- ⅓ cup olive oil.
- Salt & pepper to taste.
- 1 Tbsp poppy seeds (optional, for a pop of texture).
Step‑by‑Step Instructions
- Prepare the vegetables. In a large bowl, combine green cabbage, red cabbage, carrots, and red onion.
- Make the vinaigrette. Whisk together apple cider vinegar, honey, Dijon, olive oil, salt, and pepper until emulsified.
- Dress the slaw. Pour the vinaigrette over the cabbage mixture. Toss gently to coat all the strands evenly.
- Let it rest. Allow the coleslaw to sit for 15‑20 minutes before serving. This softens the cabbage slightly and melds the flavors.
Tips & Tricks
- Massage the cabbage with a pinch of salt for 2‑3 minutes before adding the dressing; this softens the fibers.
- If you prefer a creamier slaw, mix in ¼ cup plain Greek yogurt.
- For extra zing, add a splash of freshly squeezed lemon juice.
Variations & Substitutions
- Low‑sugar: Reduce honey to 1 Tbsp or replace with a sugar substitute.
- Spicy: Add ½ tsp cayenne pepper or a tablespoon of finely chopped jalapeño.
- Gluten‑free: Naturally gluten‑free.
Storage & Reheating
Coleslaw keeps well in the fridge for up to 4 days. Keep the dressing separate if you plan to store it longer, then toss before serving. No reheating needed.
Common Mistakes to Avoid
- Over‑dressing: Too much liquid makes the slaw soggy.
- Using pre‑shredded cabbage with additives; it can become mushy.
- Skipping the rest period, which leads to a sharp, unbalanced flavor.
3. Butter‑Lime Grilled Corn on the Cob
Why It Works
Corn on the cob screams summer. Grilling adds a smoky char, while a butter‑lime glaze brightens the sweet kernels and adds a hint of citrus that feels patriotic without being overly sweet.
Ingredients
- 6 ears fresh corn, husks removed.
- ¼ cup unsalted butter, melted.
- 2 Tbsp fresh lime juice.
- 1 tsp lime zest.
- ½ tsp smoked paprika.
- Salt & pepper to taste.
- Fresh cilantro, chopped (optional for garnish).
Step‑by‑Step Instructions
- Preheat the grill. Aim for medium‑high heat (about 400°F/200°C).
- Mix the glaze. Whisk together melted butter, lime juice, lime zest, smoked paprika, salt, and pepper.
- Brush the corn. Lightly coat each ear with the butter‑lime mixture.
- Grill. Place the corn directly on the grill grates. Cook 10‑12 minutes, turning every 2 minutes, until kernels are tender and lightly charred.
- Finish. Brush with any remaining glaze, sprinkle cilantro if desired, and serve hot.
Tips & Tricks
- Soak the corn in water for 10 minutes before grilling; this prevents burning.
- Use a silicone brush for easy, mess‑free glazing.
- If you like extra heat, add a pinch of cayenne to the glaze.
Variations & Substitutions
- Cheesy: Sprinkle grated Cotija or Parmesan after grilling.
- Herb: Swap lime for lemon and add fresh thyme.
- Vegan: Use plant‑based butter and omit the cheese garnish.
Storage & Reheating
Grilled corn is best served fresh, but leftovers can be stored in the fridge for 2 days. Reheat on the grill or under a broiler for 3‑4 minutes, brushed with a little more butter.
Common Mistakes to Avoid
- Grilling over too high heat, which burns the husk before kernels cook.
- Not brushing enough glaze, resulting in dry kernels.
- Skipping the resting period; let the corn sit 2‑3 minutes after grilling for juices to redistribute.
4. Red, White & Blue Fruit Salad
Why It Works
A vibrant fruit salad brings a refreshing, natural sweetness to the table and adds a burst of patriotic color. The light honey‑lime dressing ties the flavors together without overwhelming the fruit’s natural taste.
Ingredients
- 2 cups strawberries, hulled and quartered (red).
- 2 cups blueberries (blue).
- 2 cups cubed white peaches or mango (white).
- 1 banana, sliced (optional, adds creaminess).
- ¼ cup honey or agave syrup.
- 2 Tbsp fresh lime juice.
- 1 tsp lime zest.
- Fresh mint leaves for garnish.
Step‑by‑Step Instructions
- Prep the fruit. Rinse all berries, pat dry, and cut fruit into bite‑size pieces.
- Make the dressing. Whisk honey, lime juice, and lime zest until smooth.
- Combine. In a large bowl, gently toss the strawberries, blueberries, and peach cubes with the dressing. Add banana last to avoid browning.
- Chill. Refrigerate for 30 minutes to let flavors meld.
- Serve. Garnish with fresh mint leaves just before serving.
Tips & Tricks
- To prevent banana from turning brown, toss it with a tiny splash of lemon juice.
- Use frozen blueberries (thawed) for extra chill and texture.
- Add a drizzle of melted dark chocolate for an elegant finish.
Variations & Substitutions
- Berry‑only: Swap peach for raspberries for a deeper red hue.
- Seasonal twist: Use watermelon cubes for extra red and juicy bite.
- Vegan: Use agave syrup instead of honey.
Storage & Reheating
Fruit salad is best served the same day. Store covered in the fridge for up to 24 hours; avoid adding banana if you need to keep it longer.
Common Mistakes to Avoid
- Over‑mixing, which bruises delicate berries.
- Adding dressing too early; fruit can become soggy.
- Using over‑ripe fruit that releases excess liquid.
5. Classic Deviled Eggs
Why It Works
Deviled eggs are finger‑friendly, protein‑packed, and instantly recognizable at any summer gathering. The silky yolk filling with a hint of mustard and paprika is a crowd‑pleaser that pairs well with any BBQ main.
Ingredients
- 12 large eggs.
- ½ cup mayonnaise (or avocado mayo for a lighter touch).
- 2 tsp Dijon mustard.
- 1 tsp white vinegar.
- ¼ tsp smoked paprika, plus extra for garnish.
- Salt & pepper to taste.
- Chives, finely chopped (optional).
Step‑by‑Step Instructions
- Boil the eggs. Place eggs in a saucepan, cover with cold water, bring to a boil, then remove from heat and let sit 10 minutes.
- Cool & peel. Transfer eggs to an ice‑water bath for 5 minutes, then gently peel.
- Halve and remove yolks. Slice each egg lengthwise and pop out the yolks into a bowl.
- Prepare the filling. Mash yolks with mayonnaise, mustard, vinegar, smoked paprika, salt, and pepper until smooth.
- Pipe or spoon filling. Transfer mixture to a piping bag fitted with a star tip, or simply spoon into the egg whites.
- Garnish. Sprinkle with extra smoked paprika and chopped chives.
Tips & Tricks
- For extra creaminess, fold in a teaspoon of cream cheese.
- Use a small zip‑top bag, snip a corner, and pipe directly from the bag for a quick, mess‑free method.
- Adding a pinch of curry powder gives an exotic twist without overwhelming the classic flavor.
Variations & Substitutions
- Low‑fat: Substitute half the mayo with plain Greek yogurt.
- Vegan: Use tofu‑based “egg” and vegan mayo.
- Spicy: Mix in a dash of hot sauce or finely chopped jalapeño.
Storage & Reheating
Keep deviled eggs refrigerated, covered with a damp paper towel, for up to 2 days. They are served cold; reheating is not recommended.
Common Mistakes to Avoid
- Over‑cooking the eggs, which creates a green ring around the yolk.
- Using a bland mayo; choose a quality brand for depth of flavor.
- Not seasoning the filling enough; a pinch of salt makes a big difference.
6. Sweet & Smoky Baked Beans
Why It Works
Rich, sweet, and smoky baked beans are a staple side that complements every meat‑focused main. The slow‑cooked beans develop a caramelized glaze that’s impossible to resist.
Ingredients
- 2 lbs (900 g) navy beans, soaked overnight and drained.
- 1 large onion, diced.
- 3 cloves garlic, minced.
- 1 cup ketchup.
- ¼ cup brown sugar.
- 2 Tbsp molasses.
- 1 Tbsp apple cider vinegar.
- 1 tsp smoked paprika.
- 1 tsp mustard powder.
- ½ tsp black pepper.
- 2 cups vegetable broth (or water).
- 2 Tbsp olive oil.
Step‑by‑Step Instructions
- Sauté aromatics. In a large Dutch oven, heat olive oil over medium heat. Add onion and garlic; cook until translucent, about 5 minutes.
- Add seasonings. Stir in ketchup, brown sugar, molasses, apple cider vinegar, smoked paprika, mustard powder, and pepper.
- Combine beans and liquid. Add the soaked beans and vegetable broth. Bring to a simmer.
- Slow cook. Cover and cook on low heat for 2‑3 hours, stirring occasionally, until beans are tender and sauce thickens. For a thicker glaze, uncover for the last 30 minutes.
- Adjust seasoning. Taste and add a pinch more salt or sugar if needed.
Tips & Tricks
- If you’re short on time, use a pressure cooker: 30 minutes at high pressure, then reduce sauce on the stove.
- A splash of liquid smoke adds a deeper smoky flavor without a grill.
- Stir gently toward the end to avoid breaking the beans.
Variations & Substitutions
- Spicy: Add ½ tsp cayenne pepper or a diced chipotle pepper.
- Sweet potato: Mix in cubed sweet potatoes for extra sweetness and texture.
- Gluten‑free: Ensure the ketchup is gluten‑free.
Storage & Reheating
Cool beans to room temperature, then refrigerate in an airtight container for up to 5 days. Reheat gently on the stovetop over low heat, adding a splash of broth if the sauce thickens too much.
Common Mistakes to Avoid
- Skipping the overnight soak; this leads to uneven cooking.
- Cooking too fast on high heat; beans can split and become mushy.
- Not stirring enough during the final reduction; the sauce may scorch.
7. Cheesy Macaroni Salad
Why It Works
Macaroni salad provides a comforting, creamy bite that pairs perfectly with spicy grilled foods. The combination of tender pasta, crisp veggies, and a cheesy dressing makes it a hit among kids and adults alike.
Ingredients
- 12 oz (340 g) elbow macaroni.
- ½ cup mayonnaise.
- ¼ cup sour cream.
- 1 cup shredded sharp cheddar cheese.
- ½ cup frozen peas, thawed.
- ¼ cup red bell pepper, diced.
- ¼ cup celery, finely chopped.
- 2 Tbsp dill pickle relish.
- 1 tsp apple cider vinegar.
- Salt & pepper to taste.
Step‑by‑Step Instructions
- Cook pasta. Boil macaroni according to package directions, al dente. Drain and rinse with cold water to stop cooking.
- Make the dressing. Whisk together mayo, sour cream, cheddar, dill relish, apple cider vinegar, salt, and pepper.
- Combine. In a large bowl, toss pasta with peas, bell pepper, and celery. Fold in the dressing until evenly coated.
- Chill. Cover and refrigerate for at least 1 hour before serving.
Tips & Tricks
- For extra zing, add a splash of hot sauce or a pinch of smoked paprika.
- Use whole‑grain or gluten‑free pasta if needed.
- Adding a handful of toasted breadcrumbs on top before serving adds a pleasant crunch.
Variations & Substitutions
- Low‑fat: Use light mayo and Greek yogurt instead of sour cream.
- Vegan: Swap mayo with vegan mayo and cheese with a plant‑based cheddar.
- Herbaceous: Mix in fresh basil or dill for a brighter flavor.
Storage & Reheating
Store in the fridge for up to 4 days. Serve cold; reheating will change the texture of the mayo‑based dressing.
Common Mistakes to Avoid
- Over‑cooking pasta; it continues to absorb dressing while cooling.
- Adding the dressing while the pasta is still warm; this can make it soggy.
- Skipping the chilling step, resulting in a thin, watery salad.
8. Colorful Veggie Platter with Patriotic Dip
Why It Works
A bright vegetable platter offers a crunchy, healthy counterpoint to richer sides. Pairing it with a dip that’s tinted red, white, and blue makes the presentation instantly festive.
Ingredients – Veggies
- 1 red bell pepper, sliced.
- 1 yellow bell pepper, sliced.
- 1 large carrot, cut into sticks.
- 1 cup cherry tomatoes.
- 1 cup broccoli florets, blanched.
- 1 cup cauliflower florets, blanched.
- 1 cup cucumber rounds.
Ingredients – Patriotic Dip
- ½ cup Greek yogurt.
- ¼ cup light cream cheese, softened.
- 2 Tbsp honey.
- ½ tsp vanilla extract.
- Red food coloring (a few drops).
- Blue food coloring (a few drops).
- Fresh strawberries, pureed (for red swirl).
- Blueberries, mashed (for blue swirl).
- Fresh mint leaves for garnish.
Step‑by‑Step Instructions
- Prepare veggies. Arrange sliced peppers, carrot sticks, cherry tomatoes, cucumber, and blanched broccoli & cauliflower on a large serving board.
- Make the base dip. Blend Greek yogurt, cream cheese, honey, and vanilla until smooth.
- Create colored swirls. Divide the dip into three bowls. Add red food coloring to one, blue to another, and leave the third white.
- Layer the dip. Spoon each colored dip onto a plate, using a spoon to create a wavy, patriotic pattern. Garnish with mint leaves.
- Serve. Place the dip at the center of the veggie platter for a striking visual impact.
Tips & Tricks
- Blanch broccoli and cauliflower for 2 minutes, then shock in ice water to retain bright color.
- If you prefer natural coloring, use beet puree for red and blueberry puree for blue.
- Keep the dip covered in the fridge until ready to serve; the colors stay vivid.
Variations & Substitutions
- Dairy‑free: Use coconut milk yogurt and dairy‑free cream cheese.
- Spicy dip: Add a pinch of cayenne to the white portion.
- Gluten‑free: Naturally gluten‑free.
Storage & Reheating
Store the dip in an airtight container for up to 3 days. Keep veggies crisp by covering with a damp paper towel. No reheating needed.
Common Mistakes to Avoid
- Over‑blanching vegetables, which leads to mushy texture.
- Using too much food coloring; a few drops are enough.
- Leaving the dip uncovered; it can dry out.
All the recipes above are built on flexible foundations. Here are quick ideas to tailor the entire spread to specific dietary needs or flavor preferences:
- Gluten‑free gathering: Use gluten‑free pasta, confirm ketchup and mustard are gluten‑free, and avoid any processed seasonings that contain wheat starch.
- Vegan-friendly party: Swap dairy‑based mayo, sour cream, and cheese with high‑quality plant‑based alternatives. Coconut‑based yogurt works well in the dip and mac salad.
- Low‑sugar version: Reduce honey or maple syrup in the fruit salad and baked beans; substitute with a natural sweetener like erythritol.
- Heat seekers: Add jalapeños, cayenne, or chipotle powder to the coleslaw, mac salad, and baked beans for a smoky kick.
- Herb‑centric twists: Incorporate fresh rosemary, thyme, or dill into the potato salad, deviled eggs, and corn glaze for a garden‑fresh profile.
Storage, Reheating, and Serving Tips for a Stress‑Free BBQ
Preparing side dishes ahead of time is the secret to enjoying your own party. Here’s a quick cheat‑sheet:
| Dish | Refrigeration Time | Reheat Method | Serving Temp. |
|---|---|---|---|
| Potato Salad | 3 days | None (serve cold) | Cold |
| Coleslaw | 4 days | None | Cold |
| Grilled Corn | 2 days | Grill 3‑4 min, medium heat | Warm |
| Fruit Salad | 24 hrs | None | Cold |
| Deviled Eggs | 2 days | None | Cold |
| Baked Beans | 5 days | Stovetop low, 5‑10 min | Warm |
| Macaroni Salad | 4 days | None | Cold |
| Veggie Platter & Dip | 3 days | None | Cold |
Common Mistakes to Avoid Across the Entire BBQ
- Last‑minute prep: Many sides taste better after they’ve rested. Do the bulk of the work the night before.
- Overcrowding the grill: Space out corn and any grilled veggies to avoid steaming instead of searing.
- Ignoring seasoning layers: Taste each component (dressing, beans, yolk mixture) before assembling to ensure balance.
- Neglecting temperature control: Keep hot foods above 140°F and cold foods below 40°F to maintain food safety.
- Forgetting garnish: A sprinkle of fresh herbs, a dash of paprika, or a few citrus zest curls elevate the visual appeal.
FAQs
Can I make the potato salad a day ahead?
Yes! In fact, making it 12‑24 hours ahead allows the potatoes to fully absorb the dressing, giving deeper flavor and a creamier texture.
What’s the best way to keep coleslaw crisp?
Massage the cabbage lightly with a pinch of salt before dressing, and store the slaw in an airtight container with the dressing on the side. Mix together just before serving.
My corn gets burnt before the kernels are cooked. How do I fix this?
Soak the corn in water for 10 minutes before grilling, and cook over medium heat, turning frequently. Using indirect heat on the grill can also prevent flare‑ups.
Can I freeze any of these side dishes?
Baked beans freeze well for up to 3 months; just thaw and reheat gently. Most salads (potato, mac, coleslaw) lose texture when frozen, so it’s best to keep them refrigerated and enjoy fresh.
How can I make the fruit salad extra festive without added sugar?
Use naturally sweet fruits like mango and ripe strawberries, and add a splash of orange juice for brightness. A drizzle of agave or a pinch of stevia can add sweetness without refining sugar.
Do I need to use a special grill for the corn?
No special equipment is required. A standard gas or charcoal grill works fine. Just make sure the grill grates are clean and lightly oiled to prevent sticking.
Conclusion: Your All‑American Side Dish Arsenal Is Ready
A spectacular 4th of July BBQ isn’t just about the grill; it’s about the harmony of flavors, textures, and colors that surround your main dishes. By mastering these seven crowd‑pleasing sides—creamy potato salad, tangy coleslaw, buttery lime‑grilled corn, patriotic fruit salad, classic deviled eggs, sweet‑smoky baked beans, cheesy macaroni salad, and a vibrant veggie platter—you’ll offer guests a well‑rounded feast that satisfies every palate.
Each recipe has been crafted with beginner cooks in mind, featuring clear steps, handy tips, and flexible substitutions. Prepare as much as possible ahead of time, store responsibly, and remember the small details—like a final sprinkle of paprika or a fresh herb garnish—that turn good food into unforgettable food.
Now, pin this guide, set up your patio, fire up the grill, and get ready for a day of fireworks, laughter, and countless compliments on your side dish spread. Happy Independence Day, and enjoy the delicious celebrations!