Table of Contents
There’s something magical about summer gatherings in America. The smell of grilled burgers wafting through the backyard, kids running around in the sunshine, and most importantly—the spread of incredible side dishes that make every gathering memorable. Among all these delicious options, one dish consistently steals the show and has guests coming back for seconds (and thirds): a perfectly made Classic American Pasta Salad.
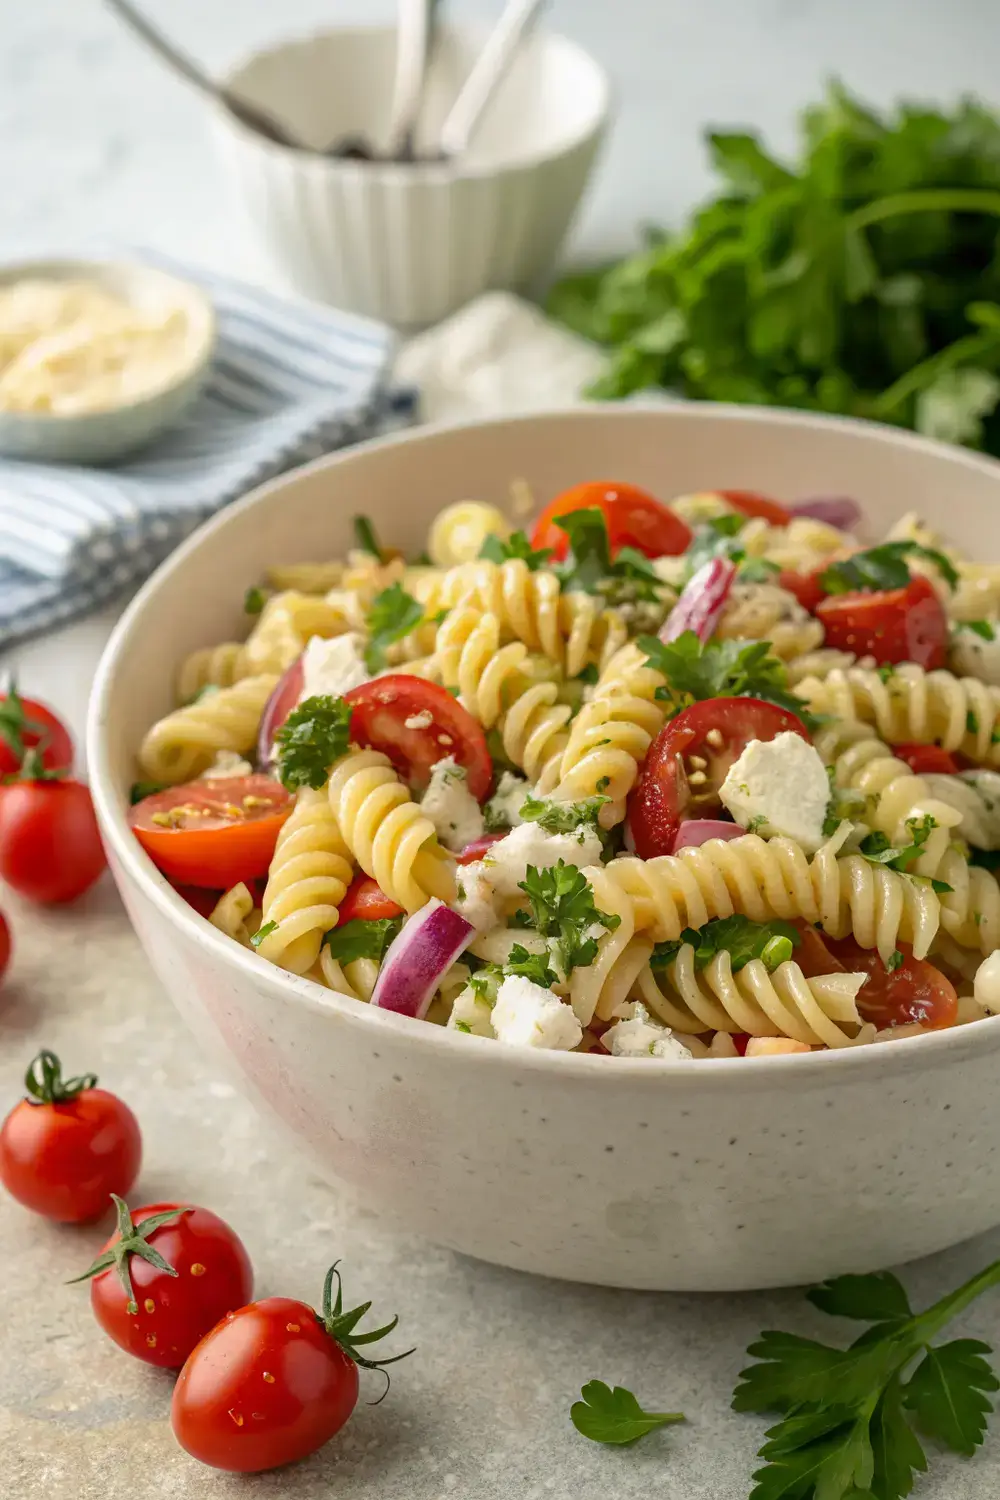
This isn’t just any pasta salad. This is the kind of dish that disappears from the table within minutes of being set out, the one guests ask you to write down the recipe for, and the side dish that will become your go-to for every summer occasion from now on. The combination of perfectly cooked rotini pasta with crisp, colorful vegetables and a tangy homemade Italian dressing creates something truly special—a side dish that manages to be both refreshing and satisfying at the same time.
What makes this pasta salad truly stand out is the homemade dressing. While you could certainly reach for a store-bought option, taking just a few extra minutes to whip up a batch of your own Italian dressing transforms this dish from ordinary to extraordinary. The combination of extra virgin olive oil, red wine vinegar, Dijon mustard, garlic, and a touch of honey creates a vinaigrette that’s both bright and creamy, with just the right amount of sweetness to balance the tangy vinegar.
The beauty of this Classic American Pasta Salad lies in its versatility. It’s perfectly at home on a 4th of July picnic table, equally delicious at a backyard barbecue, and absolutely ideal for any potluck gathering. The vegetables add a beautiful rainbow of color that makes it as pleasing to the eye as it is to the palate, while the fresh herbs and Parmesan cheese elevate it far beyond the typical pasta salad you might find at the grocery store.
One of the best things about this recipe is that it actually gets better when made ahead of time. The flavors have a chance to meld and develop as it sits in the refrigerator, which means you can prepare it the night before your gathering and simply pull it out when you’re ready to serve. This makes it the ultimate make-ahead dish for busy hosts who want to spend time with their guests rather than being stuck in the kitchen at the last minute.
Whether you’re a seasoned home cook or just starting out in the kitchen, this recipe is completely approachable for cooks of all skill levels. The instructions are straightforward, the ingredients are easy to find at any grocery store, and there are plenty of tips along the way to ensure your pasta salad turns out perfectly every single time. So let’s dive in and create a dish that will make your 4th of July cookout the talk of the neighborhood.
What Makes This Pasta Salad Special
Before we get into the recipe itself, let’s talk about why this particular pasta salad stands out from the countless others you might find at summer gatherings. The secret lies in the balance of flavors, textures, and colors that come together in every single bite.
The rotini pasta is the perfect choice for this salad because its twisted shape holds onto the dressing beautifully while also providing satisfying texture. Unlike smoother pasta shapes that might let the dressing slide right off, rotini catches and holds every bit of that delicious homemade Italian vinaigrette.
The vegetables in this salad aren’t just there for looks—each one brings something special to the party. The red bell pepper adds a sweet, slightly crunchy element. Cherry tomatoes burst with juicy freshness in every bite. Cucumber provides that essential crisp, cooling quality that makes this salad so refreshing on a hot summer day. And the thinly sliced red onion? It brings a subtle sharpness that lifts all the other flavors and keeps things interesting.
Then we have the finishing touches that truly elevate this dish. Fresh flat-leaf parsley adds brightness and a pop of color, while shredded Parmesan cheese brings that savory, umami quality that ties everything together. A pinch of salt and freshly cracked black pepper is the final step that brings the whole dish into perfect balance.
But the real star of the show is definitely the homemade Italian dressing. Made with extra virgin olive oil for richness, red wine vinegar for tang, Dijon mustard to help emulsify everything and add depth, fresh garlic for aromatic punch, and a touch of honey to round out the flavors—this dressing is leagues better than anything you could buy at the store. And the best part? It takes only about five minutes to make.
Ingredients You’ll Need
Now let’s talk about what you’ll need to gather before you start cooking. Everything on this list should be readily available at your local grocery store, and you might even have most of these items already in your pantry.
For the Pasta
The foundation of any great pasta salad is, of course, the pasta itself. You’ll need 16 ounces of rotini pasta. This medium-sized, twisted pasta shape is ideal because it holds onto dressing beautifully while providing satisfying texture. You can find rotini in the pasta aisle of virtually any grocery store—look for brands that offer different colors if you want to get creative, though the classic golden yellow works perfectly.
For the Homemade Italian Dressing
The dressing is where the magic happens, and you’ll want to use quality ingredients here since they’re the stars of the show:
– ½ cup extra virgin olive oil: This forms the rich, smooth base of your dressing. Look for a good quality extra virgin olive oil—you’ll taste the difference.
– 3 tablespoons red wine vinegar: This provides the tangy, bright acidity that makes the dressing so refreshing. Red wine vinegar has a more complex flavor than white or balsamic.
– 1 tablespoon Dijon mustard: This isn’t just for flavor—the Dijon helps emulsify the dressing, which means it keeps the oil and vinegar from separating.
– 2 cloves garlic, minced: Fresh garlic adds incredible aromatic depth. If you’re sensitive to raw garlic, you can lightly sauté it first, but the raw version gives the best flavor.
– 1 tablespoon honey: Just a touch of sweetness balances out the tangy vinegar and makes the dressing incredibly moreish.
– ½ teaspoon salt: Always taste and adjust as needed.
– ¼ teaspoon black pepper: Freshly cracked is best, but pre-ground works in a pinch.
For the Vegetables
The vegetables are what make this pasta salad so special, adding color, crunch, and fresh flavor:
– 1 cup red bell pepper, diced: About one medium pepper. Red bell peppers are sweeter than green ones and add beautiful color to the salad.
– 1 cup cherry tomatoes, halved: These little tomatoes pack a punch of sweetness and juiciness. Look for a mix of red and yellow if you can find them for extra visual appeal.
– 1 cup cucumber, sliced: English cucumbers work great here as they have fewer seeds, but regular cucumbers are fine too—just scoop out the seeds if they’re large.
– ½ cup red onion, thinly sliced: Red onion adds a nice sharp bite. Slice it as thinly as possible for the best texture.
– ¼ cup fresh flat-leaf parsley, chopped: This isn’t just for looks—fresh parsley adds bright, herbaceous flavor that elevates the entire dish.
– ½ cup Parmesan cheese, shredded: Look for a block of Parmesan and shred it yourself for the best texture and flavor. The pre-shredded kind doesn’t melt as nicely.
Kitchen Tools You’ll Need
Having the right tools makes any recipe easier, and this one is no exception. Here’s what you’ll want to have on hand:
A large pot for boiling the pasta—you’ll want something big enough that the pasta has room to move around. A colander for draining the pasta. A large bowl for mixing everything together—this should be big enough to hold all the pasta, vegetables, and dressing comfortably. A medium bowl or jar for shaking up the dressing. Sharp knife and cutting board for chopping all your vegetables. A microplane or box grater for the Parmesan cheese if you’re shredding it yourself. Measuring cups and spoons for getting the dressing proportions right.
Step-by-Step Instructions
Now let’s get cooking! Follow these steps carefully, and you’ll have a pasta salad that’s absolutely perfect.
Step 1: Cook the Pasta
Start by bringing a large pot of salted water to a rolling boil. You’ll want to use about 4-6 quarts of water per pound of pasta, and don’t forget to salt it well—your pasta water should taste like the sea. This is your only chance to season the pasta itself, so don’t skip this step.
Add your rotini pasta to the boiling water and cook according to the package directions, but here’s an important tip: cook it for one to two minutes less than the package suggests. You want the pasta to be al dente—that means it should still have a tiny bit of firmness when you bite into it. Why? Because the pasta will continue cooking as it sits in the salad, and if you cook it fully now, it’ll turn mushy later.
Once the pasta is done, drain it in a colander and rinse it briefly with cold water to stop the cooking process. This also helps cool it down so it doesn’t cook the vegetables or melt the Parmesan when you combine everything. You want the pasta to be room temperature or slightly cool, not hot.
Step 2: Prepare Your Vegetables
While the pasta is cooking, you can get all your vegetables prepped and ready to go. This is called mise en place, and it makes the actual assembly much smoother.
Start with the red bell pepper. Wash it well, then cut it in half and remove the seeds and white pith. Dice it into bite-sized pieces—about the size of a cherry tomato half. You’ll want about one cup total.
Next, halve your cherry tomatoes. Simply cut each tomato in half through the equator. If you’re using larger cherry tomatoes, you might want to quarter them instead so they’re not too big.
For the cucumber, you can slice it into half-moons or quarter-moons depending on your preference. Just make sure they’re thin enough to be easy to eat. If you’re using a regular cucumber with large seeds, cut it in half lengthwise and scoop out the seeds with a spoon before slicing.
The red onion needs to be sliced as thinly as possible. Use a sharp knife and slice it from root to tip for the best results. Thin slices will be much more pleasant to eat than thick ones, which can be overpowering.
Finally, chop your fresh parsley. Remove the stems and roughly chop the leaves. You don’t want to over-chop it or it’ll lose its fresh appearance.
Step 3: Make the Homemade Italian Dressing
This is where the magic happens! The homemade dressing is what truly sets this pasta salad apart from anything you could buy at the store.
In a medium bowl or a jar with a tight-fitting lid, combine your red wine vinegar, Dijon mustard, minced garlic, honey, salt, and pepper. Whisk it all together vigorously (or shake the jar) until the Dijon is fully incorporated and the mixture looks slightly frothy.
Now slowly drizzle in your extra virgin olive oil while continuing to whisk or shake. This is the key to a successful vinaigrette—adding the oil slowly while mixing continuously helps create an emulsion where the oil and vinegar blend together rather than separating. If you dump all the oil in at once, you’ll end up with a separated dressing.
Taste your dressing and adjust the seasonings as needed. Maybe it needs a bit more salt, or perhaps you’d like a touch more honey if you prefer it sweeter. This is your chance to make it perfect for your own taste preferences.
Step 4: Combine Everything
Now comes the fun part—putting it all together! In your large mixing bowl, add the cooled pasta, all your prepared vegetables, the chopped parsley, and half of the shredded Parmesan.
Pour your homemade Italian dressing over everything, then use a large spoon or spatula to toss everything together gently. You want to make sure the dressing is evenly distributed and coats every piece of pasta and vegetable. This might take a minute or two of gentle tossing.
Once everything is well combined, taste and adjust seasoning as needed. Remember, the pasta will absorb some of the dressing as it sits, so you might want to err on the slightly overdressed side.
Step 5: Add the Final Touches
After you’ve tossed everything together, sprinkle the remaining Parmesan cheese over the top. This not only adds extra flavor but also makes the salad look beautiful and appetizing.
At this point, you could serve the salad immediately if you’re in a hurry, but here’s the secret to making it truly exceptional: let it rest. Cover the bowl and pop it in the refrigerator for at least an hour, or even overnight if possible. This gives the pasta time to absorb the dressing and the flavors a chance to meld together beautifully.
When you’re ready to serve, give it a quick toss to redistribute any dressing that’s settled at the bottom, and add a little extra fresh parsley on top for presentation if you like.
Tips for the Perfect Pasta Salad
Now that you know how to make this recipe, let me share some insider tips that will help ensure your pasta salad is absolutely perfect every single time.
First, don’t skip the salt in the pasta water. It seems like a small step, but it’s your only opportunity to season the pasta itself. A well-salted pot of water makes a huge difference in the final flavor of your dish.
Second, make sure your pasta is completely cooled before adding the dressing. If it’s still hot, it will create steam and make the salad watery. It can also cause the Parmesan to clump together rather than distributing nicely.
Third, when it comes to the vegetables, don’t be afraid to customize based on what you have available or prefer. Some people love adding black olives or pepperoncini for extra flavor. Others prefer to add some fresh mozzarella balls. The beauty of this recipe is its flexibility.
Fourth, always use a good quality extra virgin olive oil for the dressing. Since the oil is a main component of the dressing, using a quality one makes a noticeable difference in both flavor and texture.
Fifth, if you’re making this ahead of time, keep in mind that the pasta will continue to absorb dressing as it sits. You might want to reserve a little extra dressing to add right before serving if it seems a bit dry.
Delicious Variations and Substitutions
One of the best things about this Classic American Pasta Salad is how adaptable it is. While the original recipe is absolutely delicious as written, there are plenty of ways to make it your own.
Protein Additions
If you want to turn this side dish into a more substantial meal, consider adding some protein. Grilled and diced chicken breast works beautifully and makes this perfect for lunch the next day. Shrimp is another fantastic option that adds a summery feel. You could also add some cannellini beans or chickpeas for extra protein and fiber if you’re looking to keep it meat-free.
Vegetable Substitutions
Feel free to swap in your favorite vegetables or use what you have on hand. Diced yellow squash or zucchini adds nice color and texture. Some people love adding finely diced celery for extra crunch. Sun-dried tomatoes can replace or supplement the cherry tomatoes for a more intense tomato flavor. Just keep in mind that you want vegetables that will hold up well in the salad and not get soggy.
Cheese Alternatives
While Parmesan is classic, you could certainly use other cheeses. Feta cheese adds a nice tangy element and works particularly well if you add olives. Shredded mozzarella is milder and melts slightly into the salad. A blend of Italian cheeses works great too.
Dressing Variations
The homemade Italian dressing is absolutely delicious, but you can play with the flavors. Add some dried oregano or Italian seasoning for extra herb flavor. A squeeze of fresh lemon juice instead of some of the vinegar brightens things up. Some red pepper flakes add a nice kick if you like a little heat.
Gluten-Free Option
If you need to make this gluten-free, simply swap the regular rotini for your favorite gluten-free pasta shape. Most grocery stores now carry several options that work well in cold pasta salads.
How to Store Your Pasta Salad
Proper storage is key to keeping your pasta salad fresh and delicious. Here’s everything you need to know about storing this dish.
Refrigerator Storage
This pasta salad keeps beautifully in the refrigerator for up to five days. Simply transfer it to an airtight container or cover the mixing bowl tightly with plastic wrap or a lid. The flavors actually continue to develop and improve over the first day or two, making this an ideal make-ahead dish.
When you’re ready to eat leftovers, give the salad a good stir to redistribute the dressing, as some may have settled to the bottom. You might find that the pasta has absorbed a lot of the dressing during storage—if it seems a bit dry, just add a splash of olive oil and a tiny splash of red wine vinegar to freshen it up.
Can You Freeze It?
Honestly, this isn’t the best dish for freezing. The vegetables will lose their crisp texture, and the pasta can become mushy when thawed. It’s really best enjoyed fresh or within a few days of making it. The good news is that it keeps so well in the refrigerator that freezing isn’t necessary.
Serving Tips
If you’re serving this at a gathering, keep it cold until you’re ready to serve. Pasta salad should be kept at refrigerator temperature until serving time. If it’s sitting out at room temperature for more than two hours, you should discard any leftovers due to food safety concerns.
When serving at a barbecue or picnic, consider putting the bowl on a bed of ice or setting it in a cooler with ice packs to keep it fresh. This is especially important on hot summer days.
Common Mistakes to Avoid
Even the most experienced cooks can make mistakes with pasta salad sometimes. Here are the most common pitfalls and how to avoid them.
Overcooking the Pasta
This is probably the most common mistake. Remember, your pasta should still have a slight firmness when you drain it—it’ll continue cooking as it sits in the salad. Overcooked pasta becomes mushy and falls apart, ruining the texture of the entire dish.
Using Warm Pasta
Adding hot pasta to your salad causes problems. It can cook the vegetables, especially if they’re delicate, and it can cause the Parmesan to clump together rather than distributing evenly. Always let your pasta cool completely before mixing everything together.
Not Seasoning Enough
Pasta salad needs seasoning at every stage—salty pasta water, well-seasoned dressing, and a final taste check before serving. Don’t be afraid to add more salt and pepper than you think you need. Remember that you’re seasoning a large quantity of food, and it needs more than you’d expect.
Skipping the Rest Time
I know it’s tempting to serve immediately, but this salad really benefits from some rest time in the refrigerator. The pasta needs time to absorb the dressing and the flavors need time to meld together. If you can, make it at least a few hours ahead, or even overnight.
Using the Wrong Dressing
While you can use store-bought Italian dressing in a pinch, it really doesn’t compare to the homemade version. The homemade dressing is creamier, more flavorful, and you can customize it to your exact preferences. Plus, it only takes five minutes to make.
Not Adding Enough Vegetables
Don’t be shy with the vegetables—they’re what make this salad special. Use the full amount called for, or even add more. A pasta salad that’s mostly pasta with just a few vegetables is disappointing. You want a good balance of everything in every bite.
Frequently Asked Questions
Now let’s address some of the most common questions people have about this Classic American Pasta Salad.
How far in advance can I make this pasta salad?
You can make this pasta salad up to five days in advance and store it in the refrigerator. In fact, it’s actually better when made a day or two ahead because the flavors have time to meld together beautifully. I recommend making it at least four hours ahead, but overnight is ideal. Just give it a good stir before serving to redistribute the dressing.
Can I use a different type of pasta?
Absolutely! While rotini is the traditional choice and works beautifully, you can use other short pasta shapes. Penne, fusilli, farfalle (bowtie), or even elbow macaroni all work well. Just keep in mind that different shapes hold dressing differently, and some might not have quite as much texture as rotini.
Is this pasta salad gluten-free?
The classic recipe uses regular wheat pasta, so it’s not gluten-free as written. However, you can easily make it gluten-free by using your favorite gluten-free pasta instead. Most grocery stores carry several options, and many brands work wonderfully in cold pasta salads.
How long does this pasta salad last at room temperature?
If you’re serving this at a barbecue or picnic, it should not sit at room temperature for more than two hours. After that point, bacteria can start to grow, especially in the mayonnaise-free dressing we’re using here (which is actually safer than mayo-based salads in this regard). Keep it chilled until ready to serve, and consider using ice packs or a bed of ice to keep it cold.
Can I add meat to this pasta salad?
Yes! Grilled chicken breast, shrimp, or even diced ham (just make sure it’s not pork if you’re avoiding it) all work wonderfully. If adding protein, cook it separately and let it cool before adding to the salad. You could also add beans or chickpeas for a vegetarian protein boost.
What can I serve with this pasta salad?
This Classic American Pasta Salad is incredibly versatile and pairs well with almost anything you’d serve at a barbecue or cookout. It’s perfect alongside grilled burgers, hot dogs, chicken, or steaks. It also goes wonderfully with other summer sides like coleslaw, corn on the cob, baked beans, or watermelon.
Can I make this dairy-free?
Yes, you can easily make this pasta salad dairy-free by omitting the Parmesan cheese. The salad will still be delicious and full of flavor. You could also try adding some nutritional yeast for a cheesy flavor without the dairy.
Why is my pasta salad dry?
This usually happens because the pasta absorbed all the dressing as it sat. To fix this, simply add a little more olive oil and a splash of red wine vinegar (or regular vinegar) and toss to combine. Start with a tablespoon of olive oil and a teaspoon of vinegar, then adjust to taste. This is also why it’s a good idea to reserve some dressing when you first make it.
Final Thoughts
There you have it—the ultimate Classic American Pasta Salad that’s guaranteed to be the star of your 4th of July cookout and every summer gathering thereafter. This recipe has everything you could want in a side dish: vibrant colors, incredible flavor, satisfying textures, and the kind of crowd-pleasing appeal that keeps guests coming back for more.
The beauty of this dish lies in its simplicity. With just a few basic ingredients and minimal cooking required, you can create something truly special that tastes like it took hours to prepare. The homemade Italian dressing is the secret weapon that elevates this far above typical pasta salads, and the fresh vegetables add color, crunch, and nutrition that make this dish as good for you as it is delicious.
What I love most about this recipe is its make-ahead convenience. In today’s busy world, the ability to prepare a dish the night before and simply pull it out when guests arrive is invaluable. This pasta salad actually improves with time, making it the perfect do-ahead dish for entertaining.
Whether you’re hosting a large backyard barbecue, bringing a dish to a potluck, or simply looking for a delicious side to serve with dinner, this Classic American Pasta Salad fits the bill perfectly. It’s versatile enough to work with almost any main dish, crowd-pleasing enough to disappear from the table quickly, and simple enough that even beginner cooks can tackle it with confidence.
So go ahead and add this recipe to your summer rotation. Once you see how quickly it disappears at your first gathering, it’ll become a permanent fixture at every cookout you host. Your family and friends will thank you, and you’ll have a new go-to recipe that you can make again and again throughout the summer months and beyond.
Now it’s your turn to get cooking. Gather your ingredients, follow these simple steps, and get ready to create a dish that will have everyone asking for the recipe. Happy cooking, and enjoy every delicious bite!


