Table of Contents
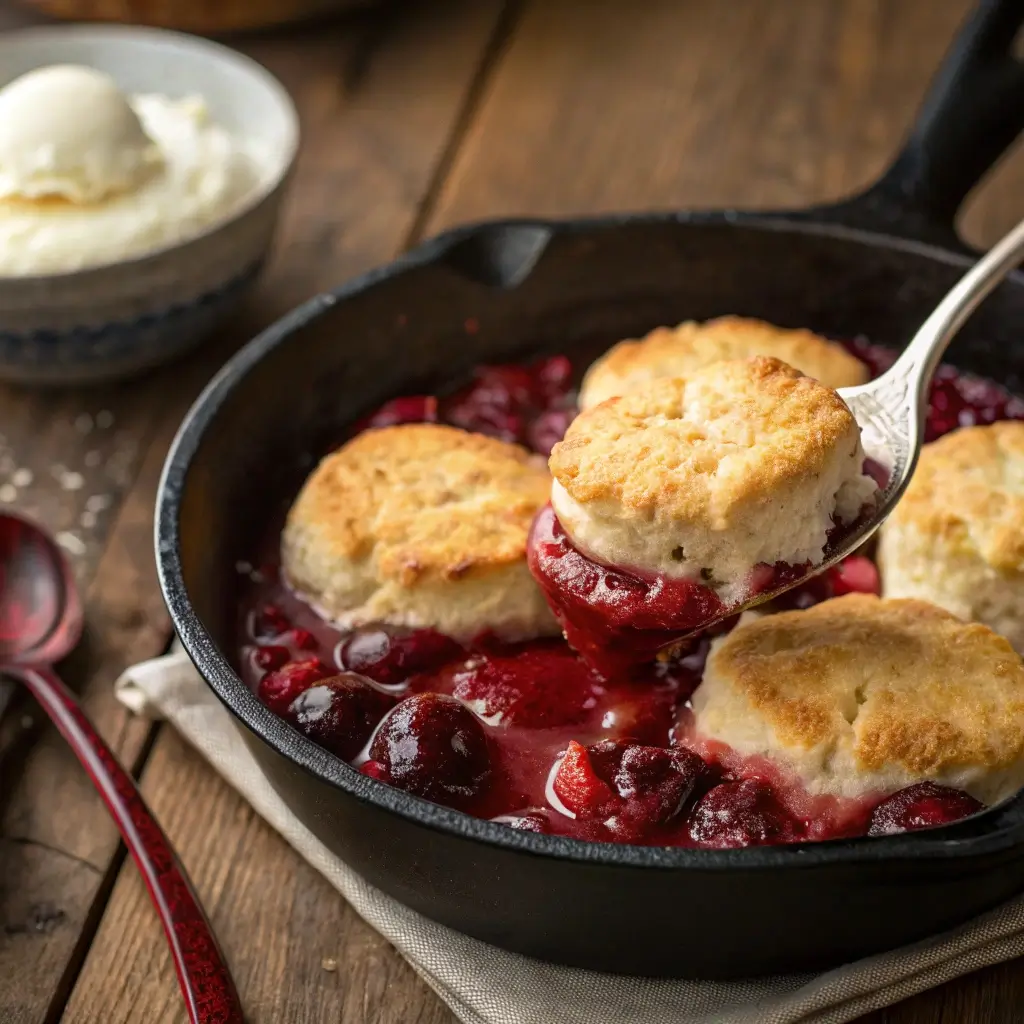
There’s something deeply satisfying about a bubbling cherry cobbler fresh from the oven. With a sweet-tart cherry filling and fluffy golden buttermilk biscuit topping, this rustic dessert is comfort food at its finest. It’s the kind of recipe that brings people together, whether you’re serving it at a summer barbecue or curling up with a warm bowl on a cool evening.
Pair it with a scoop of vanilla ice cream or a dollop of whipped cream, and you’ve got a dessert that never goes out of style.
📌 Why You’ll Love This Cherry Cobbler Recipe
This cobbler isn’t just delicious—it’s also practical and adaptable. Whether you’re using fresh cherries at the peak of summer or relying on frozen ones year-round, this dish comes together with ease. And that buttermilk biscuit topping? It’s tender, buttery, and the perfect contrast to the juicy fruit beneath.
⭐ Key Highlights:
Simple Pantry Ingredients
Fresh or Frozen Cherries
No Stand Mixer Needed
Rustic, Homestyle Dessert
Easily Doubled for Crowds
🧺 Ingredients
Here’s everything you need to bring this cherry cobbler to life.
🍒 For the Cherry Filling:
5 cups fresh or frozen cherries, pitted (sweet or tart)
¾ cup granulated sugar
1 tablespoon cornstarch
1 tablespoon lemon juice
½ teaspoon vanilla extract
Pinch of salt
🧈 For the Buttermilk Biscuit Topping:
1 ½ cups all-purpose flour
⅓ cup granulated sugar
1 ½ teaspoons baking powder
½ teaspoon baking soda
¼ teaspoon salt
6 tablespoons unsalted butter, cold and cubed
⅔ cup buttermilk, cold
1 tablespoon coarse sugar (for topping, optional)
👩🍳 How to Make Cherry Cobbler with Buttermilk Biscuit Topping
Let’s break it down step-by-step. This recipe uses one skillet or baking dish, making cleanup a breeze.
🔥 Step 1: Preheat the Oven
Preheat your oven to 375°F (190°C).
🍒 Step 2: Make the Cherry Filling
In a large mixing bowl, combine the cherries, sugar, cornstarch, lemon juice, vanilla extract, and a pinch of salt. Toss until the cherries are evenly coated.
💡 Tip: If using frozen cherries, no need to thaw—just add 5 extra minutes to the bake time.
Transfer the mixture into a 10-inch oven-safe skillet or 2-quart baking dish. Spread evenly.
🧁 Step 3: Prepare the Biscuit Dough
In a separate bowl, whisk together flour, sugar, baking powder, baking soda, and salt. Cut in the cold cubed butter using a pastry cutter or fork until the mixture resembles coarse crumbs.
Pour in the cold buttermilk and gently mix just until combined—do not overmix.
🍪 Step 4: Add the Topping
Scoop 6–8 dollops of biscuit dough over the cherry mixture, leaving space between for the biscuits to expand. Sprinkle with coarse sugar for a golden, crunchy finish.
🔥 Step 5: Bake
Bake for 35–45 minutes, or until the cherry filling is bubbling and the biscuit tops are golden brown.
🧭 Pro tip: If the biscuits brown too quickly, loosely cover with foil during the last 10 minutes.
🕰 Step 6: Cool Slightly and Serve
Let the cobbler cool for at least 10–15 minutes before serving. This allows the filling to thicken slightly.
.
🍦 Serving Suggestions
Top with vanilla ice cream or fresh whipped cream.
For a breakfast treat, serve with Greek yogurt or mascarpone.
A drizzle of honey or maple syrup adds extra sweetness for tart cherry versions.
🥄 Tips & Variations
Cherry Substitutions
Mix in other berries (like blueberries or blackberries).
Use sour cherries and increase the sugar slightly.
Try frozen mixed berries for a twist.
Biscuit Topping Variations
Add lemon zest to the dough for brightness.
Use brown sugar for a deeper molasses flavor.
Add cinnamon or nutmeg to the dry mix for a spiced topping.
Make It Ahead
The filling can be made up to 1 day in advance and stored in the fridge.
Biscuit dough can be prepped and refrigerated separately for quick assembly.
🧊 Storage & Reheating
Refrigerate leftovers for up to 4 days in an airtight container.
To reheat, bake at 350°F for 10–15 minutes or microwave individual servings for 30–60 seconds.
This cobbler is not ideal for freezing once baked, as the topping may become soggy. Freeze the filling separately and add biscuit topping fresh before baking.
❓ FAQs About Cherry Cobbler
Can I use canned cherry pie filling?
Technically yes, but the flavor won’t be as fresh or balanced. Homemade cherry filling is more vibrant and less sugary.
What’s the difference between cobbler and crisp?
A cobbler has a biscuit or cake-like topping, while a crisp has a crumbly oat-based topping.
Do I need to peel cherries?
Nope! Cherry skins soften beautifully as they bake. Just make sure they’re pitted.
Can I make this gluten-free?
Yes—use a 1:1 gluten-free flour blend in place of all-purpose flour for the biscuit topping.
What if I don’t have buttermilk?
You can make a quick substitute: mix ⅔ cup milk with 2 teaspoons lemon juice or vinegar. Let sit for 5 minutes before using.
Final Thoughts
This Cherry Cobbler with Buttermilk Biscuit Topping is a timeless dessert with rustic charm and rich, fruit-forward flavor. It’s a celebration of cherries in their juiciest form—sweet, tart, and cozy all at once. The fluffy biscuits soak up just enough cherry juice to become tender without losing their golden edges.
Serve it warm with ice cream for a dessert that’s sure to become a family favorite. Whether you’re baking for a holiday, a picnic, or just a Tuesday night, this cobbler delivers every single time.