Table of Contents
Why These Drumsticks Are the Perfect Backyard BBQ Hit
There’s something magical about the smell of charred chicken and sweet maple sauce wafting across the yard on a warm summer evening. Whether you’re hosting a Fourth of July cookout, a family reunion, or just a casual Friday night dinner, these smoky maple BBQ chicken drumsticks are the kind of dish that makes people stop mid-conversation and ask, “What’s that smell?” The secret? A long, lazy buttermilk soak that tenderizes the meat until it practically melts off the bone, followed by a bold seasoning rub and a sticky honey-mustard glaze that’s equal parts sweet, tangy, and a little bit smoky. Serve them with a crisp garlic dill coleslaw and a basket of cornbread, and you’ve got a meal that feels like a party even if it’s just for you and the kids.
I’ve been making these drumsticks for years, and every time I do, I get the same reaction: “How did you make these so juicy?” The answer is simple—patience. You let the buttermilk do its work for at least four hours, or better yet, overnight. That slow, quiet marination breaks down the proteins in the chicken, locks in moisture, and gives you that fall-apart texture without any need for a slow cooker or fancy equipment. Then, when you toss them in smoked paprika, garlic powder, salt, and pepper, and grill them until they’re golden and charred, you get a crust that’s just barely crunchy on the outside and impossibly tender inside. Finish them with a quick brush of homemade or store-bought honey-mustard BBQ sauce, and you’ve got a dish that’s ready in 30 minutes of active time—but tastes like you’ve been slaving over it all day.
This recipe is designed for beginners who want impressive results without a lot of fuss. No messy bones to wrestle with (well, they’re still drumsticks, but the meat comes right off), no complicated steps, and no fancy ingredients you can’t find at your local grocery store. Plus, everything is easily adaptable if you need to swap something out or change the vibe a little. Whether you’re grilling on a backyard charcoal pit, a gas grill, or even using your oven’s broiler, these drumsticks will shine.
Craving a crowd-pleasing 4th of July main dish? These easy BBQ chicken drumsticks are a PB&J-worthy hit! Soak the drumsticks in buttermilk for 4+ hours (or overnight) to tenderize them unreal. Then toss with smoked paprika, garlic powder, salt, and pepper—grill until golden, juicy, and coated in that sticky honey-mustard BBQ sauce (store-bought or homemade). No messy bones! Serve with garlic dill coleslaw or cornbread to complete the party vibe. Ready in 30 minutes? YES! Great for grilling at home, picnics, or backyard BBQs this Fourth.
Ingredients You’ll Need
Before you fire up the grill, let’s talk about what you’ll need. I’ve listed everything below with a quick note on why each ingredient matters. Grab your groceries, clear your counter, and let’s get started.
Buttermilk Brine
- 4–6 chicken drumsticks – Look for ones that are plump and evenly sized. Thighs work too if you prefer, but drumsticks are easier to handle on the grill and have that satisfying bite.
- 1 cup buttermilk – This is the star of the show. Buttermilk is acidic, which helps break down the muscle fibers in the chicken and adds a subtle tang that makes the meat richer. You can use whole milk with a tablespoon of lemon juice if you’re out, but buttermilk is really worth it.
- 1 teaspoon salt – Seasoning the brine helps the chicken absorb flavor from the inside out.
- 1 teaspoon black pepper – Adds warmth and depth.
Seasoning Blend
- 1 tablespoon smoked paprika – This gives the drumsticks that signature smoky flavor without needing a smoker. Regular paprika works, but smoked is a game-changer.
- 1 teaspoon garlic powder – Concentrated garlic flavor that blends right into the rub.
- 1 teaspoon onion powder – Adds a little sweetness and complexity.
- 1/2 teaspoon cayenne pepper (optional) – If you like a little kick, this is your friend. Skip it if you’re serving little ones.
- 1/2 teaspoon brown sugar – Helps form a nice crust when you grill.
Honey-Mustard BBQ Sauce
- 1/2 cup honey – Provides the sweet, sticky backbone of the glaze.
- 1/4 cup Dijon mustard – Gives the sauce that tangy, slightly sharp flavor that balances the honey.
- 2 tablespoons apple cider vinegar – Brightens everything up and adds a little zing.
- 1 tablespoon soy sauce (or tamari for gluten-free) – Adds umami and helps the sauce cling to the chicken.
- 1 teaspoon smoked paprika – Reinforces that smoky note.
- 1/2 teaspoon garlic powder – More garlic goodness.
- Pinch of salt and pepper – To taste.
If you’re short on time, a good-quality store-bought honey BBQ sauce works perfectly. Just look for one that’s not too sweet—something with a little mustard or vinegar kick is ideal.
For Serving
- Garlic dill coleslaw – Shredded cabbage tossed with a creamy dressing of mayo, buttermilk, minced garlic, and fresh dill. It’s crunchy, cool, and cuts right through the richness of the drumsticks.
- Cornbread – A basket of warm cornbread is the perfect side. It soaks up the sauce and adds a sweet, crumbly contrast.
- Fresh herbs – A sprinkle of chopped parsley or chives on top looks beautiful and adds a pop of color.
Step-by-Step Instructions
Now that you’ve got everything ready, let’s walk through the process. I’ll break it down into clear steps so you can follow along even if you’ve never brined chicken before.
Soak the Drumsticks in Buttermilk
This is the most important step, so don’t skip it or rush it. In a large bowl or zip-top bag, combine the buttermilk, salt, and pepper. Add the drumsticks, making sure they’re fully submerged. Seal the bag, press out as much air as you can, and place it in the refrigerator. Let it sit for at least 4 hours, but 8 to 12 hours is even better. Overnight is ideal because the chicken really absorbs the tangy brine and becomes incredibly tender.
Beginner tip: If you’re worried about the bag leaking, double-bag it or place the bowl inside a larger container. You want everything contained so your fridge doesn’t smell like chicken juice all week.
Prepare the Seasoning
While the drumsticks are marinating, mix your dry rub. In a small bowl, combine the smoked paprika, garlic powder, onion powder, cayenne (if using), brown sugar, salt, and pepper. Stir until everything is evenly distributed. Set this aside—you’ll use it right before grilling.
Preheat and Prep the Grill
Whether you’re using a gas grill or charcoal, preheat it to medium-high heat, around 400–450°F. If you’re using charcoal, wait until the coals are covered in a light layer of gray ash. Oil the grates lightly with a folded paper towel dipped in vegetable oil—this prevents sticking and helps get those nice grill marks.
Pro tip: If you’re using a gas grill, leave one side on medium heat for indirect cooking. This is useful if the drumsticks start to char too fast.
Grill the Drumsticks
Remove the drumsticks from the buttermilk and pat them dry with paper towels. This step is crucial—moisture on the surface will prevent a good sear and crisp crust. Once they’re dry, place them on a plate and sprinkle the seasoning rub generously on all sides, pressing it in gently so it adheres.
Place the drumsticks on the grill, skin side down if there’s any skin left, and cook for about 6–8 minutes per side. You want a nice char and golden color. Use tongs to flip them halfway through—don’t pierce the meat with a fork, as that lets juices escape.
How do you know they’re done? The internal temperature should reach 165°F when measured at the thickest part of the drumstick. If you don’t have a meat thermometer, you can cut into the meat near the bone—it should be juicy and no longer pink.
Glaze with Honey-Mustard BBQ Sauce
Once the drumsticks are nearly cooked through, it’s time to glaze them. If you’re using the homemade sauce, whisk it together now. Brush the drumsticks generously with the honey-mustard mixture, turning them to coat all sides. Let them sit on the grill for another 2–3 minutes so the sauce caramelizes and gets a little tacky. If you’re using store-bought sauce, you can brush it on during the last few minutes of grilling or even right after you pull them off the heat.
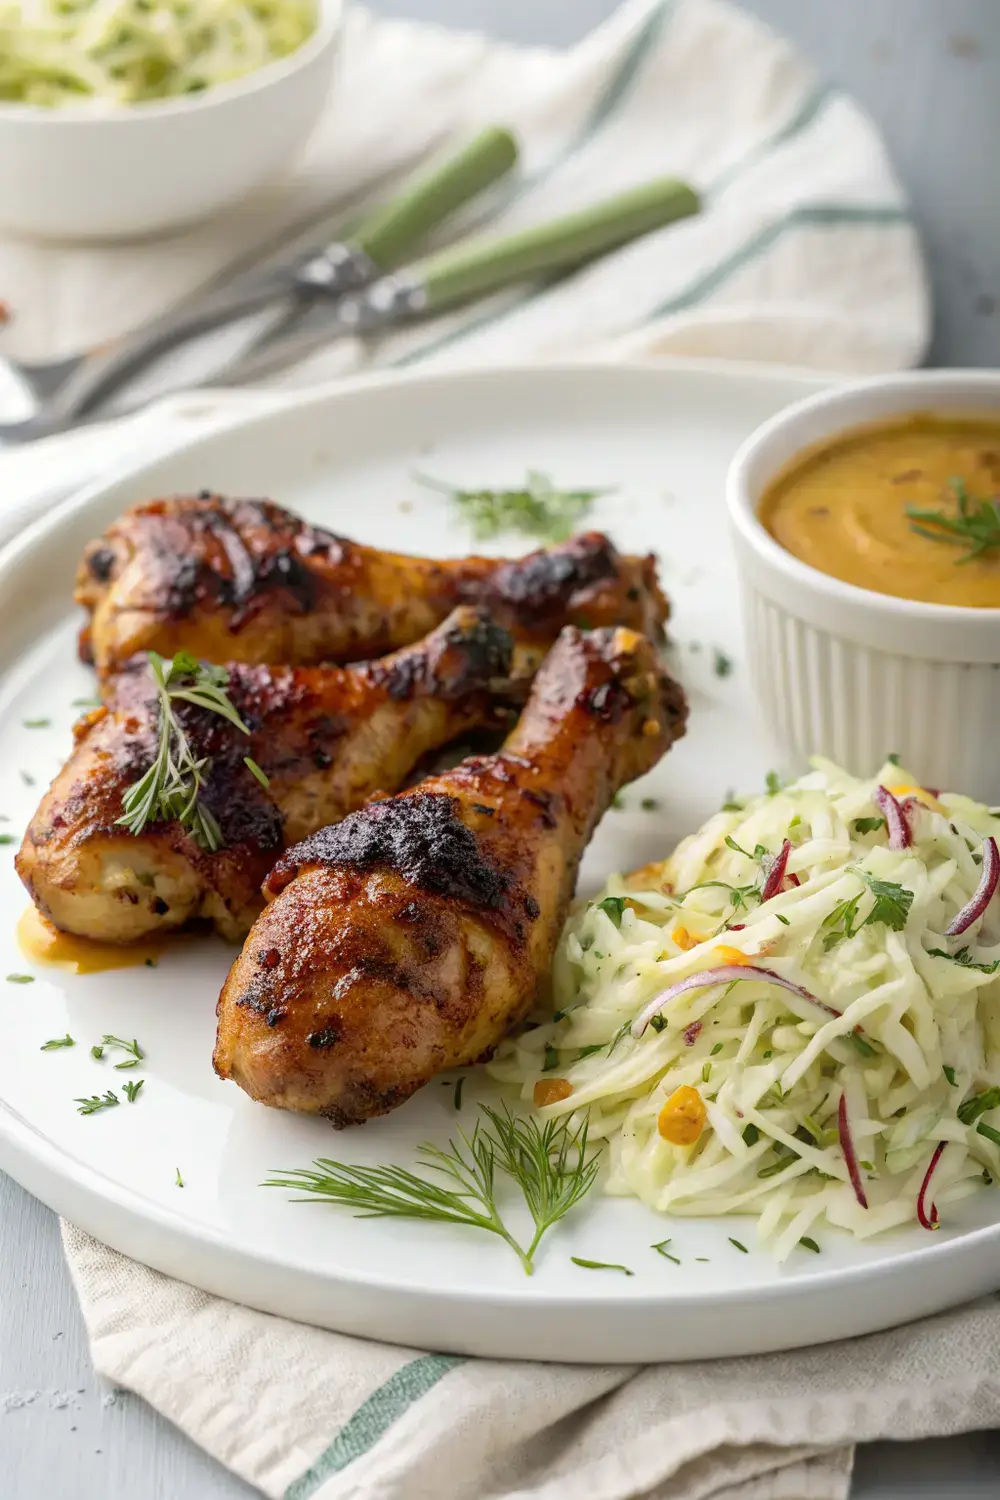
Grilled BBQ chicken drumsticks glazed with honey-mustard sauce, served with garlic dill coleslaw on a white plate—perfect for backyard parties.
Rest and Serve
Remove the drumsticks from the grill and let them rest for 5 minutes. This allows the juices to redistribute so they don’t all pour out when you bite in. While they rest, slice the cornbread, toss the coleslaw, and plate everything up. Garnish with a little extra sauce drizzled on top and a sprinkle of fresh herbs. Serve immediately while the chicken is still warm and the sauce is glossy.
Cooking Variations and Substitutions
One of the best things about this recipe is how easy it is to tweak. Here are some ideas to switch things up depending on what you have on hand or what your crowd prefers.
Swap the Sauce
If honey-mustard isn’t your thing, try a maple bourbon BBQ sauce (just skip the bourbon and use extra maple syrup), a tangy red pepper BBQ sauce, or even a simple mix of ketchup, brown sugar, and apple cider vinegar. The key is to keep it sticky and sweet enough to glaze well.
Use Turkey Drumsticks Instead
Turkey drumsticks work great here too. They’re leaner, so you might want to add a little extra oil or butter to the brine to keep them moist. The cook time is similar—just watch the internal temperature and don’t overcook.
Make the Coleslaw Ahead
The garlic dill coleslaw is actually better if you make it a few hours ahead. The flavors meld together and the cabbage softens just slightly, which makes it easier to eat alongside the drumsticks. Store it in the fridge in a covered bowl and toss again before serving to refresh the dressing.
Other Side Dishes
If coleslaw isn’t your thing, try mac and cheese, baked beans, or a simple green salad with a vinaigrette. Cornbread is always a safe bet, but you could also do roasted potatoes or grilled corn on the cob to round out the spread.
Storage and Reheating Tips
You’ll probably have leftovers—these drumsticks are that good. Here’s how to store and reheat them without turning them into dry, sad chicken.
- Refrigerator: Place the drumsticks in an airtight container or zip-top bag. They’ll keep for 3–4 days. The sauce may thicken a bit in the fridge, so a quick reheat will loosen it back up.
- Freezer: If you want to make a big batch for future parties, wrap the drumsticks tightly in plastic wrap, then foil, and freeze for up to 2 months. Thaw in the refrigerator overnight before reheating.
- Reheating: The best way to reheat is in the oven at 350°F for about 15–20 minutes, covered with foil to keep them moist. You can also use a microwave on medium power, but the texture won’t be quite as good. If you’re reheating the sauce separately, add a splash of water or apple cider vinegar to thin it out.
Common Mistakes to Avoid
I’ve been making these for a while, and I’ve learned a few things the hard way. Here’s what to watch out for so your first attempt is a winner.
- Not soaking long enough. Four hours is the minimum. If you can, do it overnight. The buttermilk really makes a difference in tenderness.
- Skip patting the drumsticks dry. Moisture on the surface means no sear and a steamed texture instead of grilled.
- Overcrowding the grill. Leave space between the drumsticks so the heat circulates properly. Crowding causes steam and uneven cooking.
- Adding the sauce too early. If you glaze the chicken at the beginning of cooking, the sugar in the sauce will burn and turn bitter. Wait until the last few minutes.
- Not using a meat thermometer. Chicken is safe at 165°F, but overcooking it dries it out. A thermometer takes the guesswork out of it.
Frequently Asked Questions
Can I use boneless chicken thighs instead of drumsticks?
Absolutely! Boneless thighs work really well in this recipe. Just reduce the grilling time to about 4–5 minutes per side since they’re thinner. Make sure to pat them dry and season them the same way.
How long should I soak the drumsticks in buttermilk?
At least 4 hours, but overnight is ideal. The longer they soak, the more tender and flavorful they become. If you’re in a rush, 4 hours will still do a good job.
Can I use store-bought BBQ sauce instead of making my own?
Yes! A good-quality store-bought honey BBQ sauce or honey-mustard BBQ sauce works perfectly. Just check the label to make sure it’s not too sweet or loaded with artificial flavors. You can always thin it out with a splash of apple cider vinegar if it’s too thick.
What’s the best way to make garlic dill coleslaw?
Shred a small head of cabbage (or use a bag of coleslaw mix), then toss with 1/2 cup mayo, 1/4 cup buttermilk, 1 minced garlic clove, 1 tablespoon fresh dill (or 1 teaspoon dried), a squeeze of lemon juice, salt, and pepper. Let it chill for at least 30 minutes before serving so the flavors meld.
Can I make these drumsticks in the oven instead of on the grill?
Of course! Preheat your oven to 425°F. Place the seasoned drumsticks on a wire rack set over a baking sheet (this helps air circulate and get a crispier skin). Bake for 35–40 minutes, flipping halfway, then brush with the honey-mustard sauce and broil for the last 3–5 minutes to get a nice glaze.
How do I get crispy skin on the drumsticks?
The key is patting the chicken dry before seasoning and making sure your grill or oven is hot enough. High heat creates a Maillard reaction that gives you that golden, slightly crispy exterior. Also, don’t move the drumsticks around too much on the grill—let them develop a sear on one side before flipping.
Conclusion
These smoky maple BBQ chicken drumsticks are the kind of recipe that makes you feel like a backyard BBQ pro even if you’re just learning to use your grill. The buttermilk brine does all the heavy lifting for tenderness, the smoked paprika and garlic rub brings that deep, campfire flavor, and the honey-mustard glaze ties everything together with just the right amount of sweetness and tang. Pair them with a cool, crunchy coleslaw and some warm cornbread, and you’ve got a meal that’s perfect for Fourth of July parties, summer get-togethers, or any evening when you want something special without spending all day in the kitchen.
Don’t be intimidated by the soaking step—just toss the drumsticks in buttermilk before bed and forget about them until morning. The rest is simple seasoning, a hot grill, and a quick glaze. Before you know it, you’ll be pulling tender, sticky drumsticks off the grill and watching your family and friends dig in with happy, saucy smiles. Give this recipe a try, and you’ll see why it’s become a staple at every cookout I host. Happy grilling!


