Table of Contents
If you’re someone who loves the taste of fruit preserves, then you’re in for a treat! Plum jelly is an excellent way to capture the sweet, tangy flavor of ripe plums in a jar. Making your own plum jelly recipe at home is not only satisfying but also a fantastic way to preserve the essence of summer. Whether you’re a seasoned jam maker or trying it for the first time, you’ll find that making plum jelly is both simple and fun. In this article, we’ll walk you through the whole process, from selecting the right plums to canning and storing the jelly for later enjoyment.
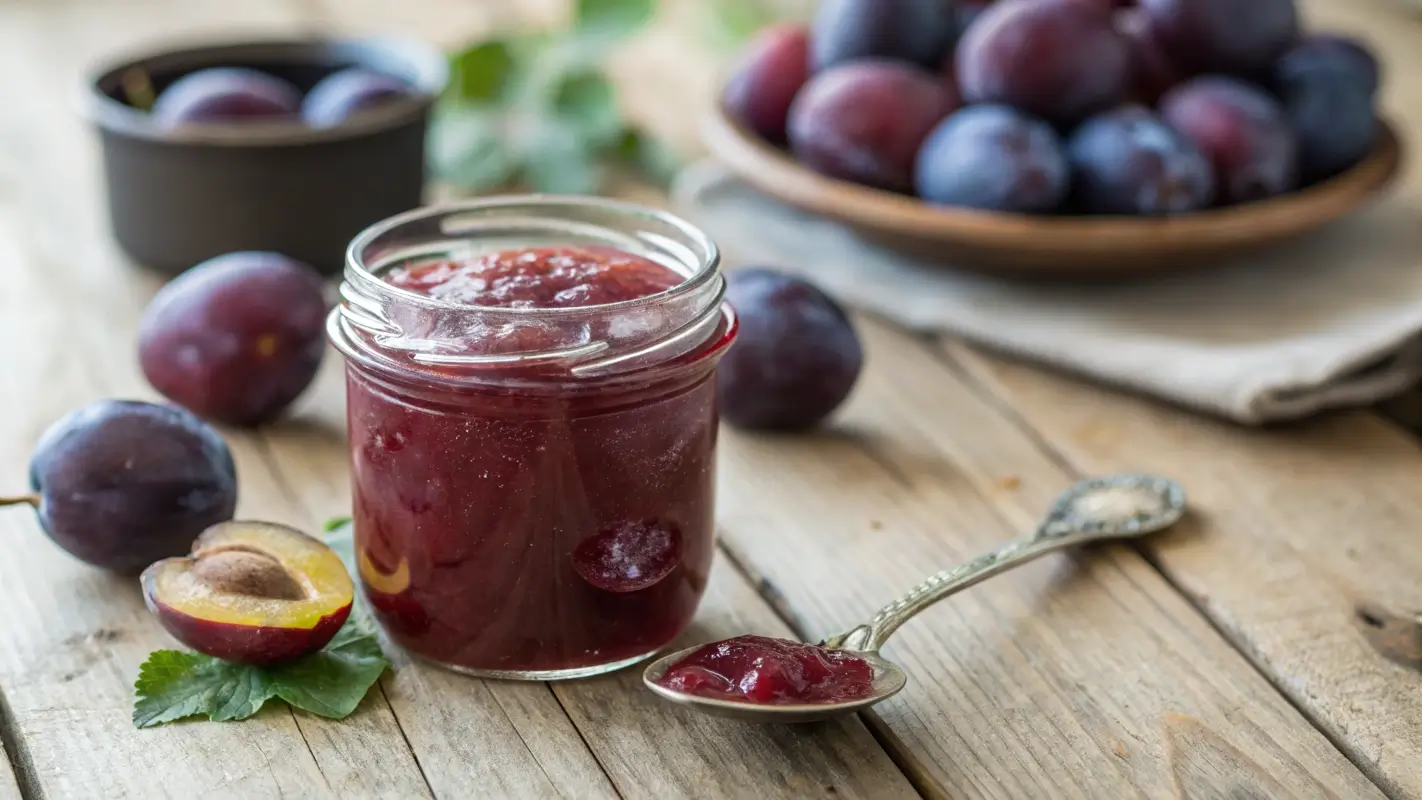
Understanding Plum Jelly
What is Plum Jelly?
Plum jelly is a delicious fruit spread made by extracting the juice from plums and combining it with sugar and pectin. Unlike jam, which includes the fruit pulp, jelly is clear and smooth, offering a delicate texture that spreads easily on toast, pastries, or even as a glaze for meats. The jelly-making process involves boiling the juice until it reaches a gel-like consistency, perfect for storing or gifting.
When making your own plum jelly recipe, you have the flexibility to control the sweetness, texture, and flavor profile. Some people love adding a dash of lemon juice for added zing, while others may prefer to keep the focus entirely on the natural flavor of the plums. It’s the kind of recipe that’s open to creativity.
Health Benefits of Plums
While plum jelly may not be the first thing that comes to mind when thinking about health benefits, plums are packed with nutrients that make them a great addition to your diet. Plums are rich in vitamins, antioxidants, and fiber, which can support digestive health and help fight oxidative stress. In fact, plums contain a compound called anthocyanin, which gives the fruit its rich purple color and may contribute to heart health.
Moreover, plums are naturally low in calories, making them a great option if you’re looking for a way to indulge without the guilt. Of course, since plum jelly involves sugar, it’s best enjoyed in moderation, but knowing that plums themselves offer such great health benefits can make your homemade jelly even more satisfying.
Key Ingredients for Plum Jelly
When it comes to making the perfect plum jelly recipe, selecting the right ingredients is key. The beauty of this homemade preserve is that it uses simple, natural ingredients, yet the outcome is incredibly delicious. Here’s a closer look at what you’ll need:
1. Fresh, Ripe Plums
The most important ingredient in your plum jelly is, of course, the plums! Look for plums that are ripe and bursting with flavor. They should yield slightly to gentle pressure but not be overly soft. Plums are the star of the show, and the better the fruit, the better your jelly will taste.
You can use different types of plums for jelly, but most commonly, red plums or Italian plums (also known as prune plums) are preferred for their balance of sweetness and tartness. Ripe plums will yield more juice, which is essential for a smoother consistency in your jelly.
2. Sugar
Sugar acts as both a sweetener and a preservative in plum jelly. Since plums can have varying levels of sweetness depending on their ripeness, you’ll need to adjust the amount of sugar to taste. The typical ratio is about 1 to 1½ cups of sugar per cup of plum juice. Keep in mind that too little sugar can affect the gelling process and taste, while too much sugar can overpower the plums’ natural flavor.
3. Pectin
Pectin is what makes your plum jelly set. It’s a naturally occurring substance found in fruit, especially in the skins and seeds, that helps the jelly thicken. While some fruits, like apples and citrus, have enough natural pectin to set jelly without any help, plums are a bit lower in pectin. This is where commercial pectin comes into play.
Use liquid pectin or pectin powder, which you can find in most grocery stores in the canning section. The amount you need will depend on the brand and type you’re using, so make sure to follow the instructions on the packaging for the best results.
4. Lemon Juice
Lemon juice isn’t just for flavor – it helps with the setting process of the jelly by providing acidity. The natural pectin in fruit works best in an acidic environment, and the lemon juice helps to ensure the jelly sets properly. Plus, it enhances the brightness and freshness of the plum jelly, balancing out the sweetness.
5. Water
Water is used to extract the juice from the plums during the cooking process. You don’t need a lot of water, just enough to help the plums break down and release their juice. Once the juice has been extracted, the water will be cooked off, leaving you with concentrated plum jelly goodness.
6. Optional Add-ins
Some people like to experiment with their plum jelly recipe by adding spices like cinnamon or a touch of vanilla. If you want to add a unique twist to your jelly, consider experimenting with a small batch to see what flavors you like best. A pinch of cinnamon or nutmeg can give your jelly an extra warmth, while a dash of vanilla can add a lovely sweetness.
Step-by-Step Plum Jelly Recipe
Making plum jelly is a rewarding and surprisingly simple process, especially when you break it down into clear, manageable steps. With the right ingredients and a little patience, you’ll be enjoying your homemade plum jelly in no time. Let’s get started!
Step 1: Prepare the Plums
First things first, you need to prepare your plums. Start by washing the fruit thoroughly under cold water to remove any dirt or pesticides. Next, cut the plums in half, remove the pits, and cut them into smaller chunks. You don’t need to peel the plums since the skins will help with the natural pectin release, which is essential for the jelly’s texture.
Step 2: Extract the Plum Juice
Now that your plums are ready, it’s time to extract the juice. In a large saucepan or pot, add the cut plums along with about ½ to 1 cup of water (depending on the juiciness of your plums). The goal is to get the plums soft enough to release their juice, but you don’t want to add too much water.
Bring the mixture to a boil over medium-high heat. Once the plums start to break down, reduce the heat to a simmer and cook them for about 10-15 minutes, stirring occasionally. The fruit should be soft and mushy by this point.
Step 3: Strain the Plum Juice
Once the plums are soft and have released their juice, you’ll need to strain the mixture to separate the juice from the pulp and skin. You can use a fine mesh strainer, cheesecloth, or a jelly bag for this process.
To strain, place your strainer or cloth over a large bowl, and pour the plum mixture into it. Let the juice drain for about 30 minutes to an hour. For a smoother jelly, you can use the back of a spoon to press the pulp and extract as much juice as possible. Discard the leftover pulp.
You should now have pure plum juice to work with, and you’re one step closer to making your plum jelly!
Step 4: Measure the Juice and Add Sugar
Once you have your fresh plum juice, measure it to determine how much sugar you’ll need. Typically, for every 4 cups of plum juice, you’ll need about 4 cups of sugar. Add the sugar to the plum juice in a large pot, stirring to dissolve it.
Next, bring the mixture to a boil over medium-high heat, stirring frequently to prevent the sugar from sticking to the bottom of the pot. Keep an eye on it, as the mixture can quickly boil over.
Step 5: Add the Pectin and Lemon Juice
Once the sugar is dissolved, it’s time to add the pectin and lemon juice. Stir in the pectin according to the package instructions (if you’re using liquid pectin, usually you’ll add it right before the jelly reaches a full boil). Then, add the lemon juice to the pot. As we mentioned earlier, the acidity from the lemon juice helps the plum jelly set perfectly.
Bring the mixture to a rolling boil, making sure it’s bubbling vigorously. Keep it boiling for about 1-2 minutes while stirring constantly. The mixture should start to thicken up as it boils.
Step 6: Test the Jelly for Doneness
To check if your plum jelly is ready to set, you’ll need to test it for doneness. One of the most common methods is the “plate test.” Place a small plate in the freezer before starting your jelly. When the jelly has boiled for the right amount of time, spoon a small amount of the mixture onto the cold plate. Let it sit for a minute, and then run your finger through the jelly. If it wrinkles and doesn’t run back into place, it’s ready. If it’s still too runny, continue boiling for another minute and test again.
Step 7: Fill the Jars
Once your plum jelly is ready, it’s time to transfer it into sterilized jars. Carefully pour the jelly into the hot jars, leaving about ¼ inch of space at the top. Wipe the rims of the jars with a clean cloth to remove any residue. Then, place the lids on the jars, tightening them just enough to seal.
Step 8: Process the Jars (Optional)
If you plan to store your plum jelly for long-term use, you’ll need to process the jars in a water bath. Place the filled jars in a large pot of simmering water, ensuring they are covered by at least 1-2 inches of water. Bring the water to a boil and process the jars for about 5-10 minutes.
Once done, carefully remove the jars from the water bath and let them cool. You should hear a “pop” sound as the jars seal. This means your plum jelly is safely preserved.
Variations of Plum Jelly
Once you’ve mastered the classic plum jelly recipe, you might be tempted to experiment with different flavors and twists to make your homemade jelly even more exciting. Here are some variations you can try, each offering its unique taste and texture.
1. Plum and Spice Jelly
For those who enjoy a little kick, plum jelly can be infused with warming spices such as cinnamon, cloves, and ginger. Simply add a cinnamon stick or a few whole cloves during the cooking process and remove them before straining the juice. A pinch of ground ginger can also add an extra depth of flavor, making it perfect for the fall season.
2. Plum and Berry Jelly
Mixing plums with other fruits is a fantastic way to create a more complex jelly. Blueberries, blackberries, and raspberries all pair wonderfully with plums. You can either cook the berries with the plums or use them to infuse the juice. For a smoother texture, mash the berries and strain them along with the plums.
3. Plum and Citrus Jelly
Add a refreshing twist by incorporating citrus fruits like oranges or lemons into your plum jelly. The bright acidity from the citrus helps balance the sweetness of the plums, giving the jelly a zesty kick. Simply add the zest and juice of the citrus fruits to the mixture, enhancing the flavor with a lovely citrusy aroma.
4. Plum and Apple Jelly
Apples are another fruit that pairs beautifully with plums, adding both sweetness and pectin. Apple peels and cores can be added during the cooking process to boost the jelly’s natural setting qualities. Once the juice has been strained, you’ll have a fruity blend of plum and apple that’s smooth and sweet.
5. Plum and Ginger Jelly
For a unique and sophisticated twist, try adding fresh ginger to your plum jelly. Grate a small amount of ginger and add it to the pot while the plums are simmering. The spicy warmth of the ginger complements the sweet tartness of the plums, creating a dynamic flavor profile.
6. No-Sugar Plum Jelly
If you’re watching your sugar intake or prefer a healthier alternative, you can make a no-sugar plum jelly by using sugar substitutes like Stevia, monk fruit, or erythritol. However, keep in mind that the texture and consistency might vary slightly, so it’s essential to follow a no-sugar pectin recipe to ensure proper gelling.
These variations allow you to tailor your plum jelly to suit your preferences, whether you’re looking for something spicy, fruity, or a bit more natural. You can experiment and get creative with your plum jelly recipe to make it truly your own!
If you’re a fan of fruity spreads, don’t miss our Peach Jelly Recipe for another delicious homemade treat!
Common Mistakes to Avoid
While making plum jelly can be an enjoyable process, it’s easy to make a few mistakes along the way that can affect the final outcome. Here are some common pitfalls to watch out for:
1. Not Using Enough Pectin
Pectin is crucial for the jelly to set properly. If you’re using fruit that is low in natural pectin (like some varieties of plums), you’ll need to add extra commercial pectin. Don’t skip this step or use too little – otherwise, your plum jelly will end up too runny and won’t firm up properly.
2. Not Testing for Doneness
It can be tempting to skip the testing phase and assume your jelly is ready when it’s boiling away. However, you should always test your plum jelly to check for doneness. Use the plate test (a small spoonful on a chilled plate) to determine if the jelly has reached the correct consistency. If it hasn’t, continue boiling for a few more minutes.
3. Overcooking the Jelly
While it’s important to boil the plum jelly long enough for it to set, you don’t want to overdo it. Boiling the jelly for too long can cause it to become too thick and difficult to spread. It may also lose some of its fresh fruit flavor. Always keep an eye on your jelly as it boils to avoid overcooking.
4. Not Sterilizing Jars
If you’re planning to preserve your plum jelly for long-term storage, don’t overlook sterilizing your jars. Failing to properly sterilize the jars can lead to contamination and spoilage. To sterilize, simply place the jars in boiling water for 10 minutes before filling them with jelly.
5. Not Stirring Enough
Stirring regularly during the cooking process is essential to prevent the sugar from burning or sticking to the bottom of the pot. If you don’t stir enough, the sugar can caramelize, leaving you with a jelly that tastes burnt or too sugary.
Avoid these common mistakes, and your plum jelly will turn out perfectly every time. With a little attention to detail, you’ll be enjoying your homemade jelly with pride!
Learn more about the health benefits of plums and other fruits in your diet at Healthline – Health Benefits of Plums.
Conclusion
Making plum jelly at home is a rewarding and simple way to enjoy the rich flavors of summer all year long. With just a few basic ingredients, you can create a delightful spread that’s perfect for toast, desserts, or even as a gift. Whether you stick to the classic recipe or try out creative variations, homemade plum jelly will surely add a personal touch to your kitchen. So, gather your plums and get ready to preserve a bit of sunshine in a jar. Happy jelly making!