Table of Contents
Welcome to the whimsical world of Lorax cookies! Inspired by Dr. Seuss’s beloved character, the Lorax, these cookies are a delightful treat that brings a fun, colorful twist to your kitchen. Whether you’re a fan of Dr. Seuss’s stories or simply love to bake, this recipe is perfect for both kids and adults alike. With the vibrant decorations and easy-to-follow instructions, you’ll be able to create these Lorax-themed cookies that will leave everyone smiling. Let’s dive into the details and discover how to make these sweet treats that are as charming as they are tasty!
What is a Lorax Cookie?
If you’ve ever read Dr. Seuss’s The Lorax, you’ll know that it’s a story about a forest protector, and a character full of personality. But did you know that you can bring the Lorax to life in the form of a delicious cookie? Yes, you heard that right! A Lorax cookie is a fun, creative treat that combines the whimsy of Dr. Seuss’s story with the sweetness of homemade cookies.
These cookies are often decorated to reflect the iconic Truffula trees, the Lorax’s face, and other memorable elements from the story. With colorful icing and unique shapes, these cookies are a great way to introduce kids to baking while celebrating the message of environmental protection. Whether you’re preparing a batch for a themed party or just baking for fun, these cookies are sure to be a hit.
A Sweet Tribute to Dr. Seuss
The Lorax cookie recipe isn’t just a dessert—it’s a tribute to one of the most influential children’s books ever written. Dr. Seuss’s The Lorax teaches the importance of taking care of our planet, and these cookies creatively embody that message. From the bright Truffula tree decorations to the little Lorax face made with edible materials, this recipe is a fun way to engage children and families with the environment.
Making these cookies with your loved ones not only brings joy to the kitchen but also sparks conversations about eco-friendly practices and the importance of protecting nature. And, let’s be honest, they’re delicious too!
It’s not just about baking; it’s about creating something that has meaning. So, get ready to roll up your sleeves, put on your aprons, and bring the Lorax to life in your kitchen!
Ingredients and Preparation
Key Ingredients for the Lorax Cookie Recipe
To make the perfect Lorax Cookie Recipe, you’ll need a few basic ingredients, along with some creative additions to capture the essence of the Truffula trees and the Lorax himself. Here’s what you’ll need to get started:
Flour and Sugar
The foundation of any cookie starts with flour and sugar. For these cookies, you can use all-purpose flour to get a soft and chewy texture. If you’re feeling adventurous, you can also substitute some of it with whole wheat flour for a healthier twist. As for the sugar, regular granulated sugar works best to give your cookies that perfect sweetness. You can even try a mix of white and brown sugar for added flavor and richness.
Butter and Eggs
Ah, the butter! This is where the magic happens. Butter not only gives the cookies a rich flavor but also contributes to that perfect soft and tender texture we all love. Use unsalted butter for better control over the flavor. Eggs play a vital role in binding the ingredients together, while also contributing to the cookie’s richness and moisture. Make sure to use fresh eggs for the best results.
Special Ingredients
Here’s where things get fun! You can add a pinch of baking soda to help your cookies spread and bake evenly. A bit of vanilla extract will also elevate the flavor, adding a subtle sweetness to balance the other ingredients. But what really makes these cookies stand out are the Lorax-themed decorations. To create those beautiful Truffula trees, consider using colored sprinkles, candy melts, or even colored fondant. Edible eyes or chocolate chips can help create the Lorax’s face for that extra special touch!
Lorax-themed Decor
Decorating these cookies is one of the best parts! Think of bright yellow, pink, and green to bring the Truffula trees to life. You can either pipe icing into tree shapes or use fondant to cut out tree designs. For the face of the Lorax, you’ll need to get creative—edible eyes, orange icing for his mustache, and a little bit of black icing for his nose. The sky’s the limit when it comes to decorating these fun cookies!
Step-by-Step Instructions for Making Lorax Cookie Recipe
Now that you’ve got your ingredients, it’s time to roll up your sleeves and get baking! Here’s a simple, step-by-step guide to making your Lorax Cookie Recipe:
Mixing the Ingredients
Start by preheating your oven to 350°F (175°C) and lining a baking sheet with parchment paper. In a large bowl, whisk together the flour, sugar, and baking soda. In a separate bowl, cream together the butter and eggs until smooth. Add in the vanilla extract and mix until combined. Gradually add the dry ingredients into the wet ingredients, stirring until the dough comes together.
Shaping the Cookies
Once the dough is ready, scoop out small portions using a spoon or cookie scoop. Roll them into balls, and then flatten them slightly with your hands or a fork. If you want to create Lorax-inspired shapes (like a tree or face), you can use cookie cutters or shape them by hand. Don’t forget to leave some space between each cookie on the baking sheet to allow for even baking.
Baking and Cooling
Bake the cookies for about 8-10 minutes, or until the edges turn golden brown. Be careful not to overbake them, as they can become too crisp. Once out of the oven, let the cookies cool on the baking sheet for a few minutes before transferring them to a wire rack to cool completely. This is when the fun begins—time to decorate!
Creative Ways to Decorate Lorax Cookies
Now that your cookies are baked and cooled, it’s time to add that Lorax flair with fun and colorful decorations. Here are some ideas to help you create Lorax-inspired designs that will wow your family and friends.
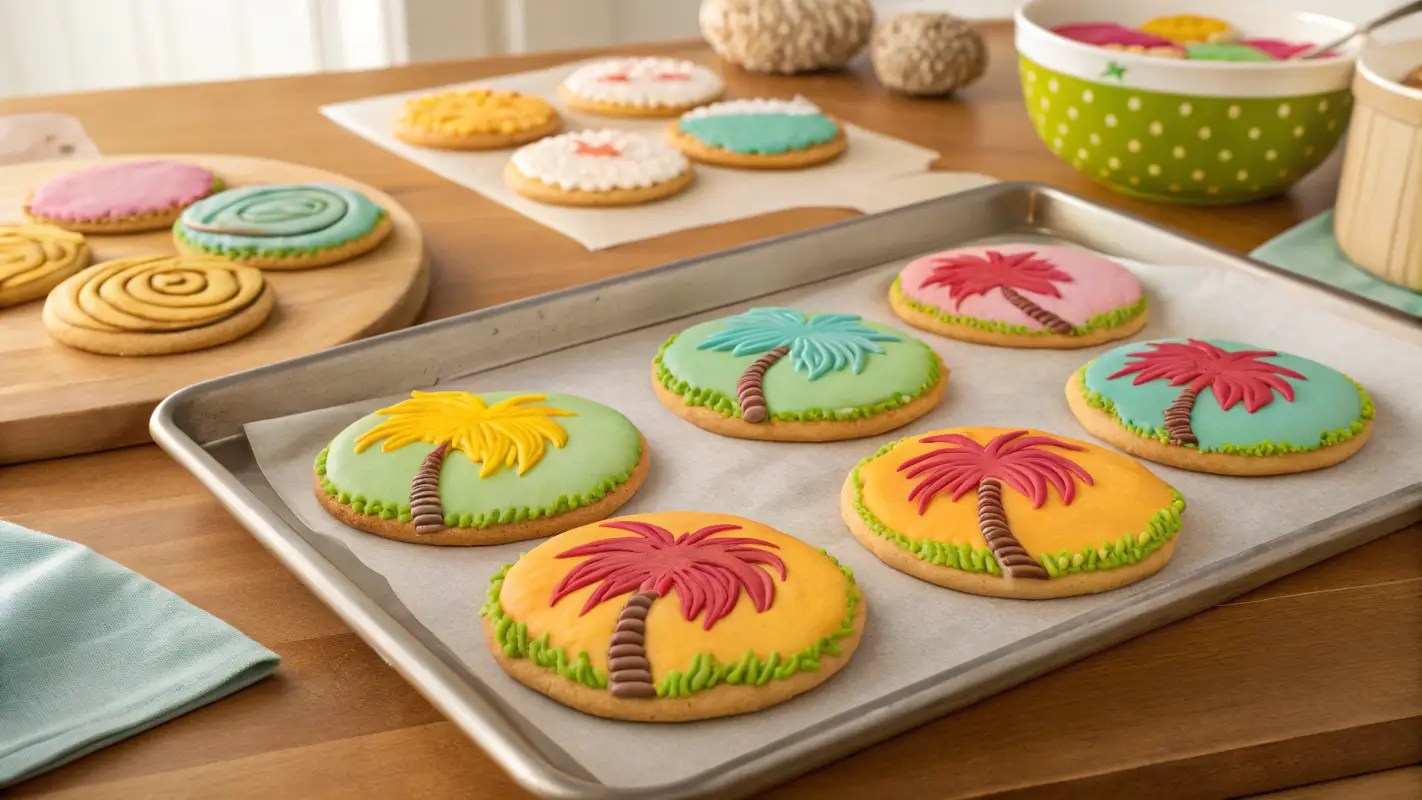
Truffula Tree Design
The Truffula trees are the heart and soul of the Lorax cookie recipe, so let’s start there. Using colored icing, pipe long tree trunks, and then create fluffy, round tops using either a piping bag or edible paint. If you’re feeling extra fancy, you can roll your cookies in colored sprinkles or candy melts to add texture. You can even get creative with different icing tips to make the trunks look more textured, just like the whimsical trees from the story.
The Lorax Face
Creating the Lorax face on your cookies can be a fun challenge! Use orange icing to pipe a mustache across the center of the cookie, and then add two edible eyes for a cute, cartoonish look. You can also use chocolate chips to create the eyes or cut circles from fondant to make them stand out. A little black icing for the nose completes the face, giving you a perfect Lorax cookie.
Alternative Decorating Ideas
Don’t feel confined to just the Truffula trees and the Lorax face—get creative! You could make Lorax cookie shapes like the character’s body or even a simple tree silhouette. Consider using edible glitter to give your cookies a magical touch or add a sprinkle of colored sugar for extra fun. The best part? You can get your kids involved in the decorating process too!
Different Types of Lorax Cookie Recipe
While the classic Lorax cookie recipe is always a hit, sometimes it’s fun to mix things up. Here are some delicious variations to consider when making your next batch.
Vegan Lorax Cookies
For those who prefer plant-based options, you can easily create vegan Lorax cookies. Simply substitute the butter for vegan butter or coconut oil, and use a flax egg (1 tablespoon of ground flaxseed mixed with 3 tablespoons of water) instead of regular eggs. You can also ensure that your sugar is plant-based by choosing a vegan-approved sweetener. These cookies will have the same great taste as the classic version, but with a vegan twist!
Gluten-Free Lorax Cookies
If you’re baking for someone with a gluten intolerance, don’t worry! You can make a gluten-free version of the Lorax cookie recipe by swapping regular flour for a gluten-free all-purpose flour blend. Be sure to check that the other ingredients, like your sugar and butter, are gluten-free as well. These cookies will still have the same soft, chewy texture as the original but are perfect for anyone with dietary restrictions.
Lorax Cookie Brownies Recipe
For a chocolatey twist, why not turn your Lorax Cookie Recipe into brownies? Simply follow the same recipe and bake it in a brownie pan instead of shaping individual cookies. Once baked and cooled, you can cut them into squares and decorate them with the same Truffula tree and Lorax face designs. This is a great option if you’re looking for a thicker, fudgy dessert!
How to Make Healthier Lorax Cookie Recipe
While Lorax Cookie Recipe are already a sweet treat, there’s always room for a little health boost! If you’re looking to make them a bit lighter or fit them into a healthier lifestyle, there are a few simple substitutions you can make without sacrificing flavor or fun.
Using Healthier Sweeteners
Instead of using regular granulated sugar, consider swapping it out for healthier alternatives like coconut sugar, maple syrup, or honey. These sweeteners have a lower glycemic index and add a unique flavor to the cookies. Keep in mind, though, that using liquid sweeteners like maple syrup or honey will alter the dough’s consistency, so you may need to adjust the dry ingredients slightly.
Whole Grain Flour Substitutes
For a more nutritious option, you can replace regular all-purpose flour with whole grain flour, like whole wheat flour or oat flour. These flours are higher in fiber and nutrients compared to refined flour, giving your cookies a slightly denser texture. You can also experiment with almond flour if you prefer a gluten-free option that’s rich in protein and healthy fats.
Reducing Fat Content
If you want to reduce the fat content, consider swapping the butter for unsweetened applesauce or coconut oil. These alternatives provide a similar texture without all the saturated fats. Using less butter (or oil) can also help make your cookies a bit lighter. This way, you can enjoy the delicious Lorax cookies without feeling guilty!
Looking for healthier options? Check out our Healthy Dessert Alternatives for delicious treats that are perfect for making lighter, healthier Lorax cookies!
Storage and Shelf Life
Storing and Preserving Your Lorax Cookies
Once your Lorax cookies are baked and decorated, you’ll want to keep them fresh for as long as possible. Here are some tips for storing them properly so you can enjoy them for days to come.
Best Ways to Store
Store your cookies in an airtight container at room temperature for up to 5 days. This will help keep them soft and fresh. If you’re concerned about the cookies becoming too dry, you can add a slice of bread to the container, which helps maintain moisture. Just make sure to keep the cookies away from any direct sunlight or heat sources, as they could dry out more quickly.
Freezing Lorax Cookies
For longer storage, you can freeze your cookies! To freeze the cookies, place them in a single layer on a baking sheet and freeze until solid, then transfer them to a freezer-safe bag or container. They can be stored in the freezer for up to 3 months. When you’re ready to enjoy them, simply thaw them at room temperature or pop them in the microwave for a few seconds.
How Long Do Lorax Cookies Last?
When stored properly, your Lorax cookies should stay fresh for about 3 to 5 days at room temperature. If you’ve decorated them with icing, they might last a little longer due to the added sugar. Just be sure to check for any changes in texture or flavor as they age—though with how tasty they are, they probably won’t last long!
Here are some of the most commonly asked questions about making these Lorax Cookie Recipe. Let’s address them so you can be fully prepared for your baking adventure!
Can I Make Lorax Cookie Recipe Without Food Coloring?
Yes! If you prefer to avoid food coloring, you can still create stunning Lorax Cookie Recipe using naturally colored ingredients. For example, use beet juice for pink, spinach powder for green, or turmeric for yellow. If you’d rather stick with natural colors, you can opt for chocolate chips or cocoa powder to make darker decorations. The possibilities are endless!
What Other Decorations Can I Use for Lorax Cookies?
You don’t have to limit yourself to the typical Truffula tree designs or the Lorax face. Try using sprinkles, edible glitter, or even colored sugar to add more texture and color to your cookies. You can also get creative with different shapes, like making cookies in the form of the Lorax’s body, or a cute forest scene with Truffula trees and animals.
Can I Use Different Types of Flour for Lorax Cookie Recipe?
Yes, you can! If you’re looking for a gluten-free option, you can use gluten-free flour blends or almond flour instead of traditional all-purpose flour. For a healthier alternative, try using whole wheat flour or spelt flour. Just be aware that different flours may affect the texture slightly, so adjust your dough consistency as needed.
Are Lorax Cookies Kid-Friendly?
Absolutely! Lorax Cookie Recipe are not only fun to make, but they’re also a great project for kids. Let them help decorate the cookies, shaping the Truffula trees or making the Lorax face. It’s a perfect way to engage children in a creative, hands-on baking activity while teaching them about the environment and the importance of caring for nature.
Can I Freeze Lorax Cookie Dough?
Yes, you can freeze the cookie dough! If you want to bake your cookies at a later time, roll the dough into balls and place them on a baking sheet. Freeze them until solid, then transfer to a freezer-safe bag. When you’re ready to bake, just place the dough balls on a baking sheet and bake them straight from the freezer. It’s a simple way to enjoy fresh cookies without the wait!
Conclusion
Wrapping Up the Lorax Cookie Recipe
There you have it—your complete guide to making Lorax Cookie Recipe! These colorful, fun, and tasty treats are a perfect way to get the whole family involved in a creative baking session. Whether you’re making them for a special occasion, a Dr. Seuss-themed party, or just for some everyday fun, these cookies are sure to bring smiles to everyone’s faces.
Don’t forget, the best part of the Lorax cookie recipe is the decorating process. Get as creative as you like—after all, the sky’s the limit when it comes to creating these whimsical treats. And with the healthier alternatives, storage tips, and FAQs, you’re now ready to bake a batch that everyone will enjoy!
So, what are you waiting for? Grab your ingredients and start baking these fun, delicious Lorax cookies. Your next family baking day just got a whole lot sweeter!
Want to dive deeper into the world of Dr. Seuss? Visit the Dr. Seuss Official Website for more fun activities, stories, and inspiration for your next baking adventure!


