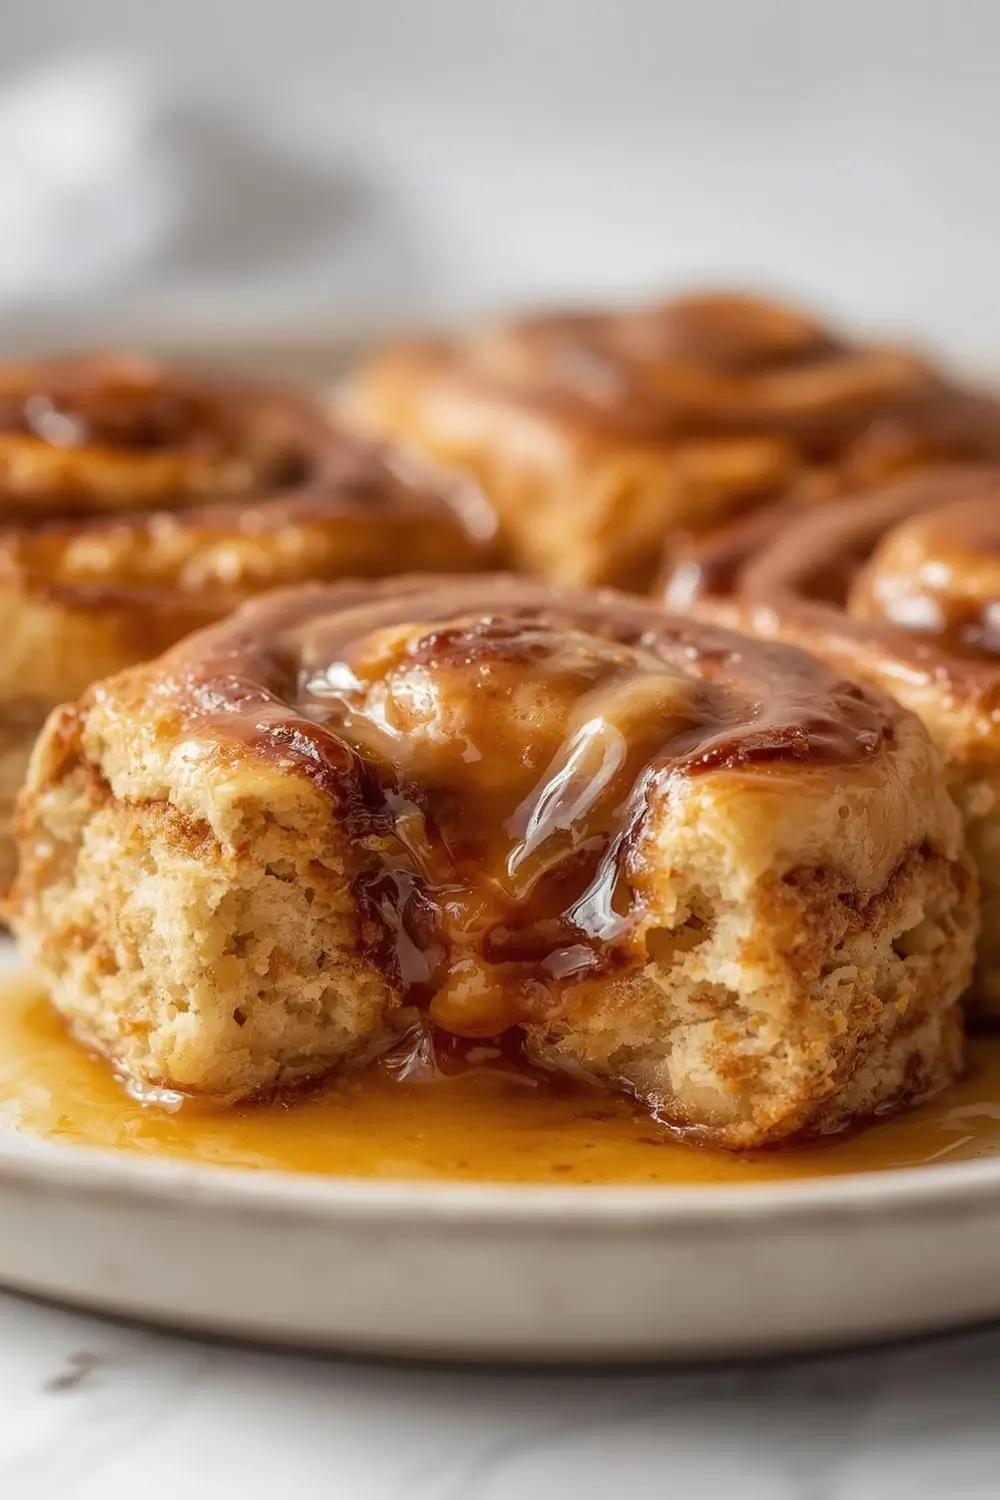
The Ultimate Extra Gooey Cinnamon Rolls: A Beginner’s Guide to Bakery-Style Perfection
There’s something undeniably magical about the moment a warm, freshly baked cinnamon roll emerges from the oven. The intoxicating aroma of cinnamon and brown sugar fills the kitchen, promising a taste of pure, comforting indulgence. But what if you could elevate that classic treat, pushing it beyond the ordinary into the realm of truly extraordinary? Welcome to the world of Extra Gooey Cinnamon Rolls. These aren’t just rolls; they’re a decadent, melt-in-your-mouth experience designed to satisfy the deepest cravings and leave you wondering why you ever settled for less. Forget the dry, slightly tough rolls you might have encountered before – these are soft, tender, and packed with a luscious, caramel-like filling that oozes with every bite. They boast a perfectly caramelized edge and a rich, buttery crumb that rivals any professional bakery. This recipe is your key to unlocking that bakery magic right in your own kitchen, guaranteed to become a cherished weekend tradition.
Why These Rolls Are Truly Special
The magic lies in the details. We start with a soft, slightly enriched dough that rises beautifully, creating a tender crumb. The filling isn’t just sprinkled on top; it’s generously layered within, ensuring every single roll is bursting with flavor. The secret weapon? A generous amount of brown sugar combined with butter, creating that signature gooey, caramel-like center that defines these rolls. We’ll also explore variations to suit your taste, from adding nuts to experimenting with different spices. Plus, we’ll cover everything you need to know about storing and reheating these delights, so you can enjoy them fresh even days later. Let’s dive in and create something truly special.
Gathering Your Ingredients: The Foundation of Flavor
Before you begin, ensure you have all your ingredients measured and ready. Baking is a science, and having everything prepped (mise en place) makes the process smoother and less stressful. Here’s what you’ll need for the dough and the filling:
For the Dough:
- 1 cup (240ml) whole milk: Warm to about 110°F (43°C). This activates the yeast.
- 2 1/4 teaspoons (1 standard packet) active dry yeast: The leavening agent that makes the dough rise.
- 1/4 cup (50g) granulated sugar: Feeds the yeast and adds sweetness.
- 1 large egg, at room temperature: Adds richness and structure.
- 1/4 cup (60g) unsalted butter, melted and slightly cooled: Provides tenderness and flavor.
- 1 teaspoon salt: Balances the sweetness and enhances flavor.
- 4 1/2 to 5 cups (562g to 625g) all-purpose flour: The main structure. Start with 4 1/2 cups and add more as needed.
- 1/4 cup (60ml) vegetable oil or additional melted butter: Helps keep the rolls tender.
For the Filling:
- 1 cup (200g) packed light or dark brown sugar: The star of the gooeyness.
- 2 tablespoons ground cinnamon: The classic warm spice.
- 1/2 cup (113g) unsalted butter, softened: Creates the rich, spreadable layer.
- 1/4 teaspoon salt: Enhances the cinnamon flavor.
For the Glaze (Optional but Recommended):
- 1 cup (120g) powdered sugar (confectioners’ sugar): For a sweet finish.
- 2-3 tablespoons milk or heavy cream: To reach the desired consistency.
- 1/2 teaspoon vanilla extract: Adds a subtle depth.
Why These Ingredients Matter
- Warm Milk (110°F): Too hot kills the yeast; too cold won’t activate it. This temperature is crucial for proper rising.
- Active Dry Yeast: This is the workhorse. Ensure it’s fresh and within its expiration date. Proofing it in warm milk with a pinch of sugar confirms it’s active.
- Granulated Sugar: Feeds the yeast and contributes to browning.
- Egg & Butter: Add richness, tenderness, and flavor. The egg also helps bind the dough.
- Salt: Essential for flavor balance. Don’t skip it!
- Flour: All-purpose is standard. The exact amount depends on humidity and how you measure. Start with 4 1/2 cups and add only as needed until the dough pulls away from the bowl and is slightly tacky but not sticky.
- Brown Sugar: Its molasses content creates the signature deep caramel flavor and gooey texture when melted. Light or dark works, but dark adds more robust flavor.
- Cinnamon: The classic pairing. Use a good quality ground cinnamon.
- Softened Butter: Crucial for spreading the filling evenly and creating that rich layer. If it’s too cold, it won’t spread; if too warm, it might melt too much.
- Powdered Sugar Glaze: Adds a beautiful, sweet finish. Adjust the milk for thickness.
Step-by-Step Instructions: From Bowl to Oven
Now, let’s transform these ingredients into glorious rolls. This process involves mixing, kneading, rising, shaping, and baking. Follow along carefully, and don’t hesitate to refer back to the tips for success.
1. Activate the Yeast (10-15 minutes):
* In a large mixing bowl (or the bowl of a stand mixer), combine the warm milk, 1 teaspoon of the granulated sugar, and the active dry yeast. Stir gently and let it sit undisturbed for 10-15 minutes. You should see it become foamy on top – this confirms the yeast is active and ready to work its magic. If it doesn’t foam, your yeast might be expired, and you’ll need to start over with fresh yeast.
2. Combine Wet Ingredients:
* Once the yeast is foamy, add the melted butter, the remaining granulated sugar, the egg, and the salt to the bowl. Whisk everything together until well combined.
3. Incorporate the Flour:
* Gradually add the flour, about 1 cup at a time, mixing with a wooden spoon or the dough hook attachment on low speed. The dough will start to come together. Once it’s too stiff to stir, turn it out onto a lightly floured surface.
4. Knead the Dough (8-10 minutes):
* Knead the dough by hand for 8-10 minutes, or use the dough hook on medium-low speed for 5-7 minutes. The goal is to develop the gluten, making the dough smooth, elastic, and slightly tacky but not sticky. Add small amounts of flour only if the dough is excessively sticky (more than 1/4 cup total). The dough should pass the “windowpane test” – stretch a small piece thin enough to see light through it without tearing.
5. First Rise (1-1.5 hours):
* Lightly grease a large bowl with oil or butter. Place the kneaded dough ball in the bowl, turning it once to coat it lightly with oil. Cover the bowl tightly with plastic wrap or a damp kitchen towel. Let it rise in a warm, draft-free spot until doubled in size. This usually takes 1 to 1.5 hours, but it can vary depending on room temperature. The dough is ready when it looks puffy and springs back slowly when gently poked.
6. Prepare the Filling:
* While the dough rises, make the filling. In a medium bowl, combine the brown sugar, cinnamon, and salt. Cut in the softened butter using a pastry cutter, two forks, or your fingers until the mixture resembles coarse crumbs. Set aside.
7. Shape the Rolls:
* Punch down the risen dough gently to release air bubbles. Turn it out onto a lightly floured surface. Roll the dough into a large rectangle, roughly 12 inches by 18 inches. Aim for an even thickness, about 1/4 to 1/2 inch thick.
* Spread the softened butter evenly over the entire surface of the dough, leaving a small border around the edges.
* Sprinkle the brown sugar-cinnamon mixture evenly over the buttered dough, also leaving a small border. Press it gently into the butter so it adheres well.
* Starting from the long end, carefully roll the dough up tightly into a log. Pinch the seam closed firmly to seal.
* Using a sharp knife or dental floss, cut the log into 12 equal pieces (about 1.5 inches thick each). Place the rolls cut-side up in a lightly greased 9-inch round or square baking pan, or an 8×8 inch pan. They should fit snugly but not be overcrowded. Cover loosely with plastic wrap or a towel.
8. Second Rise (30-45 minutes):
* Let the rolls rise again in a warm place until they look puffy and have doubled in size, and they are touching each other and the sides of the pan. This usually takes 30-45 minutes. Preheat your oven to 350°F (175°C) during the last 10 minutes of this rising time.
9. Bake to Golden Perfection (25-30 minutes):
* Bake the rolls in the preheated oven for 25-30 minutes, or until the tops are a deep golden brown and the edges look set. The rolls should feel firm when gently pressed in the center. The gooey filling should be bubbling around the edges. Remove from the oven and let them cool in the pan for at least 15 minutes before glazing (if using).
10. Make and Apply the Glaze (Optional):
* While the rolls cool, whisk together the powdered sugar, milk (or cream), and vanilla extract in a small bowl until smooth. Adjust the milk for your desired glaze consistency (thinner for drizzling, thicker for a coating).
* Once the rolls are cooled for 15 minutes, drizzle or spread the glaze evenly over the tops of the rolls. The warmth helps the glaze melt slightly into the rolls, enhancing the gooey factor.
Variations and Substitutions: Making it Your Own
The beauty of this recipe is its adaptability. Here are some ideas to customize your Extra Gooey Cinnamon Rolls:
- Add-Ins: Fold in 1/2 to 3/4 cup of chopped pecans, walnuts, or pecans into the filling before rolling. Or, sprinkle some on top of the glaze before it sets.
- Spice It Up: Add 1/2 teaspoon of ground cardamom, nutmeg, or ginger to the filling for a unique twist.
- Different Fillings: Swap the brown sugar-cinnamon filling for a cream cheese filling (beat 4 oz softened cream cheese with 1/4 cup powdered sugar and 1 tsp vanilla until smooth) or a chocolate filling (mix 1/2 cup chocolate chips with 2 tbsp butter and a pinch of salt).
- Flavored Glaze: Add a teaspoon of orange zest, lemon zest, or maple extract to the glaze for a different flavor profile.
- Whole Wheat Option: Substitute up to 1 cup of the all-purpose flour with whole wheat flour for a heartier roll (may require slightly more liquid).
- Vegan Option: Use plant-based milk (like almond or oat) and plant-based butter for the dough and filling. Ensure your yeast is vegan. Use a flax egg (1 tbsp ground flaxseed + 3 tbsp water, let sit 5 mins) instead of the regular egg.
Storage and Reheating: Keeping the Magic Alive
These rolls are best enjoyed fresh and warm on the day they’re baked, but you can certainly make them ahead or store leftovers:
- Cooling Completely: Always let the rolls cool completely on a wire rack before storing. This prevents condensation and sogginess.
- Room Temperature: Store cooled rolls in an airtight container at room temperature for up to 2 days. They will remain quite gooey and delicious.
- Refrigeration: For longer storage (up to 4 days), wrap individual rolls tightly in plastic wrap or place them in an airtight container. They may firm up slightly in the fridge.
Freezing: For maximum freshness, freeze the cooled* rolls (without glaze) in a single layer on a baking sheet until solid (about 1 hour), then transfer to a freezer-safe bag or container. Freeze for up to 3 months. To reheat, thaw overnight in the fridge or at room temperature, then warm gently in a low oven (300°F/150°C) for 10-15 minutes or microwave for 20-30 seconds per roll. Reheat glazed rolls gently in the oven (300°F/150°C) for 10-15 minutes to melt the glaze back in.
Common Mistakes to Avoid: Ensuring Gooey Success
Even experienced bakers can run into issues. Here’s how to avoid the pitfalls:
- Killing the Yeast: Using milk that’s too hot (above 110°F/43°C) or adding salt directly to the yeast mixture without dissolving it first can kill the yeast. Always proof yeast in warm milk with a pinch of sugar.
- Over-Kneading: Over-kneading develops too much gluten, resulting in tough, chewy rolls instead of tender, soft ones. Knead just until the dough is smooth and elastic.
- Under-Proofing: If the dough doesn’t rise enough before baking, the rolls won’t be light and airy; they’ll be dense. Be patient during the rising stages.
- Over-Baking: Baking too long dries out the rolls, especially the edges. They should be golden brown, but the center should still feel soft. The gooey filling is a good indicator – it should be bubbling.
- Filling Too Cold: Using cold butter for the filling makes it difficult to spread evenly and can cause the dough to tear. Ensure the butter is softened to room temperature.
- Not Using Enough Butter: Insufficient butter in the filling or on top leads to less richness and less gooeyness. Generously spread the softened butter.
- Skipping the Second Rise: The second rise is crucial for developing flavor and texture. Don’t skip it!
- Glazing Too Early: Glazing hot rolls straight from the oven can make the glaze run off or become soggy. Always let them cool slightly first.
Frequently Asked Questions: Your Cinnamon Roll Queries Answered
1. Can I make these rolls ahead of time?
* Absolutely! You can shape the rolls and let them rise overnight in the refrigerator. Place the shaped rolls in a pan, cover tightly, and refrigerate for up to 16-18 hours. When ready to bake, let them sit at room temperature for 30-45 minutes to warm up, then bake as directed. They might need a few extra minutes in the oven.
2. Why are my rolls not gooey in the center?
* This is often due to under-proofing (not rising enough) or overbaking. Ensure they have a good second rise and bake them just until golden brown. The filling should be bubbling around the edges when done.
3. Can I use a bread machine?
* Yes! Add the ingredients to your bread machine in the order recommended by the manufacturer (usually liquid first, then dry, with yeast last). Select the dough cycle. Once the cycle finishes, proceed with shaping and baking the rolls as directed.
4. How do I know when the dough has risen enough?
* The dough is ready when it has doubled in size and when you gently poke it with your finger, the indentation remains (springs back slowly). It should look puffy and airy.
5. Can I use self-rising flour?
* No, self-rising flour contains leavening agents that are not suitable for this recipe. You need the specific rise from active dry yeast and the control over rising times.
6. What if my dough is too sticky?
* Add flour, 1 tablespoon at a time, while kneading or mixing. Don’t add too much at once. The dough should be soft and slightly tacky, not sticky to the touch.
7. Can I use a different type of milk?
* Whole milk is ideal for richness, but 2% or even skim milk will work. Avoid non-dairy milks like almond milk unless you are making a vegan version, as they can affect the texture and rise.
8. How do I prevent the rolls from sticking to the pan?
* Generously grease your baking pan with butter or non-stick spray. You can also line the pan with parchment paper for easy removal.
9. Can I freeze the unbaked rolls?
* Yes! After shaping the rolls and placing them in the pan, cover them tightly with plastic wrap and freeze. When ready to bake, thaw overnight in the fridge, then let them come to room temperature for 30-45 minutes before baking as directed (they may need a few extra minutes).
10. Why is the glaze runny?
* You might have added too much milk or cream. Simply whisk in more powdered sugar until you reach the desired consistency. If it’s too thick, add a tiny bit more liquid.
The Perfect Finish: A Warm Conclusion
Creating Extra Gooey Cinnamon Rolls is more than just following a recipe; it’s about embracing the process and the joy of baking. The aroma that fills your home, the anticipation as they bake, and the pure, unadulterated pleasure of biting into that first, perfectly gooey roll – it’s a moment worth savoring. These rolls are a celebration of simple ingredients transformed into something extraordinary. They embody warmth, comfort, and the magic of homemade goodness. Whether you enjoy them for a special weekend breakfast, a holiday treat, or simply a moment of pure indulgence, these Extra Gooey Cinnamon Rolls are guaranteed to become a beloved staple in your baking repertoire. So, gather your ingredients, preheat your oven, and get ready to create a little bit of cinnamon roll heaven. Happy baking!
Pin this recipe for later!