Table of Contents
- 1 Why You’ll Love This Dilly Beans Recipe
- 2 Ingredients
- 3 Equipment
- 4 Step‑by‑Step Instructions
- 5 Flavor Variations & Customizations
- 6 Storage & Shelf‑Life
- 7 Nutrition Per Pint Jar (approx.)
- 8 Creative Serving Ideas
- 9 Troubleshooting Tips
- 10 Frequently Asked Questions (FAQs)
- 11 Final Notes & Recipe Recap
- 12 Bonus Tips for Pickle Lovers
- 13 Summary
- 14 Storage, Shelf Life & Safety Recap
- 15 Final Thoughts
Why You’ll Love This Dilly Beans Recipe
-
Easy & approachable: No hot-water bath or pressure canning—just pour, seal, and wait.
-
Crunchy perfection: Quick pickling keeps beans crisp, not mushy.
-
Flavorful punch: Garlic, dill, and peppercorns create bold tangy flavors.
-
Customizable: Add spices like mustard seeds or red pepper flakes if you like.
-
Versatile uses: Snackable, giftable, or pantry-ready for months.
Ingredients
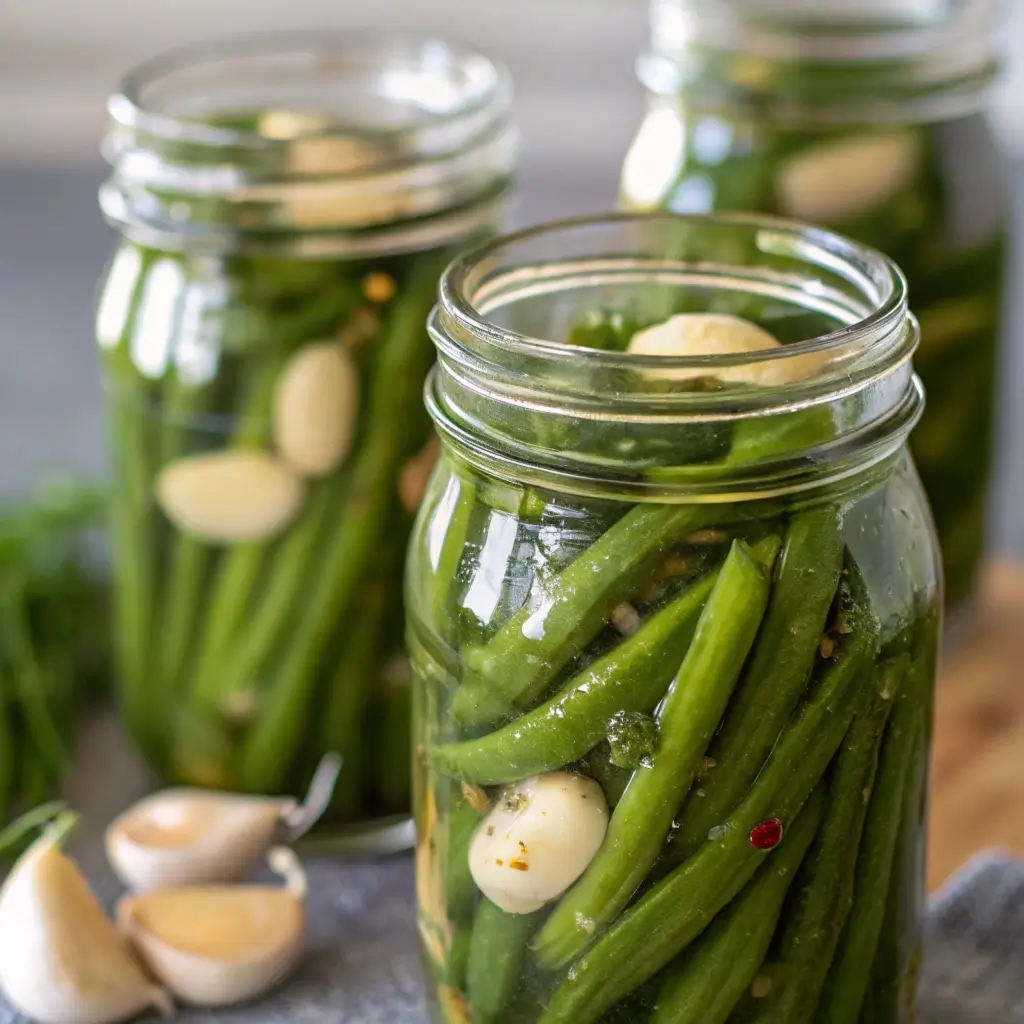
Here’s what you’ll need to make about 4 pint‑size jars of dilly beans:
-
2 lbs fresh green beans (about 1 quart loosely packed)
-
4 cloves garlic (peeled)
-
4 sprigs fresh dill or 2 tbsp dill seeds
-
2 tsp pickling salt (kosher or natural sea salt)
-
1 cup distilled white vinegar (5% acidity)
-
1 cup water
-
1 tsp whole black peppercorns
-
(Optional) ½ tsp red pepper flakes for a spicy kick
-
(Optional) ½ tsp mustard seeds for extra flavor
Equipment
-
4 pint‑size (16‑oz) mason jars + lids and rings
-
Large pot for heating brine and sterilizing
-
Tongs or jar lifter
-
Funnel and jar brush (optional but helpful)
-
Cutting board and sharp knife
Step‑by‑Step Instructions
1. Prepare the Green Beans
-
Wash the green beans thoroughly.
-
Trim the stem ends—snap or cut off about ¼″ from the top, keeping beans mostly whole to stay crisp.
-
Discard any blemished or tough beans.
2. Sterilize the Jars
-
Submerge jars and lids in a clean pot of boiling water for 10 minutes.
-
Use tongs to remove and let them air-dry on a clean surface.
-
Don’t let jars sit without lids longer than needed.
3. Make the Brine
-
In a pot, combine vinegar, water, and pickling salt.
-
Bring to a simmer over medium heat, stirring until salt fully dissolves.
-
Keep the brine hot but not boiling.
4. Pack the Jars
-
Place 1 garlic clove, 1 dill sprig, ½ tsp peppercorns, and optional spices in each jar.
-
Pack green beans vertically, tucking in tightly to leave ~½″ headspace.
-
Repeat for all jars.
5. Add Brine & Seal
-
Pour hot brine over beans using a funnel, maintaining the ½″ headspace.
-
Remove air bubbles—gently tap or use a chopstick around inner edges.
-
Wipe jar rims with a clean damp cloth.
-
Center lids, screw rings fingertip-tight (not metal-on-metal tight).
6. Cool & Wait
-
Let jars sit at room temperature (68–75 °F) on a counter.
-
Expect overnight “pings” as lids seal.
-
Wait at least 48 hours before sampling; flavor develops in 7–10 days.
Flavor Variations & Customizations
-
Spicy Dilly Beans: Add ¼–½ tsp crushed red pepper flakes in each jar.
-
Mustardy Blend: Toss in ½ tsp mustard seeds or a splash of powder.
-
Herby Mix: Use tarragon, thyme, or oregano alongside dill.
-
Garlic Lovers: Add 2 garlic cloves per jar.
-
Sweet Enhancement: Mix 1 tbsp sugar into brine for lightly sweet pickles.
Storage & Shelf‑Life
-
Pantry or cool cabinet: Store sealed jars at room temp for up to 6 months.
-
Refrigerator: Once opened, refrigerate and consume within 3–4 weeks.
-
Signs of spoilage: Discard if brine becomes cloudy, slimy, or lid pops before opening.
Nutrition Per Pint Jar (approx.)
| Component | Amount |
|---|---|
| Calories | 30 kcal |
| Carbohydrates | 5 g |
| Fiber | 2 g |
| Protein | 1 g |
| Fat | 0 g |
| Sodium | ≈300 mg* |
| Vitamin A | high |
| Vitamin C | moderate |
*Sodium level depends on salt content; adjust per taste or to reduce.
Creative Serving Ideas
-
Munch straight from the jar as a refreshing snack.
-
Add to charcuterie boards, sandwiches, or burgers.
-
Chop and toss into salads for added texture.
-
Serve on a relish tray alongside deviled eggs and pickles.
-
Include in Bloody Mary (or non‑alcoholic version) garnishes.
-
Create a tangy bean salad—mix with cherry tomatoes, cucumbers, olive oil.
Troubleshooting Tips
-
Beans went limp? Likely overcooked or soaked too long. Use very fresh beans.
-
Brine too cloudy? Could be salt grain residue; use filtered water.
-
Lid seal didn’t “ping”? Ensure threads are clean and lids finger-tight.
-
Foreground spoilage? Discard the jar—don’t taste fermented or slimy contents.
Frequently Asked Questions (FAQs)
Q1: Can I use a different type of vinegar?
A: Use only distilled white vinegar with 5% acidity for safety and clarity. Avoid cider or rice vinegar as they may alter flavor and acidity balance.
Q2: Do I need a water bath canner?
A: No! This is a fermentive refrigerator-style process that doesn’t require pressure or hot-water-bath canning. Jars seal naturally, but always refrigerate after opening.
Q3: How long until these are ready to eat?
A: They’re safest after 48 hours, but flavor and crispness peak around 7–10 days. For best taste, wait at least one week.
Q4: Why are my beans cloudy or mushy?
A:
-
Cloudy brine = over-salting, water quality, or natural sediment.
-
Mushy beans = overcooked or soaking in brine too long before sealing.
-
Always pack freshly trimmed beans immediately after rinsing.
Q5: Can I use frozen beans?
A: Not recommended. Frozen beans lack crunch and will yield soggy pickles.
Q6: Are dilly beans healthy?
A: Yes—low in calories and fat, high in vitamins A and C, and full of fiber. Pickling adds sodium, so you might cut (e.g., by using low-sodium salt) if watching intake.
Q7: Can I reuse jars and lids?
A: Yes, but only lids that seal properly (no rust or dents). Rings and jars can be sterilized and reused safely.
Q8: What temp should jars cool at?
A: Room temperature (68–75 °F). Avoid direct sunlight or drafts for reliable seals.
Q9: Do these beans ferment?
A: No—they’re quick pickles soaked in vinegar brine, not fermented. Expect tanginess, not fizzy fermentation flavors.
Q10: Can I double the recipe?
A: Absolutely. Follow the same ratio: 1 cup vinegar + 1 cup water + ½ tsp salt per pint jar. Scale the spices accordingly and ensure you have enough clean jars and brine to fully submerge the beans.
Final Notes & Recipe Recap
Here’s a quick overview of the prep:
-
Prep: Trim & wash beans.
-
Sterilize: Boil jars & lids for 10 minutes.
-
Brine: Heat vinegar + water + salt until salt fully dissolves.
-
Pack: Layer garlic, dill, spices, and beans into clean jars.
-
Fill & Seal: Pour brine, remove air pockets, seal lids fingertip-tight.
-
Settle: Let jars sit overnight. Eat in 2 days, peak flavor at 1 week.
-
Store: Keep sealed at cool room temps up to 6 months; refrigerate after opening.
Bonus Tips for Pickle Lovers
-
Choose fresh produce: Use beans harvested the same day if possible for the best crunch.
-
Try other veggies: This brine works great with asparagus, carrots, or even okra.
-
Label everything: Add dates and any flavor twists you try to each jar.
-
Gift-ready: Tie some twine or a rustic tag on the lid, and they make fantastic gifts for hosts, holidays, or foodie friends.
-
Zero waste tip: Use leftover brine as a tangy vinaigrette base or for pickling boiled eggs!
Summary
-
Homemade dilly beans are quick-pickled green beans in a vinegar brine.
-
No canning required; ready to eat in 2–10 days.
-
Customizable with garlic, dill, pepper, and more.
-
Store sealed jars up to 6 months; refrigerate after opening.
-
Crunchy, tangy, and perfect as a snack or side!
Storage, Shelf Life & Safety Recap
| Storage Method | Shelf Life | Notes |
|---|---|---|
| Sealed (cool, dry place) | Up to 6 months | Keep out of direct sunlight. |
| Opened (refrigerated) | 3–4 weeks | Use clean utensils to extend freshness. |
| Spoilage Signs | Discard immediately | Cloudy brine, foul odor, bulging lids. |
Final Thoughts
Making homemade dilly beans is a satisfying, beginner-friendly way to preserve fresh garden bounty while unlocking bold, crisp flavors. The ingredients are simple, the method is stress-free, and the results are undeniably addictive. Plus, they’re a perfect project for weekend meal prep, family food crafts, or holiday gifting.
Once you’ve tasted your first crunchy homemade bean, you may never go back to store-bought pickles. So grab some fresh green beans and jars, and start pickling today!
