
Table of Contents
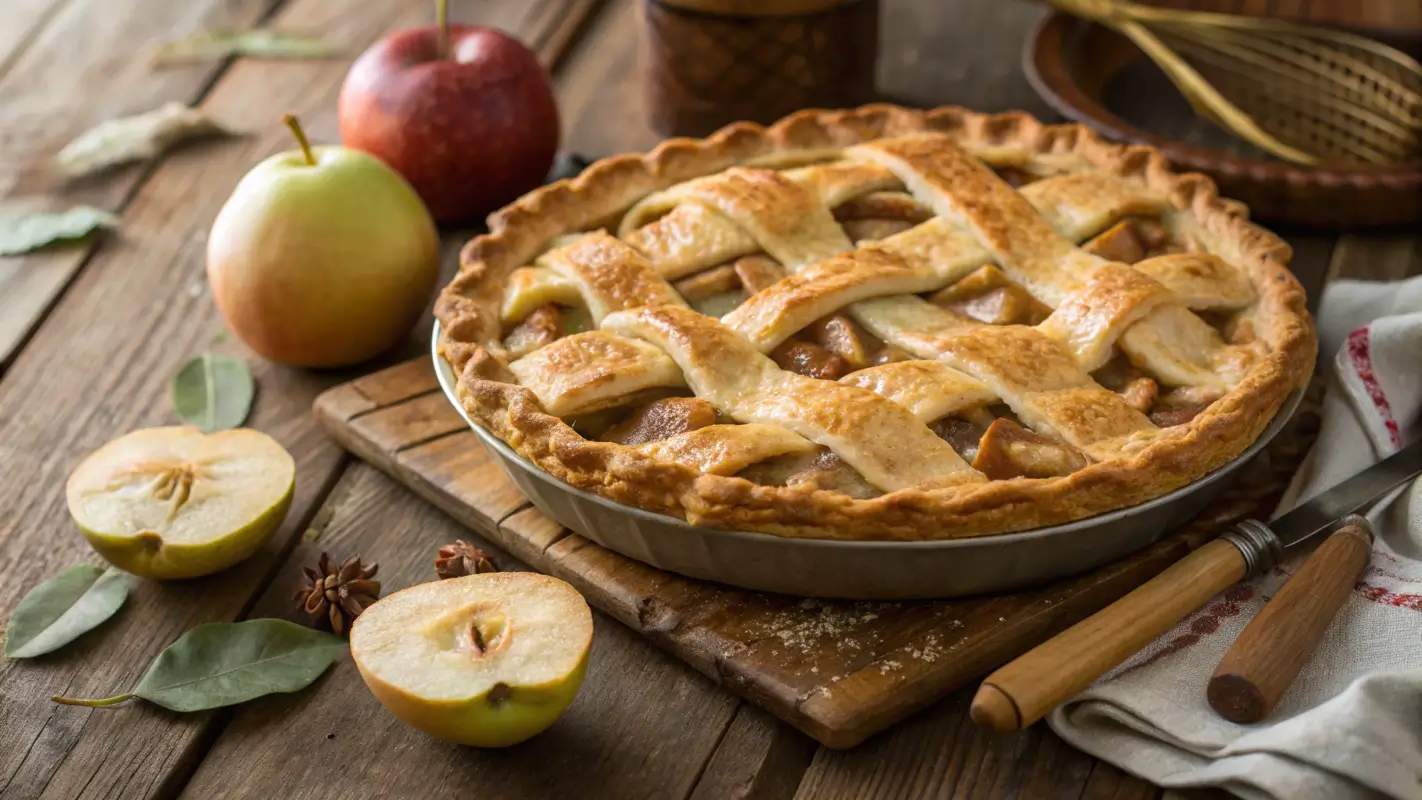
If you’re craving a comforting, fruity dessert that’s as simple as it is satisfying, an apple pear pie made with Pillsbury pie crust might just be the answer. This delightful pie combines the sweetness of apples and pears, with a touch of spice, creating the perfect balance of flavors. Whether you’re preparing it for a family gathering or just treating yourself to a cozy night in, this pie is sure to be a hit.
In this article, we’ll take you through everything you need to know to make a fantastic apple pear pie, from gathering the best ingredients to pie assembly, baking tips, and even creative variations. You’ll also learn how using Pillsbury pie crust makes the entire process even easier, so you can spend more time enjoying your creation and less time in the kitchen.
Understanding the Apple Pear Pie
What is an Apple Pear Pie?
Apple pear pie is a classic dessert that blends the tartness of apples with the delicate sweetness of pears. It’s a treat that combines the best of both fruits, offering a juicy, flavorful filling encased in a crisp, buttery crust. But what sets this pie apart from the more common apple pie is the addition of pears, which add a unique texture and subtle sweetness that perfectly complements the tanginess of apples.
Origins and History
The apple pear pie is a modern twist on the traditional apple pie, often made with varieties like Granny Smith, Honeycrisp, or Braeburn apples. The addition of pears—particularly varieties like Bartlett or Anjou—introduces an element of sophistication. Pies like this have long been beloved in many cultures, with various fruits taking center stage based on what was available in each region. In recent years, the apple pear pie has become a popular choice for fall and winter gatherings, often making its appearance at Thanksgiving and holiday dinners.
Flavor Profile
When you think of pie, you probably envision something warm, sweet, and comforting. The apple pear pie hits all the right notes. The apples provide a slight tartness and firm texture, while the pears bring a mellow, juicy sweetness. With the right balance of cinnamon, nutmeg, and vanilla extract, this pie offers a lovely blend of warm spices that are perfect for the colder months. Every bite delivers a rich and comforting experience.
Popularity in Modern Cuisine
Over the past few decades, apple pear pie has become a go-to dessert for home bakers and professional chefs alike. It’s a wonderful option for anyone looking to create a fresh take on the standard apple pie. Thanks to the Pillsbury pie crust, making this pie has never been easier. The rise of ready-made pie crusts in grocery stores has allowed more people to enjoy homemade pies without the hassle of making dough from scratch, giving the apple pear pie a prominent place in modern kitchens.
Why Choose Pillsbury for Your Pie?
If you’ve ever made a pie from scratch, you know that the crust can sometimes be the trickiest part. That’s where Pillsbury comes in. Their ready-to-bake pie crusts take the stress out of pie-making, letting you focus on creating a delicious filling instead.
Convenience and Quality
Pillsbury pie crusts are known for their reliability and ease of use. They come pre-rolled and ready to bake, so all you need to do is unroll and place them in your pie dish. This convenience makes the whole pie-making process quicker and more manageable, especially for those who are short on time but still want to create a dessert that feels homemade.
Consistency in Baking
One of the best things about using Pillsbury pie crust is the consistency. No more worrying about whether your homemade dough will turn out flaky or soggy. Pillsbury’s crusts bake up golden brown and crisp every time, ensuring your apple pear pie has a perfect foundation that’s as delightful as the filling.
Time-Saving Aspect
Let’s face it—sometimes we just don’t have the time (or energy) to make pie crust from scratch. That’s when Pillsbury comes to the rescue. With their pre-made crusts, you can still bake a delicious pie with minimal effort. Whether you’re in a rush or just not in the mood to deal with dough, Pillsbury allows you to skip the lengthy preparation and jump straight into baking your favorite pie.
Preparing the Filling
Now that you’ve gathered all the necessary ingredients, it’s time to prepare your apple pear pie filling. This process involves ensuring the fruits are ready, the spices are balanced, and the consistency is perfect. Here’s a step-by-step guide to help you make the ideal filling.
Prepping the Fruits
Washing and Peeling
Before you start, it’s crucial to thoroughly wash your apples and pears to remove any dirt, pesticides, or wax. Use cold water and scrub gently with your hands or a vegetable brush. Once clean, it’s time to peel the fruits. While peeling apples is generally straightforward, pears can sometimes be a bit tricky due to their skin’s delicate texture. A vegetable peeler or a paring knife works best for both fruits. Peeling them ensures a smooth filling without any unwanted chunks of skin.
Slicing Techniques
Uniform slicing is essential for even baking. You want each piece to be roughly the same size to ensure that they cook evenly in the pie. Start by cutting each fruit in half, removing the core, and then slicing it into thin pieces—about 1/4 to 1/2 inch thick. For a nice presentation, try to keep the slices consistent. If you want a more rustic look, feel free to vary the size a bit, but remember that the thinner the slices, the more evenly they will bake.
Preventing Browning
Pears, especially, can oxidize and turn brown when exposed to air. To prevent this, you can toss your sliced pears with a bit of lemon juice. This will not only prevent browning but also add a fresh, tangy flavor that complements the sweetness of the fruit. If you prefer, you can also use an anti-browning agent, but lemon juice is a natural and effective solution.
Mixing the Filling
Combining Ingredients
Once your fruits are prepped, it’s time to mix them with the other ingredients. In a large mixing bowl, combine your sliced apples and pears with the sweeteners—whether it’s granulated sugar, brown sugar, or an alternative sweetener. Add in your spices (cinnamon, nutmeg, ginger, and vanilla extract) along with the thickening agent (either flour or cornstarch). Toss everything together gently to ensure that each piece of fruit is coated with the sugar and spices. Be careful not to crush the delicate pear slices.
Resting the Mixture
After combining the ingredients, it’s a good idea to let the mixture sit for about 15 to 20 minutes. This resting period allows the sugars to draw out the natural juices from the fruit, which will help create a rich and flavorful filling. The fruit will also begin to soften slightly, making it easier to bake and ensuring that the filling has a smooth, cohesive texture.
Adjusting Sweetness and Spice
Before transferring your filling into the pie crust, give it a taste test. The mixture should be a perfect balance of sweetness and spice. If it’s too tart, add a little more sugar. If you want a stronger spice flavor, add a pinch more cinnamon or nutmeg. Everyone’s taste is different, so don’t be afraid to adjust according to your preferences. Once you’re satisfied with the flavor, it’s time to fill your pie crust and move on to baking.
Baking the Pie
Once your apple pear pie is assembled, it’s time to bake it to perfection. Proper baking ensures that the crust is golden and flaky while the filling becomes tender and flavorful. Let’s dive into the baking process, starting with the right oven settings and placement.
Oven Settings and Placement
Temperature Recommendations
For the perfect apple pear pie, preheat your oven to 425°F (220°C). This high temperature helps set the crust quickly, creating a golden, flaky base. After the initial bake, we’ll reduce the temperature to ensure the filling cooks through evenly.
Rack Positioning
To ensure even heat distribution, place your pie on the middle rack of the oven. This allows the heat to circulate evenly around the pie, ensuring that both the top and bottom crust bake evenly and that the filling cooks properly. Avoid placing the pie too close to the top or bottom heating elements, as this can cause uneven baking.
Baking Process
Initial High-Temperature Bake
Start by baking the pie at 425°F (220°C) for about 15-20 minutes. This step helps set the crust and gives it that beautiful golden color. During this time, the filling will begin to bubble and thicken, creating a delicious, rich texture.
Reducing Temperature
After the initial high-temperature bake, reduce the oven temperature to 350°F (175°C) and continue baking for another 30-40 minutes. This lower temperature ensures that the filling cooks thoroughly without over-browning the crust.
Checking for Doneness
You’ll know your pie is ready when the crust is golden brown and the filling is bubbling through the vents of the top crust. If you’re using a lattice crust, look for the filling to be visibly thickened and syrupy.
Cooling and Serving
Cooling Time
Let your pie cool for at least 1-2 hours before slicing. This cooling period allows the filling to set, making it easier to slice and serve. If you cut into the pie too soon, the filling may spill out.
Serving Suggestions
For the perfect dessert experience, serve your apple pear pie with a dollop of freshly whipped cream, a scoop of vanilla ice cream, or enjoy it plain for a lighter option. This pie is delicious either way, so choose your favorite accompaniment!
Variations and Customizations
No two apple pear pies need to be the same. Whether you have dietary restrictions or want to add a creative twist to the classic recipe, there are plenty of ways to personalize your pie to suit your tastes or needs. Let’s explore some exciting options for making this recipe your own!
Dietary Modifications
Gluten-Free Options
If you follow a gluten-free diet, there’s no need to miss out on this delicious pie! Simply substitute the Pillsbury pie crust with a gluten-free crust (many grocery stores carry gluten-free options), and replace regular flour with gluten-free thickening agents like arrowroot powder or tapioca flour. These alternatives will give your pie filling a smooth texture without compromising flavor.
Sugar Substitutes
For those looking to reduce sugar or avoid it entirely, there are a variety of sugar substitutes available. Stevia, erythritol, or even monk fruit sweetener are great options. When using these substitutes, be sure to adjust the quantities according to their sweetness levels compared to regular sugar, as some are much sweeter than others.
Vegan Adaptations
For a vegan version of your apple pear pie, replace the butter with vegan butter or coconut oil. You can also swap the egg wash for a mixture of plant-based milk and maple syrup to brush over the crust before baking. Make sure to use a plant-based crust as well, which many stores offer, or opt for a homemade vegan pie crust.
Flavor Twists
Tropical Flair
Looking to add a little tropical zest to your pie? Try mixing in shredded coconut or small chunks of pineapple into the filling. These fruits bring a new level of flavor, balancing the sweetness of the pears and apples with their own natural tang.
Spice Adjustments
Spices are one of the easiest ways to tweak your apple pear pie. Add a pinch of cardamom for a warm, aromatic twist or experiment with allspice or cloves for a deeper, more complex flavor. Just be careful not to overpower the natural sweetness of the apples and pears.
Boozy Infusion
For an adult touch, try incorporating a small amount of rum, bourbon, or brandy into the filling. This adds a rich, deep flavor that pairs beautifully with the apples and pears. Just be sure to cook the alcohol down before adding it to the pie to avoid a raw alcohol taste.
Troubleshooting and Tips
Baking can be a bit tricky, but with a few tips and troubleshooting advice, you’ll be able to solve any issues that arise while baking your apple pear pie. Let’s go over some common baking problems and how to fix them.
Common Baking Issues
Soggy Bottom Crust
A soggy bottom crust is often the result of the filling’s moisture soaking into the crust. To prevent this, you can blind bake the crust first (pre-bake the bottom crust before adding the filling). Another trick is to sprinkle a thin layer of cornstarch or flour on the bottom of the crust before adding the filling to absorb excess moisture.
Overflows and Spills
Sometimes, pies tend to overflow if the filling is too high or if it hasn’t thickened properly. To prevent this, ensure your pie isn’t overstuffed and that your filling is the right consistency. If you’re worried about spills, place a baking sheet under the pie dish to catch any drips.
Uneven Baking
To avoid uneven baking, always make sure your oven is preheated, and place your pie in the center of the oven. Check your oven’s heat distribution; some ovens can have hot spots, and rotating the pie halfway through baking can help it cook evenly.
Expert Tips
Blind Baking Hacks
If you’re concerned about a soggy crust, blind baking is your best bet. Make sure to use pie weights or dried beans to weigh the crust down while it bakes. You can also brush the baked crust with a thin layer of egg wash (or plant-based milk for vegan options) to create a barrier that further prevents sogginess.
Flavor Enhancements
Don’t be afraid to experiment with flavor enhancements. A dash of vanilla extract, a drizzle of maple syrup, or even a few squeezes of lemon juice in the filling can elevate the flavor and bring out the best in your apples and pears.
Presentation Advice
For a stunning presentation, brush your pie with a bit of plant-based milk or egg wash before baking for a golden, glossy finish. A sprinkle of sugar on top of the crust will also add an extra touch of sweetness and make it look irresistibly delicious.
Discover the health benefits of apples and pears on Healthline. These fruits are not only tasty but also nutritious!
Frequently Asked Questions
You may have some burning questions about apple pear pie, so let’s tackle a few frequently asked questions.
Common Queries About Apple Pear Pie
Can I Use Frozen Fruit?
Yes! You can use frozen apples and pears, but be sure to thaw and drain them before using them in your filling to avoid excess liquid. Frozen fruit can work well, especially if you’re looking to save time or if fresh fruit is out of season.
How Do I Store Leftovers?
Store leftover pie in the fridge, covered with plastic wrap or foil. It should stay fresh for up to 3 days. If you want to keep it for longer, you can freeze the pie (after it has cooled) for up to 3 months. Just be sure to wrap it tightly to prevent freezer burn.
Can I Make Mini Pies?
Yes! Mini apple pear pies are a great way to serve individual portions. You can use a muffin tin or small pie dishes and adjust the baking time accordingly. Keep an eye on them to avoid overbaking.
How Do I Prevent the Crust from Burning?
To prevent burning, check your pie during baking. If the crust is getting too dark before the pie is done, cover the edges with foil or a pie shield. This will protect the edges while the rest of the pie continues to bake.
Additional Resources
Further Reading and Tools
Recommended Baking Tools
Ensure your pie-making success with a few must-have tools: a good pie dish, pie weights for blind baking, and a pastry brush for glazing the crust.
Online Baking Communities
Join baking communities and forums where you can exchange ideas, share tips, and ask questions about making the perfect apple pear pie. Online groups provide a wealth of knowledge and support from fellow bakers.
Related Recipes
If you love this apple pear pie, explore this Cake Mix Fruit Eggs Recipe on OperaCook’s Recipe Collection to broaden your baking horizons!