Table of Contents
Introduction to White Trash Recipe
If you’ve ever scrolled through Pinterest or checked out food blogs, you’ve probably seen the term “White Trash Recipe” floating around. It might sound a bit odd or even controversial, but trust us, it’s not as bad as it sounds! In fact, it’s one of the most popular, easy-to-make snack mixes that combines salty, sweet, and crunchy flavors in the best way possible. This fun, no-bake treat has become a household favorite for parties, holidays, and casual snacking alike.
But where did this quirky recipe come from? Why is it called “White Trash,” and what makes it so irresistible? Let’s dive in and explore everything you need to know about this delicious treat, including its origins, the ingredients that make it stand out, and how you can make your own version at home.
What is a White Trash Recipe?
Definition and Origin
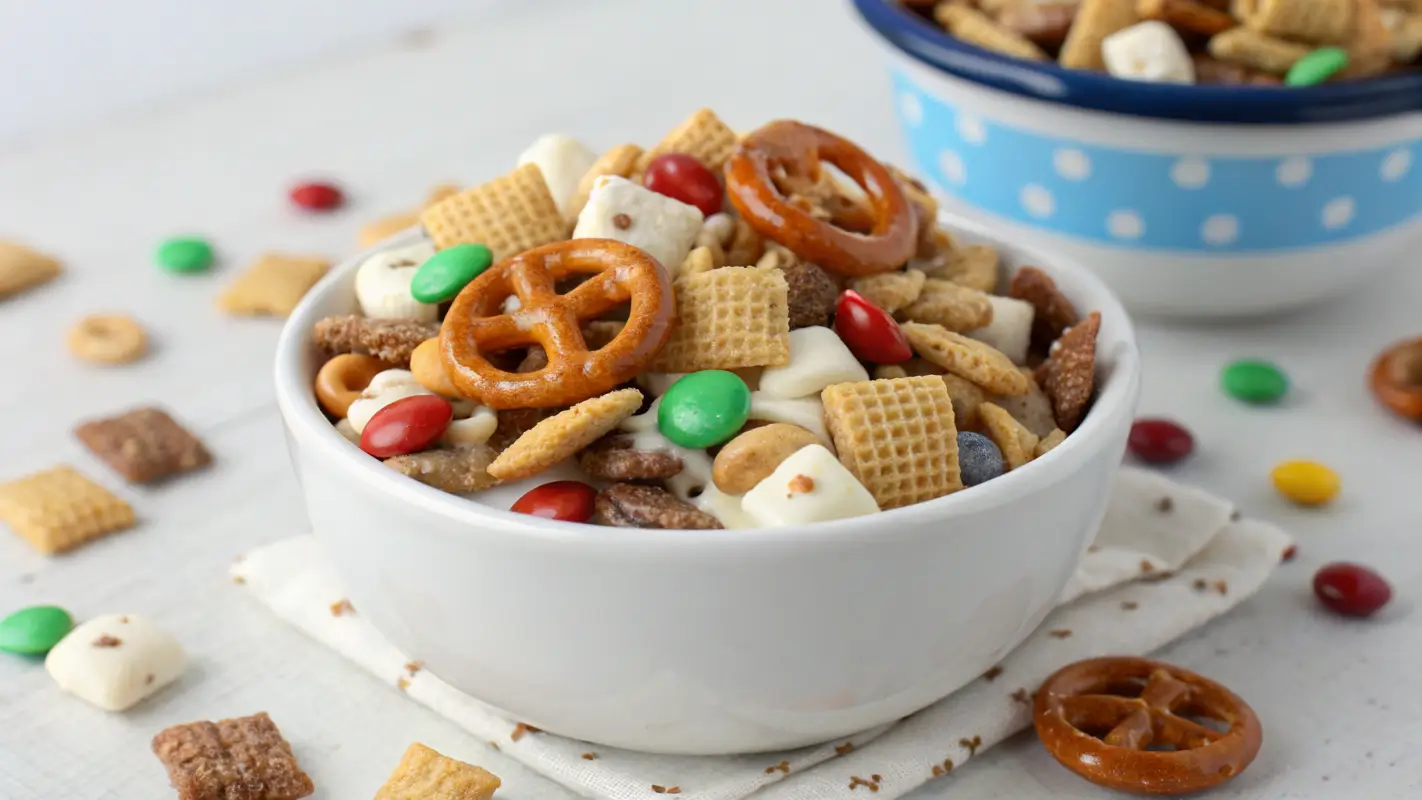
You might be wondering, what exactly is a White Trash Recipe? Simply put, it’s a sweet and salty snack mix that includes ingredients like Chex cereal, pretzels, candies, and white chocolate—making it the perfect combination of textures and flavors. Its history dates back to the early 2000s, and despite the controversial name, it has become a beloved treat that’s always a hit at parties.
But why the strange name? It’s a fun, tongue-in-cheek label that’s stuck over the years. It doesn’t refer to anything offensive or derogatory; rather, it’s just a playful term for a simple, easy-to-make snack that’s definitely no-frills. The name may have also come from the recipe’s humble ingredients and its DIY vibe—perfect for any casual gathering.
Popularity and Variations
While this recipe started off as a simple, easy snack, it quickly gained popularity due to its versatility. You can add just about anything to the mix, from M&M’s to nuts to dried fruit, giving it a customizable edge. You can find endless versions of this snack—each with slight tweaks in ingredients or seasonal twists. Whether it’s for a quick get-together or a holiday treat, the White Trash Recipe is here to stay as one of the easiest crowd-pleasers.
Why is it Called ‘White Trash’?
The Name’s Origin
It’s always interesting to explore where quirky names like this come from. The term “White Trash” has been used in various contexts over the years, but in the case of this recipe, it’s simply a fun, cheeky nickname for a snack that’s quick, tasty, and doesn’t require any fancy or expensive ingredients. The white chocolate coating used in the recipe might be part of the reason behind the name, but it’s mainly about creating something that’s easy to make and satisfying, no matter the occasion.
Cultural Significance
There’s also an element of irony in calling this snack “White Trash.” The term plays on the idea of class and fancy foods—White Trash is essentially a playful counterpoint to expensive, gourmet snacks. And let’s face it, who doesn’t love a snack that doesn’t require a degree in culinary arts? This lighthearted name makes the recipe feel approachable and fun, with no pretensions—just a bunch of comforting ingredients mixed together.
Ingredients and Preparation
Making a White Trash Recipe is as simple as it gets. You don’t need anything fancy—just some basic ingredients you probably already have in your pantry. The key is combining sweet and salty elements with a creamy coating, and voilà, you’ve got a treat that everyone will love. Here’s what you need:
Cereals
The base of the White Trash Recipe is typically a cereal, usually Chex or Rice Krispies. These cereals are light, crunchy, and neutral in flavor, making them the perfect canvas for the other ingredients. While Chex is most common, you can use any similar cereal you prefer, like Cornflakes or Special K for a different texture.
Nuts and Pretzels
For some crunchy goodness and a savory balance to the sweetness, add in some pretzels and nuts. You can’t go wrong with mini pretzels or broken pretzel sticks. Cashews and almonds are popular choices, but you can use any nuts you like. If you’re in the mood for something a little extra, peanuts or even pecans can add a nice flavor.
M&M’s and Other Candies
Candies like M&M’s are what make this recipe a little extra special. You can go with classic peanut M&M’s, regular M&M’s, or even festive versions like holiday M&M’s for an added pop of color. If you’re feeling wild, toss in some chocolate chips or gummy candies for a touch of fun and flavor.
White Chocolate or Almond Bark
The most crucial ingredient that ties everything together is the white chocolate or almond bark. This creates the sweet, creamy coating that holds all the ingredients together. You can melt the white chocolate in a microwave or double boiler and pour it over your mix. This is where the magic happens—it’s what transforms a bunch of random ingredients into a cohesive treat!
Step-by-Step Preparation
Now that you’ve gathered your ingredients, it’s time to put it all together. Don’t worry, the process is super easy and won’t take more than 20 minutes!
Mixing Dry Ingredients
Start by placing your cereal, pretzels, nuts, and M&M’s into a large mixing bowl. This part is where you can get creative—add more cereal if you prefer a bigger base or toss in extra candies if you’re a fan of sweetness. Make sure everything is evenly distributed.
Melting the Coating
Next, melt the white chocolate (or almond bark) in a microwave-safe bowl. Heat in 20-second intervals, stirring in between, until it’s completely smooth and melted. Be careful not to overheat it, as this can cause it to seize up. If you want to make this recipe even more indulgent, you can add a bit of peanut butter to the melting chocolate for an extra creamy touch.
Combining and Setting
Once your white chocolate is melted, pour it over the dry ingredients and stir gently to coat everything evenly. Be sure to cover each piece with that delicious coating. Once everything’s well mixed, spread it out on a baking sheet lined with parchment paper. Let it cool for about 30 minutes at room temperature or pop it in the fridge for a quicker set. Once it’s hardened, break it into pieces and enjoy!
Variations and Customizations
Ingredient Substitutions
The beauty of this White Trash Recipe is that it’s highly adaptable. You can mix and match ingredients based on your taste preferences or what you have on hand. Let’s explore some of the options!
Alternative Cereals
Not a fan of Chex? No problem! You can substitute with Cornflakes for a lighter crunch, or Rice Krispies for a super airy texture. For a more substantial bite, Special K or Honey Bunches of Oats also work well. Experiment with different textures to see what you like best.
Different Nuts and Pretzels
While cashews and almonds are classic choices, feel free to use whatever nuts you have lying around. Peanuts, macadamia nuts, or even hazelnuts could bring new flavors to the mix. Pretzels are a must for their saltiness, but if you’re not a fan of traditional pretzels, try mini pretzel twists or even pretzel crisps for a unique spin.
Using Other Candies
M&M’s might be the go-to candy for this recipe, but the possibilities are endless! You can use peanut butter cups, Reese’s Pieces, Jelly Beans, or any candy that tickles your fancy. Want something a little more adventurous? Try adding gummy bears, Skittles, or gummy worms for a chewy twist.
Seasonal and Themed Variations
If you’re in the holiday spirit or preparing for a themed party, White Trash Recipe can easily be adapted to fit the season or theme.
Holiday-Themed Mixes
For a Christmas version, add red and green M&M’s, sprinkle in some peppermints, or toss in a handful of candy canes. This adds a festive touch to the mix and makes it perfect for the holiday season. You can even drizzle a little white chocolate over the mix for extra sweetness.
Color-Themed Mixes
If you’re making a snack mix for a baby shower, birthday party, or sports event, consider matching the candies to the party’s colors. Blue and yellow candies for a baby shower, red and gold for a celebration, or even team colors for a game-day snack—White Trash Recipe can easily adapt to your event.
Flavor Variations
Want to add some spice to your sweet mix? Try tossing in a bit of cinnamon or pumpkin pie spice to the mix for a seasonal touch. You could also add a drizzle of caramel sauce for an indulgent twist or sprinkle in some sea salt to balance out the sweetness.
Serving and Storage
Serving Suggestions
Once your White Trash Recipe is ready to go, it’s time to serve it up! Whether you’re taking it to a party or just having a little snack attack at home, here are a few ways to present your creation:
Presentation Ideas
For a fancy touch, serve your White Trash in a large glass bowl or in smaller Mason jars. You can even bag it up in cute treat bags tied with ribbon for a party favor or gift. If you’re feeling extra, toss in some holiday-themed sprinkles or candy stars for a festive vibe.
Pairing with Beverages
This sweet and salty snack pairs well with just about anything! For a non-alcoholic drink, consider serving it with lemonade, fruit punch, or a chilled iced tea. If you’re serving it at a party, it’s also a hit with sodas or sparkling water.
Storage Tips
You’ll likely have leftovers after making your batch, and no worries—you can store it for later! Here’s how:
Optimal Storage Conditions
Keep your White Trash Recipe in an airtight container to preserve freshness. It’s best to store it at room temperature, away from heat and humidity. If you’re looking to keep it fresh for even longer, you can store it in the fridge, but make sure it’s in an airtight bag or container to prevent the chocolate from hardening too much.
Shelf Life
The best part? This snack can last for up to a week if stored properly! After a week, the texture may start to change a bit, but it’ll still be tasty. So, feel free to make a big batch and have it on hand for snacking throughout the week.
Try a fun variation with M&M’s in Lil’ Luna’s White Chocolate Trail Mix Recipe.
FAQs on White Trash Recipe
Common Questions
No matter how many times you’ve made the White Trash Recipe, there are always questions that pop up. From ingredient substitutions to storage tips, we’ve got answers to some of the most common queries people have about this delicious treat.
Can I Use Dark Chocolate Instead of White Chocolate?
Sure! While white chocolate is the traditional choice for the White Trash Recipe, you can absolutely use dark chocolate if that’s your preference. Keep in mind that dark chocolate has a richer, less sweet taste compared to white chocolate. If you’re looking for a more balanced flavor, you could even use a combination of dark and white chocolate for a perfect harmony of sweetness and bitterness.
How Long Does the White Trash Recipe Last?
This snack mix has a surprisingly long shelf life if stored properly. In an airtight container, it can last for up to a week at room temperature. If you store it in the fridge, it could last a bit longer—up to 10 days. However, like all snacks, the texture will be best within the first few days. After that, the chocolate coating may start to get a little too firm.
Can I Add Dried Fruits to the Mix?
Absolutely! Dried fruits like cranberries, raisins, or even apricots can be a great addition to your White Trash Recipe. Not only do they add some extra natural sweetness, but they also give your snack mix a chewy texture that contrasts nicely with the crunchy cereals and pretzels. Just be sure to keep the ratios balanced so the mix doesn’t get too sweet or too heavy on the dried fruits.
Conclusion
There you have it! The White Trash Recipe is one of those snacks that’s as easy to make as it is fun to eat. It’s the perfect blend of sweet, salty, and crunchy—not to mention customizable, which makes it even better. Whether you’re preparing it for a holiday party, a family get-together, or just to satisfy a snack craving, it’s a recipe that will always be a crowd-pleaser.
So, next time you’re looking for a quick and tasty treat, skip the store-bought options and make this delicious homemade snack instead. You can tweak it to your heart’s content, and if you feel inspired, check out some of our No-Bake Dessert ideas for more effortless recipes to try. Happy snacking!