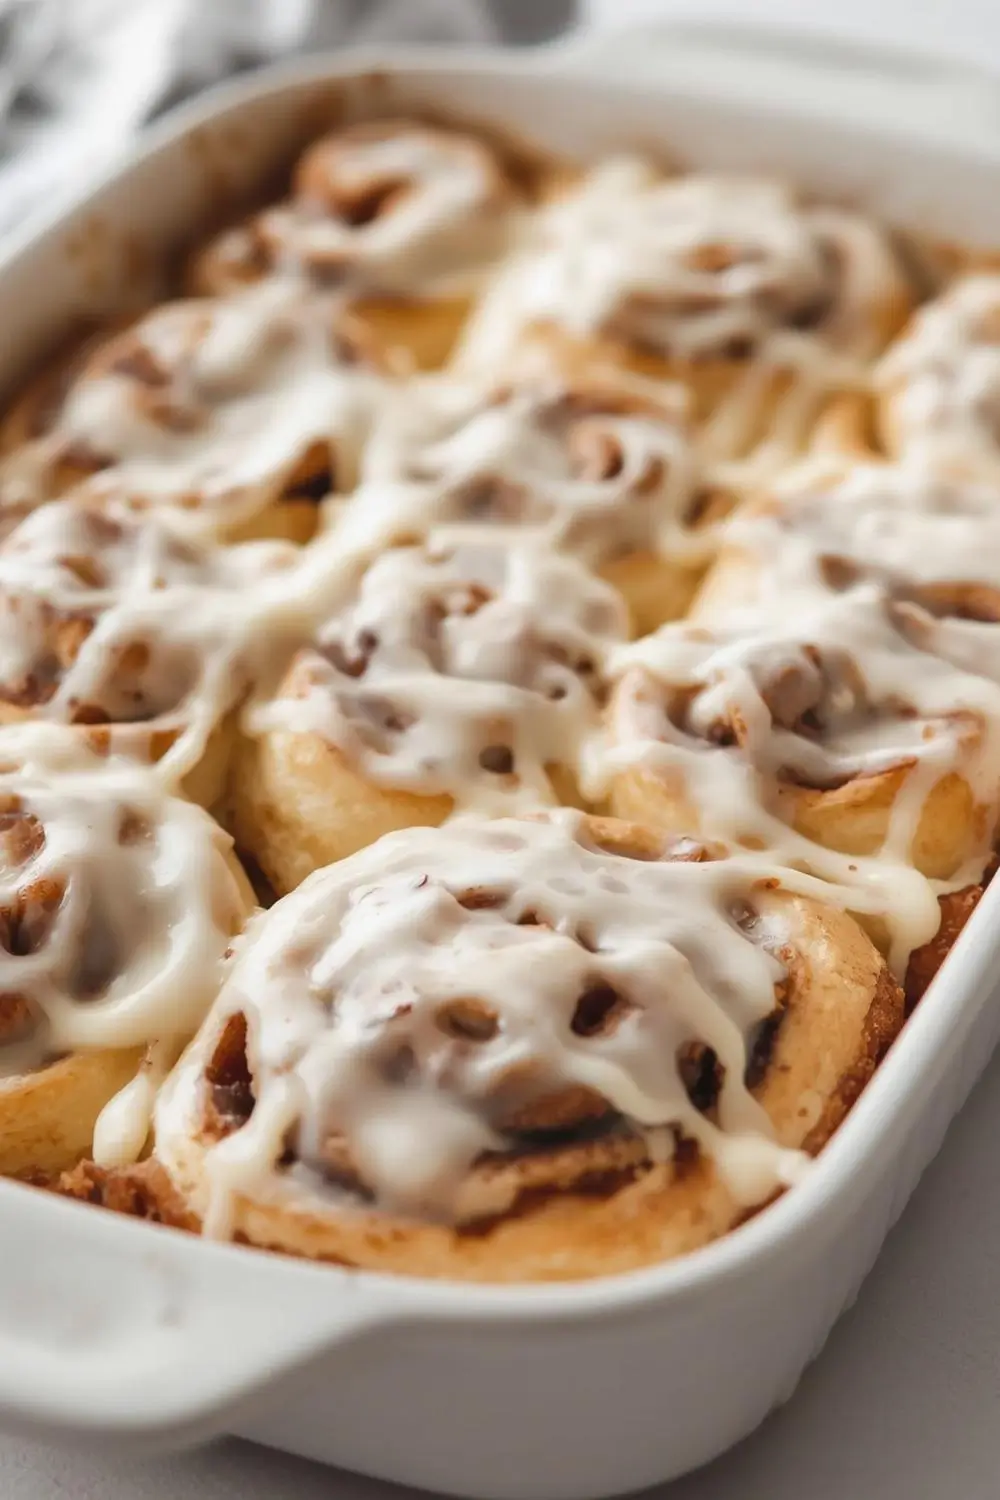
The Ultimate Guide to Irresistible Homemade Cinnamon Rolls
There’s something undeniably magical about the aroma of cinnamon rolls baking in the oven. That sweet, spicy scent promises warmth and comfort, a perfect start to any morning. While grabbing a pre-made tube from the grocery store is convenient, there’s a world of difference between those and the real deal. Imagine pulling a perfectly golden, pillowy roll from your own oven, its surface glistening with a thick, tangy cream cheese icing. These aren’t just breakfast; they’re a celebration. This guide will walk you, step-by-step, through creating the ultimate ultra-soft homemade cinnamon rolls with rich, decadent cream cheese icing. Forget the store-bought versions; this is bakery-quality perfection you can achieve right in your own kitchen.
Why Homemade Wins Every Time
You might wonder, “Why bother making them from scratch when I can buy them?” The answer lies in the texture, the flavor, and the sheer satisfaction. Homemade cinnamon rolls boast a tender, almost cloud-like crumb that simply can’t be replicated with shortcuts. The dough, enriched with butter and milk, becomes luxuriously soft. The filling, a perfect balance of brown sugar and cinnamon, melts into the dough as it bakes. And the cream cheese icing? It’s not just sweet; it’s tangy, rich, and perfectly complements the roll without overwhelming it. Plus, the process itself is a rewarding ritual, a chance to slow down and create something truly special.
The Heart of the Roll: The Dough
The foundation of any great cinnamon roll is its dough. This isn’t just flour, water, and yeast; it’s a carefully balanced mixture designed to yield maximum softness and flavor. We’ll use a combination of all-purpose flour and a touch of bread flour for structure, milk for tenderness, eggs for richness, and plenty of butter for that melt-in-your-mouth quality. The yeast is the magic ingredient that makes it rise, creating those coveted air pockets. Patience is key here; allowing the dough to rise slowly develops flavor and texture. Don’t rush this step – good things come to those who wait.
Crafting the Perfect Filling
The filling is where the cinnamon magic happens. It’s a simple blend of brown sugar, ground cinnamon, and a pinch of salt. Brown sugar, with its molasses content, adds a deeper, caramel-like sweetness compared to white sugar. The cinnamon should be fresh for the best flavor punch. Some recipes add a touch of flour to the filling to prevent it from making the dough soggy, but we’ll find the perfect balance. The butter is crucial too – melted and brushed onto the rolled-out dough before the sugar-cinnamon mixture is sprinkled on. This creates those beautiful, caramelized swirls.
The Crown Jewel: Cream Cheese Icing
No cinnamon roll is complete without its crowning glory: the icing. This isn’t just powdered sugar and milk; it’s a rich, tangy, and incredibly spreadable cream cheese frosting. Full-fat cream cheese is non-negotiable for the right texture and flavor. It’s mixed with softened butter, a splash of vanilla, a touch of salt to balance the sweetness, and just enough powdered sugar to achieve that perfect, thick, yet pourable consistency. This icing should be generous, coating each roll beautifully without being overly sweet.
Step-by-Step: From Bowl to Oven
Let’s break down the process into manageable steps, ensuring you feel confident every step of the way.
Step 1: Activating the Yeast (The First Rise)
- Why: Yeast needs warm liquid to become active and start producing carbon dioxide, which makes the dough rise.
- How: Combine warm milk (not hot!), a pinch of sugar, and active dry yeast in a large bowl. Let it sit for 5-10 minutes until it becomes foamy and smells slightly yeasty. This is your signal that the yeast is alive and ready to work.
Step 2: Building the Dough Base
- Why: Combining the wet and dry ingredients forms the initial dough structure.
- How: Add the melted butter, eggs, and salt to the activated yeast mixture. Whisk until smooth. Gradually add the flour mixture (a blend of all-purpose and bread flour) until a shaggy dough forms. Don’t add all the flour at once; you might not need it all, depending on humidity.
Step 3: Kneading for Tenderness
- Why: Kneading develops the gluten, which gives the dough its structure and chewiness. For ultra-soft rolls, we want just enough gluten development without overworking it.
- How: Turn the dough out onto a lightly floured surface. Knead for about 8-10 minutes, adding small amounts of flour only if the dough is excessively sticky. The dough should be smooth, elastic, and slightly tacky but not sticky. It should pass the “windowpane test” – stretching thin enough to see light through without tearing.
Step 4: The First Rise (Bulk Fermentation)
- Why: This is where the yeast does its main work, multiplying and producing gas, causing the dough to rise significantly and develop flavor.
- How: Place the kneaded dough in a lightly oiled bowl, turning it once to coat. Cover tightly with plastic wrap or a damp kitchen towel. Let it rise in a warm, draft-free spot until doubled in size, usually 1 to 1.5 hours. You can speed this up slightly by placing the bowl in a turned-off oven with the light on.
Step 5: Rolling and Filling (The Fun Part!)
- Why: Rolling out the dough creates the canvas for the filling and determines the roll’s thickness.
- How: Punch down the risen dough gently to release air bubbles. Turn it out onto a lightly floured surface. Roll it into a large rectangle, about 1/4 inch thick. Spread the softened butter evenly over the surface. Sprinkle the brown sugar-cinnamon mixture evenly over the butter. Starting from the long edge, carefully roll the dough up tightly into a log. Pinch the seam to seal. Cut the log into equal-sized rolls (about 1.5 inches thick) using a sharp knife or dental floss.
Step 6: Second Rise (Proofing)
- Why: The rolls need another rise to puff up before baking, ensuring maximum softness.
- How: Place the cut rolls in a lightly greased baking dish, leaving a little space between them. Cover loosely with plastic wrap or a towel. Let them rise again in a warm spot until they look puffy and nearly doubled, about 30-45 minutes. They should look like they’re ready to burst!
Step 7: Baking to Golden Perfection
- Why: Baking sets the structure, develops flavor through the Maillard reaction, and creates that irresistible golden crust.
- How: Preheat your oven to 350°F (175°C). Bake the rolls for 20-25 minutes, or until they are deeply golden brown on top and sound hollow when tapped on the bottom. The internal temperature should reach about 190°F (88°C). Keep an eye on them towards the end to prevent overbaking.
Step 8: The Grand Finale: Icing
- Why: The icing adds moisture, sweetness, and that signature tangy richness.
- How: While the rolls are still warm (but not hot), spread or drizzle the cream cheese icing generously over the top. The warmth helps the icing melt slightly into the rolls, creating a beautiful, glossy finish. Let them cool slightly before serving – this allows the icing to set slightly.
Variations and Substitutions: Making it Your Own
- Add-Ins: Fold in chopped pecans, walnuts, or raisins into the filling for extra texture and flavor. A sprinkle of cinnamon sugar on top before baking adds a nice crunch.
- Icing Variations: For a different twist, try a vanilla glaze (powdered sugar, milk, vanilla) or a maple glaze. A lemon zest in the icing brightens things up.
- Dough Variations: Substitute some of the all-purpose flour with whole wheat flour for a nuttier flavor (though texture will be slightly denser). Use buttermilk instead of regular milk for extra tenderness and tang.
- Vegan Option: Use plant-based milk (like oat or soy), vegan butter, and a flax egg (1 tbsp ground flaxseed + 3 tbsp water, mixed and rested 5 mins) in place of the dairy and eggs. Ensure your yeast is vegan-friendly.
Storage and Reheating: Keeping the Magic Alive
- Cooling: Let the rolls cool completely on a wire rack before storing. This prevents condensation and sogginess.
- Room Temperature: Store cooled rolls in an airtight container at room temperature for up to 2 days. They are best enjoyed fresh!
- Refrigeration: For longer storage (up to 5 days), wrap individual rolls tightly in plastic wrap or place them in a sealed container. Let them come to room temperature before reheating.
- Freezing: Wrap cooled rolls tightly in plastic wrap, then foil, or place in a freezer bag. Freeze for up to 3 months. Thaw overnight in the fridge, then reheat.
- Reheating: For the best texture, reheat individual rolls in the microwave for 15-20 seconds or in a preheated 350°F (175°C) oven for 5-7 minutes. This gently warms them without drying them out. Avoid the toaster oven for rolls.
Common Mistakes to Avoid: Mastering the Process
- Water Temperature: Using water that’s too hot (above 120°F/49°C) can kill the yeast. Warm it to about 110°F (43°C) – just warm to the touch.
- Over-Kneading: Overworking the dough makes it tough. Knead just until smooth and elastic. The windowpane test is your friend.
- Rushing the Rise: Yeast needs time. Don’t skip the first rise or proof. Cold environments slow it down significantly.
- Overfilling: Too much filling can cause the rolls to leak and become soggy. Be generous but not excessive.
- Underbaking: Rolls should be golden brown and sound hollow. Underbaked rolls are doughy in the center.
- Icing Too Thick: If your icing is too thick, add a teaspoon of milk or cream at a time until it reaches the perfect pourable consistency. If too thin, add a little more powdered sugar.
- Icing Too Early: Wait until the rolls are completely cool before icing. Warm rolls will melt the icing, making it runny.
Frequently Asked Questions (FAQs)
- Q: Can I make the dough ahead of time?
A: Absolutely! You can prepare the dough through step 4 (after the first rise), punch it down, cover it tightly, and refrigerate it overnight. The cold rise develops even more flavor. When ready, let it come to room temperature for about an hour before rolling and baking.
- Q: Why are my rolls dense and not fluffy?
A: This is often due to under-proofing (not rising enough) or over-kneading. Ensure you give the dough sufficient time to rise and knead gently.
- Q: Can I use active dry yeast instead of instant yeast?
A: Yes, but you need to activate it first with warm milk and sugar, as described in step 1. Instant yeast can be mixed directly with the dry ingredients.
- Q: How do I know when the rolls are done baking?
A: They should be a deep golden brown on top and sound hollow when tapped on the bottom. An internal temperature of 190°F (88°C) is a reliable indicator.
- Q: Can I freeze the baked rolls?
A: Yes! Let them cool completely, then wrap tightly in plastic wrap, then foil, or place in a freezer bag. Freeze for up to 3 months. Thaw overnight in the fridge and reheat gently.
- Q: How do I make the icing thinner for drizzling?
A: Simply add a little more milk or cream, a teaspoon at a time, until you reach your desired consistency. Start with 1-2 teaspoons.
- Q: Can I use a bread machine?
A: Yes! You can use the dough cycle to mix and knead the dough. Then proceed with shaping, rising, and baking as usual. Adjust the flour slightly if needed after the cycle.
- Q: Why is my icing separating or becoming grainy?
A: This can happen if the butter is too cold when mixing or if the powdered sugar is added too quickly. Ensure the butter is softened to room temperature and add the sugar gradually while mixing on low speed.
The Final Touch: A Warm Embrace
There’s a profound comfort in a warm cinnamon roll straight from the oven. The soft, yielding crumb, the fragrant spice, the luxurious cream cheese icing – it’s a simple pleasure that feels like a hug. This recipe, crafted with care and attention to detail, promises to deliver that perfect bakery experience in your own home. The process might seem involved, but the reward is immeasurable. So, gather your ingredients, set aside some time, and embark on this delicious journey. The aroma filling your kitchen, the anticipation as they bake, and the first bite of pure, homemade bliss – it’s an experience worth savoring. Enjoy every moment, and enjoy every heavenly bite of your ultra-soft, cream cheese-topped cinnamon rolls.