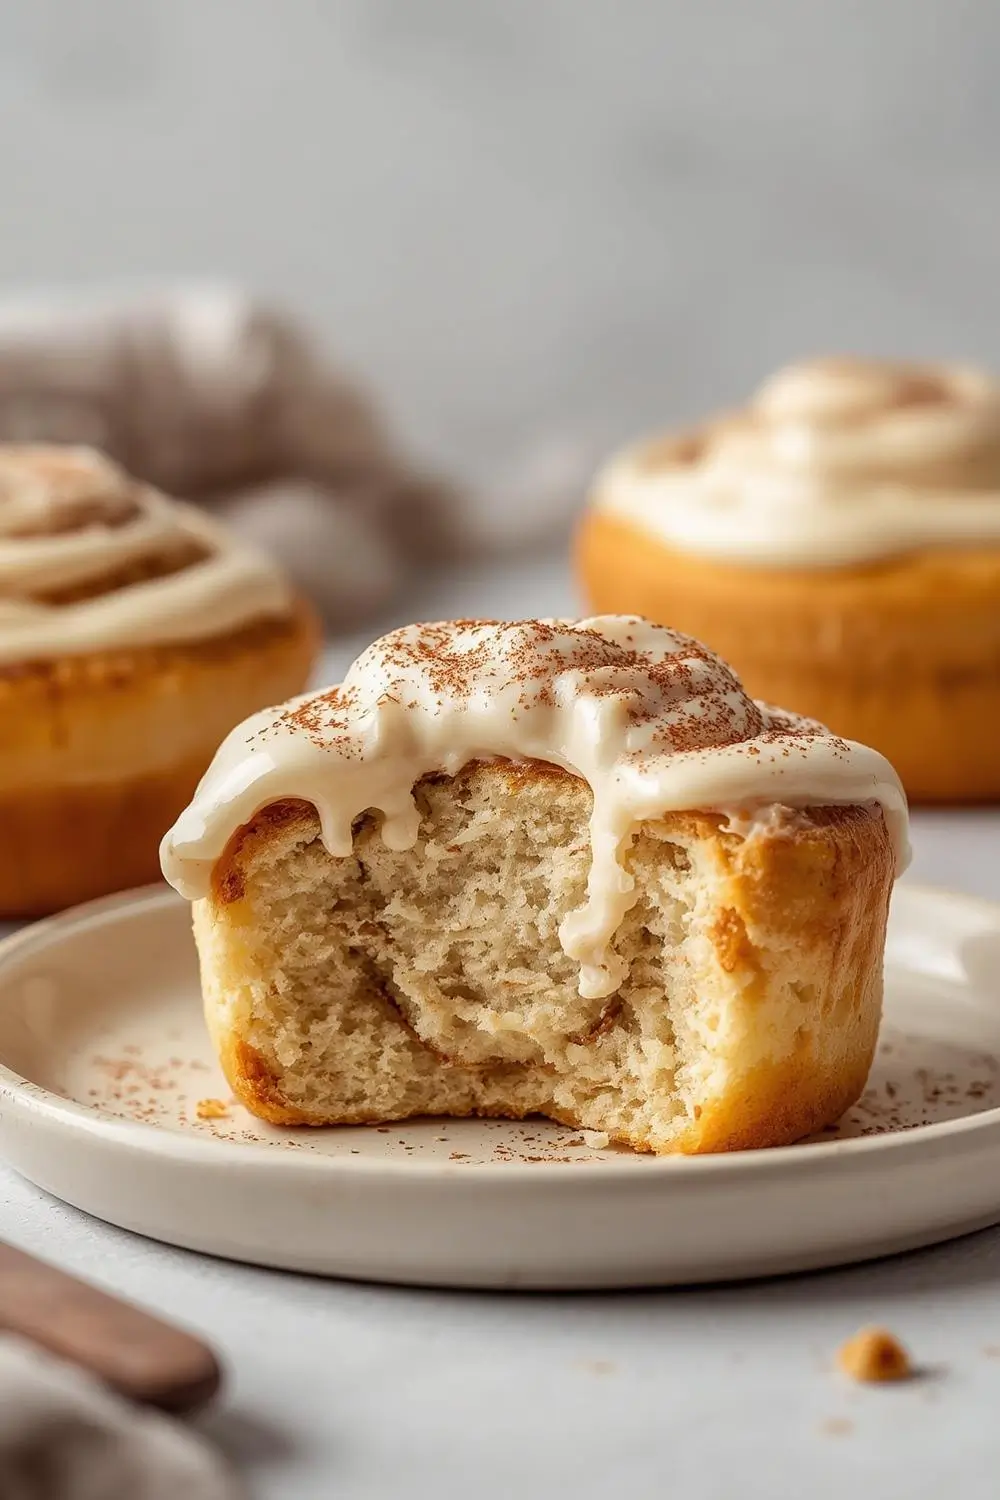
The Ultimate Guide to Irresistible Ultra Fluffy Cinnamon Rolls
Imagine the moment: a warm, aromatic kitchen, the gentle hum of the oven, and the promise of something truly special. These aren’t just cinnamon rolls; they’re an experience. Our ultra fluffy cinnamon rolls are crafted for maximum comfort, boasting tender layers that practically melt in your mouth, crowned with a silky vanilla frosting that dissolves into pure bliss. Perfect for celebrating life’s big moments or simply savoring a quiet moment of peace, each bite delivers that perfect balance of spice and creamy sweetness. Let’s dive into creating these cloud-like delights together.
Why These Rolls Are Truly Special
What sets these cinnamon rolls apart? It’s the meticulous attention to detail and the pursuit of ultimate fluffiness. We focus on a specific dough technique and a rich, yet balanced, filling and frosting. The result? Rolls so tender and airy, they feel like a warm hug. This guide isn’t just a recipe; it’s your blueprint to cinnamon roll perfection, designed for success even if you’re new to baking.
Gathering Your Ingredients: The Foundation of Fluff
Success starts with the right ingredients. Here’s what you’ll need, with a few key explanations to ensure you understand their role:
- Warm Milk (1 cup): Crucial for activating the yeast. Use whole milk for the richest flavor and best texture. The temperature should be around 105-110°F (40-43°C) – warm to the touch, not hot.
- Active Dry Yeast (2 1/4 tsp / 1 packet): The leavening agent that makes the dough rise. Ensure it’s fresh and not expired.
- Granulated Sugar (1/4 cup): Feeds the yeast and adds sweetness. The remaining sugar is used in the filling and frosting.
- Large Eggs (2), Room Temperature: Add richness, structure, and moisture. Room temperature eggs incorporate better.
- Unsalted Butter (1/2 cup / 1 stick), Melted & Slightly Cooled: Provides flavor and tenderness. Using melted butter instead of softened creates a slightly denser, more tender crumb.
- Salt (1 1/2 tsp): Enhances all the flavors, balancing the sweetness.
- Bread Flour (4 1/2 cups / 22.5 oz / 570g): The high protein content gives the dough the strength and elasticity needed for maximum fluffiness. All-purpose flour can be used, but the texture won’t be quite as lofty.
- Softened Butter (1/2 cup / 1 stick): For the filling, ensuring it spreads easily.
- Light Brown Sugar (3/4 cup): Adds moisture and a deeper caramel-like flavor compared to granulated sugar.
- Ground Cinnamon (2 tbsp): The star of the filling. Use a high-quality brand for the best flavor.
- Cream Cheese (4 oz / 1/2 block), Softened: The base for the frosting, providing tang and creaminess.
- Unsalted Butter (4 tbsp / 1/2 stick), Softened: Adds richness to the frosting.
- Pure Vanilla Extract (1 1/2 tsp): Essential for flavor depth.
- Powdered Sugar (2 1/2 – 3 cups): The sweetener and thickener for the frosting. Sift it for a smooth texture.
- Heavy Cream or Milk (2-4 tbsp): Adjusts the frosting consistency to be silky smooth.
The Dough: Where Fluff Begins
Creating the dough is the first critical step. This method ensures maximum airiness:
1. Activate the Yeast: In a large bowl or the bowl of your stand mixer, combine the warm milk, 1/4 cup granulated sugar, and yeast. Stir gently and let it sit for 5-10 minutes until foamy. This proves the yeast is active.
2. Combine Wet Ingredients: Add the room temperature eggs, melted (and slightly cooled) butter, and salt to the yeast mixture. Whisk until well combined.
3. Incorporate Flour: Gradually add the bread flour, about 1 cup at a time, mixing on low speed with the dough hook attachment (or stirring vigorously by hand) until a shaggy dough forms. The dough will be sticky.
4. Knead for Tenderness: Knead the dough on a lightly floured surface (or with the mixer on medium-low) for 8-10 minutes. The goal is a smooth, elastic dough that springs back when poked. Add small amounts of flour only if absolutely necessary to prevent sticking – too much flour makes the rolls dense. The dough should be soft and slightly tacky, not stiff.
5. First Rise: Place the dough in a lightly oiled bowl, turning it once to coat. Cover tightly with plastic wrap or a damp kitchen towel. Let it rise in a warm, draft-free spot until doubled in size, about 1 to 1.5 hours. The warmth is key for proper rising.
Rolling & Filling: Creating the Layers
Once risen, it’s time to shape the rolls:
1. Prepare the Filling: In a small bowl, combine the softened butter, light brown sugar, and cinnamon. Mix until smooth and spreadable.
2. Shape the Dough: Punch down the risen dough gently to release air. Turn it out onto a lightly floured surface. Roll it into a large rectangle, roughly 18×24 inches. Aim for an even thickness.
3. Apply the Filling: Spread the cinnamon-sugar butter mixture evenly over the entire surface of the dough, leaving a small border around the edges.
4. Roll Up: Starting from the long edge, carefully roll the dough up tightly into a log. Pinch the seam gently to seal. Trim the ends if they’re uneven.
5. Cut the Rolls: Using a sharp knife or dental floss, cut the log into 12 equal pieces (about 1.5-2 inches thick). Place them cut-side up in a lightly greased 9×13 inch baking pan, leaving a little space between them for expansion.
The Bake: Achieving Golden Perfection
The final step transforms the dough into golden, fluffy rolls:
1. Second Rise: Cover the pan loosely with plastic wrap or a towel and let the rolls rise again in a warm place until puffy, about 30-45 minutes. They should look significantly larger and spring back slowly when poked.
2. Preheat & Bake: Preheat your oven to 350°F (175°C) during the last 10 minutes of the second rise. Bake the rolls for 25-30 minutes, or until they are deeply golden brown on top and sound hollow when tapped on the bottom. The internal temperature should reach around 190-200°F (88-93°C) if you have a thermometer.
3. Cool Slightly: Remove the pan from the oven and let the rolls cool in the pan for at least 15 minutes. This allows them to set slightly and makes frosting easier.
The Frosting: Silky Vanilla Bliss
The frosting is the crowning glory:
1. Make the Frosting: In a medium bowl, beat the softened cream cheese and softened butter together until smooth and creamy. Add the vanilla extract and beat well.
2. Adjust Consistency: Gradually sift in the powdered sugar, beating on low speed until combined. Add heavy cream or milk 1 tablespoon at a time until you reach a thick but pourable consistency. It should be smooth and spreadable but not runny.
3. Frost Immediately: Spread or drizzle the frosting generously over the warm rolls. The heat helps the frosting melt slightly and soak in slightly, creating that signature melt-in-your-mouth experience. Serve warm for the ultimate indulgence.
Variations & Substitutions: Making it Your Own
- Add-Ins: Fold in 1/2 cup chopped pecans, walnuts, or raisins into the filling before rolling. Sprinkle a few extra cinnamon chips on top before baking.
- Different Frostings: Try a cream cheese glaze (add lemon juice), a simple powdered sugar glaze (add milk/vanilla), or a maple glaze (replace vanilla with maple extract).
- Whole Wheat Option: Substitute up to 1 cup of the bread flour with whole wheat flour for a nuttier flavor and added fiber (texture may be slightly denser).
- Dairy-Free: Use almond milk or oat milk instead of whole milk. Use vegan butter and a vegan cream cheese substitute for the frosting. Ensure your yeast is vegan.
- Gluten-Free: Use a high-quality gluten-free all-purpose flour blend (check for a 1:1 ratio) and ensure your yeast is gluten-free. The texture will be different but still delicious.
Storage & Reheating: Keeping the Magic Alive
- Room Temperature: Store frosted or unfrosted rolls in an airtight container at room temperature for up to 2 days. The frosting might soften slightly.
- Refrigerator: For longer storage (up to 5 days), refrigerate the rolls (unfrosted) in an airtight container. Let them come to room temperature before frosting and reheating.
- Freezing: Freeze unfrosted rolls (or frosted rolls individually wrapped) for up to 3 months. Thaw overnight in the fridge, then reheat as below.
- Reheating: Reheat individual rolls in the microwave for 15-20 seconds for a quick warm-up. For a softer texture, reheat at 300°F (150°C) for 5-8 minutes. Avoid overheating to prevent drying out.
Common Mistakes to Avoid: Mastering the Technique
- Hot Milk: Killing the yeast. Ensure milk is warm, not scalding.
- Over-Kneading: Creates tough, dense rolls. Knead just until smooth and elastic.
- Too Much Flour: Adding excessive flour during kneading or shaping leads to dryness. Use minimal flour on your surface.
- Rushing the Rise: Rolls won’t be as fluffy. Give them ample time to rise in a warm spot.
- Over-Baking: Leads to dry, hard rolls. Bake until golden brown and hollow-sounding.
- Frosting Too Early: Frosting warm rolls can make them soggy. Let them cool slightly first.
- Using Expired Yeast: Yeast won’t activate. Check the expiration date and proof it.
Your FAQs Answered
- Can I make these ahead? Absolutely! Prepare the dough through the first rise, shape the rolls, and refrigerate them overnight (covered). Let them come to room temperature for 30-45 minutes before baking. You can also freeze the shaped rolls.
- Why are my rolls dense? Likely due to over-kneading, using too much flour, not letting them rise long enough, or expired yeast. Double-check your technique.
- Can I use all-purpose flour? Yes, but the texture will be slightly less fluffy than with bread flour. Use 4 1/2 cups.
- How do I know when the dough is ready? It should be smooth, elastic, and spring back slowly when poked. It should feel slightly tacky but not sticky.
- Can I skip the butter in the filling? The butter is crucial for flavor and creating the cinnamon sugar layers. Don’t skip it.
- What if my frosting is too thick? Add a teaspoon of heavy cream or milk at a time until it reaches the desired consistency.
- Can I make these without a stand mixer? Yes! You can knead the dough by hand on a lightly floured surface for 8-10 minutes until smooth and elastic. It requires a bit more effort but is very achievable.
The Final Touch: A Celebration of Comfort
These ultra fluffy cinnamon rolls are more than just a recipe; they’re a tradition waiting to happen. The tender layers, the aromatic cinnamon, and the melt-in-your-mouth vanilla frosting create a symphony of comfort that’s hard to beat. Whether you’re enjoying them for breakfast, as an afternoon treat, or as a special dessert, they promise to bring smiles and warmth to any table. Gather your ingredients, roll up your sleeves, and create a batch of these heavenly delights. The aroma alone will make your home feel like a cozy haven. Enjoy every single, fluffy bite!