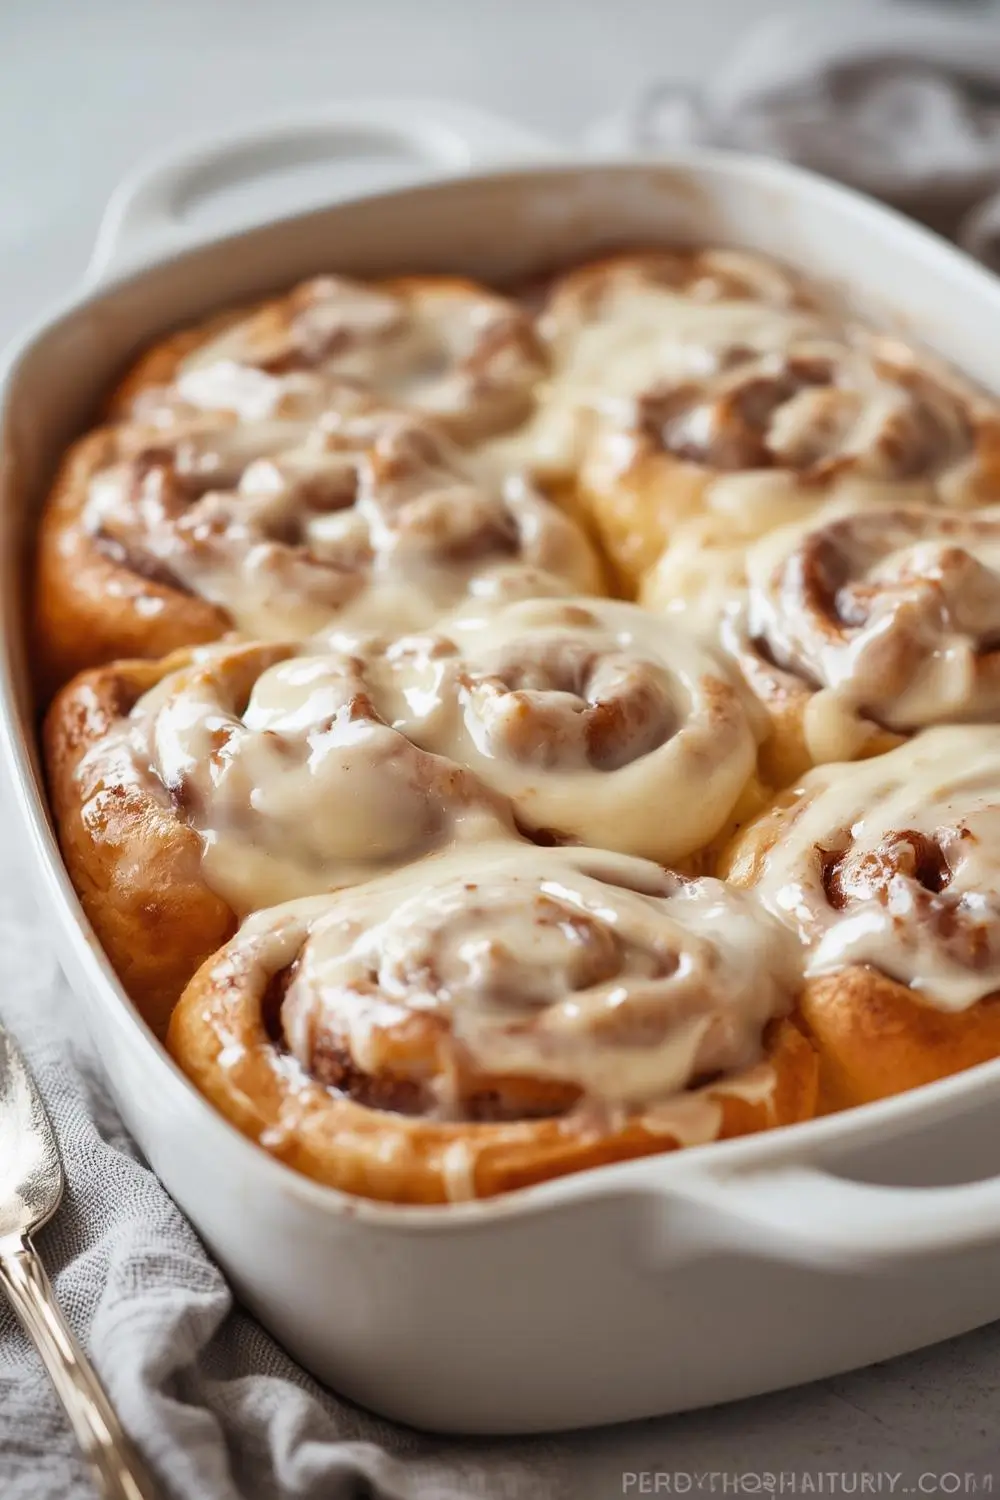
There’s something undeniably magical about the aroma of cinnamon rolls baking in the oven. That warm, sweet, spiced scent promises comfort and indulgence, and biting into one reveals layers of tender, pillowy dough wrapped around a gooey cinnamon-sugar filling, all crowned with a luxurious, melt-in-your-mouth cream glaze. These aren’t just breakfast pastries; they’re a celebration of simple ingredients transformed into pure comfort. Today, I’m sharing my foolproof recipe for Soft Fluffy Cinnamon Rolls with Silky Cream Glaze, designed to be beginner-friendly and absolutely foolproof. Forget the dry, dense versions you might have tried before – this recipe delivers restaurant-quality results right in your own kitchen.
Why This Recipe Works Wonders
The secret lies in the details. We’re using a rich, slightly enriched dough that rises beautifully, creating that coveted soft, fluffy texture. The filling is generously spiced but not overpowering, and the glaze? Oh, the glaze is pure magic. It’s not overly sweet, but it melts into every warm, tender layer, adding a subtle richness that elevates the entire experience. This recipe is crafted for the Pinterest audience, optimized for search, and designed to be shared, pinned, and loved. Let’s dive in!
Gathering Your Ingredients: The Foundation of Flavor
Before we get our hands sticky, let’s gather everything you’ll need. Don’t worry, it’s all straightforward pantry staples!
- For the Dough:
* 4 1/2 to 5 cups (560-625g) all-purpose flour (plus extra for dusting)
* 1 cup (240ml) whole milk, warmed to about 110°F (43°C) – just warm to the touch, not hot
* 1/4 cup (56g) unsalted butter, melted and slightly cooled
* 1/4 cup (50g) granulated sugar
* 1 large egg, at room temperature
* 1 large egg yolk, at room temperature
* 1 1/2 teaspoons salt
* 2 1/4 teaspoons (1 standard packet) active dry yeast or instant yeast
- For the Cinnamon Sugar Filling:
* 1/2 cup (100g) packed light brown sugar
* 2 tablespoons ground cinnamon
* 1/4 teaspoon ground nutmeg (optional, but recommended)
* 1/4 teaspoon salt
* 1/4 cup (56g) unsalted butter, softened to room temperature
- For the Silky Cream Glaze:
* 1 1/2 cups (180g) powdered sugar (confectioners’ sugar)
* 2 tablespoons heavy cream or whole milk
* 1 teaspoon pure vanilla extract
* Pinch of salt
Understanding Your Ingredients: Why They Matter
- Flour: All-purpose flour is perfect. Bread flour gives extra chew, but all-purpose is ideal for this tender roll. Measure accurately by spooning flour into the cup and leveling it off.
- Milk: Warm milk activates the yeast. Too hot kills it, too cold won’t activate it. Whole milk adds richness; skim works but yields slightly less tender rolls.
- Butter: Unsalted butter is key for control. Melted butter in the dough adds tenderness. Softened butter blends easily into the filling.
- Sugar: Granulated sugar sweetens the dough. Brown sugar in the filling adds molasses depth and moisture.
- Eggs & Egg Yolk: These enrich the dough, add structure, and contribute to the beautiful golden color.
- Yeast: Active dry or instant yeast works. Instant yeast can be mixed directly with the dry ingredients. Ensure it’s fresh!
- Cinnamon & Nutmeg: Classic pairing. Nutmeg adds a subtle warmth that complements cinnamon beautifully.
- Powdered Sugar: Gives the glaze its silky texture. Sift it to avoid lumps.
- Heavy Cream/Milk: Heavy cream makes the glaze richer and silkier. Milk works fine.
- Vanilla & Salt: Enhance flavor and balance sweetness.
Step-by-Step Instructions: From Bowl to Baking Bliss
Now, let’s transform these ingredients into heavenly rolls. This process is surprisingly straightforward with a little patience for the rising times.
1. Activate the Yeast (If using active dry yeast): Combine the warm milk, melted butter, and granulated sugar in a large mixing bowl. Sprinkle the yeast over the top. Let it sit for 5-10 minutes until foamy and fragrant. If using instant yeast, skip this step and add it directly to the dry ingredients.
2. Combine the Wet Ingredients: Add the egg, egg yolk, and salt to the yeast mixture (or dry ingredients if using instant yeast). Whisk vigorously until well combined and slightly frothy.
3. Incorporate the Flour: Gradually add 4 1/2 cups of the flour, one cup at a time, mixing with a wooden spoon or sturdy spatula after each addition. The dough will start to come together but will be very sticky. Don’t add all the flour yet!
4. Knead the Dough: Turn the dough out onto a lightly floured surface. Begin kneading, adding small amounts of the remaining flour (up to 1/2 cup more) as needed to prevent sticking. Knead for about 8-10 minutes. The dough is ready when it becomes smooth, elastic, and springs back when you gently poke it. It should be soft but not overly sticky.
5. First Rise (Bulk Fermentation): Place the kneaded dough in a lightly oiled bowl, turning it once to coat. Cover the bowl tightly with plastic wrap or a damp kitchen towel. Let it rise in a warm, draft-free spot until doubled in size, about 1 to 1.5 hours. You can place the bowl in an oven with the light on or near a warm appliance.
6. Prepare the Filling: While the dough rises, mix the brown sugar, cinnamon, nutmeg, and salt in a small bowl. Add the softened butter and rub it in with your fingers until the mixture resembles coarse crumbs. Set aside.
7. Shape the Rolls:
* Punch down the risen dough gently to release air bubbles.
* Turn it out onto a lightly floured surface and roll it into a 12×18 inch rectangle (roughly). Aim for even thickness.
* Spread the softened butter evenly over the dough, leaving a 1/2-inch border around the edges.
* Sprinkle the cinnamon sugar mixture evenly over the butter.
8. Roll and Cut: Starting from the long edge, carefully roll the dough up tightly into a log. Pinch the seam closed. Using a sharp knife or dental floss, cut the log into 12 equal pieces (about 1.5 inches thick). Place the rolls cut-side up in a lightly greased 9×13 inch baking dish, leaving a little space between them.
9. Second Rise (Proofing): Cover the dish loosely with plastic wrap or a towel. Let the rolls rise again in a warm spot until they are noticeably puffy and have doubled in size, about 30-45 minutes. They should look soft and full.
10. Preheat and Bake: While the rolls rise, preheat your oven to 350°F (175°C). Once the rolls are puffy, place them in the preheated oven and bake for 25-30 minutes, or until the tops are golden brown and the rolls are cooked through. A thermometer inserted into the center should read 190-200°F (88-93°C).
11. Make the Glaze: While the rolls bake, whisk together the powdered sugar, heavy cream (or milk), vanilla extract, and a pinch of salt until smooth and glossy. The consistency should be pourable but thick enough to coat the back of a spoon. If it’s too thick, add a tiny bit more cream; if too thin, add a touch more powdered sugar.
12. Glaze and Serve: As soon as the rolls come out of the oven, drizzle the warm glaze evenly over the top. The heat helps the glaze melt into the rolls beautifully. Let them cool in the pan for 10-15 minutes before serving. The glaze will set slightly as it cools.
Variations and Substitutions: Making it Your Own
- Different Fillings: Swap the cinnamon sugar for a chocolate-hazelnut spread (like Nutella), a brown sugar-cinnamon-pecan mix, or even a simple lemon zest and sugar filling. Get creative!
- Glaze Variations: Add a splash of orange juice to the glaze for a citrus twist. For a richer glaze, use half heavy cream and half melted butter. Sprinkle with chopped nuts or flaky sea salt before the glaze sets.
- Dough Variations: Substitute 1 cup of the flour with whole wheat flour for a heartier roll. Use buttermilk instead of milk for extra tang. Add 1/2 cup of raisins or chopped dried apricots to the filling.
- Yeast Substitutions: If you don’t have yeast, you can use a sourdough starter (reduce flour by 1/2 cup and add 1/4 cup starter liquid), but the texture will be different. Baking powder can be used for a quick version, but it won’t be as light and fluffy.
Storage and Reheating: Keeping the Magic Alive
- Storage: Store leftover rolls in an airtight container at room temperature for up to 2 days. For longer storage, wrap individual rolls tightly in plastic wrap and freeze for up to 1 month. Thaw overnight at room temperature and reheat gently.
- Reheating: Reheat leftover rolls in a 300°F (150°C) oven for 5-10 minutes until warmed through and slightly crisp on the bottom. You can also reheat individual rolls in the microwave for 15-20 seconds, but this can make them slightly chewy. For the best texture, oven reheating is recommended.
Common Mistakes to Avoid: Mastering the Process
- Killing the Yeast: Using milk that’s too hot (above 110°F/43°C) will kill the yeast. Test the milk with your finger – it should feel warm, not hot.
- Over-Kneading: Over-kneading develops too much gluten, leading to tough, dense rolls. Knead just until the dough is smooth and elastic.
- Under-Rising: If the dough doesn’t rise enough, the rolls won’t be light and fluffy. Ensure your rising spot is warm and draft-free. Don’t rush it!
- Overfilling: Too much filling can cause the rolls to leak and burn. Spread the filling evenly and leave that border.
- Under-Baking: Rolls need to be golden brown and cooked through. Use a thermometer to ensure they reach 190-200°F (88-93°C) in the center.
- Glaze Too Thin/Thick: Adjust the glaze consistency by adding more powdered sugar (thicken) or more cream/milk (thin). Taste it before drizzling!
- Skipping the Second Rise: This rise is crucial for the rolls to puff up beautifully. Don’t skip it!
Frequently Asked Questions: Your Cinnamon Roll Queries Answered
1. Can I make these ahead of time? Absolutely! You can prepare the dough through step 8 (cutting the rolls), place them in the pan, cover tightly, and refrigerate overnight. Let them come to room temperature for about 1 hour before baking. They might need a few extra minutes in the oven.
2. My rolls didn’t rise much in the second rise. What happened? This is often due to a cold rising spot, old yeast, or over-kneading. Ensure your rising area is warm and draft-free. Check your yeast expiration date. Gently kneading the dough after the first rise (punching it down) helps redistribute the yeast.
3. Can I use milk alternatives? Yes, you can use almond milk, soy milk, or oat milk. Just ensure they are unsweetened and fortified with calcium. You might need to slightly adjust the liquid amount as some alternatives are thinner.
4. How do I prevent the rolls from sticking to the pan? Generously grease your baking dish with butter or non-stick spray. You can also line it with parchment paper for easy removal.
5. Can I freeze the baked rolls? Yes! Let them cool completely, then wrap each roll tightly in plastic wrap and place them in a freezer bag. Freeze for up to 1 month. Reheat as described above.
6. My glaze is lumpy. How do I fix it? Sift the powdered sugar before adding it to the glaze mixture. Whisk vigorously until smooth. If lumps remain, strain the glaze through a fine-mesh sieve.
7. Can I make these without a mixer? Yes! You can mix the dough by hand using a sturdy wooden spoon and then knead it on a floured surface. It just takes a bit more elbow grease.
8. Why are my rolls dense? This usually happens if the dough isn’t kneaded enough, the yeast wasn’t activated properly, or the rolls didn’t rise long enough. Follow the kneading and rising times carefully.
9. Can I use a bread machine? Yes! Add all the dough ingredients (except the flour for dusting) to the bread machine pan in the order recommended by your machine. Select the dough cycle. Once the cycle finishes, proceed with shaping and baking as directed.
10. What’s the best way to serve them? Warm from the oven is ideal! Serve plain, or with a scoop of vanilla ice cream melting over the top. They’re also fantastic with a cup of coffee or hot chocolate.
The Sweet Conclusion: A Reward Worth the Wait
There you have it – the blueprint for creating the most heavenly, soft, fluffy cinnamon rolls you’ve ever tasted, crowned with a silky cream glaze that melts into every tender layer. This recipe is more than just instructions; it’s a journey into the heart of baking comfort. The aroma filling your kitchen, the anticipation as they bake, the moment you pull them from the oven and drizzle that warm glaze over their golden tops – it’s pure joy. These rolls are perfect for a special weekend breakfast, a holiday treat, or simply a moment of pure indulgence. They embody the magic of transforming simple ingredients into something extraordinary. So, gather your ingredients, roll up your sleeves, and get ready to create a batch of cinnamon rolls that will become a cherished tradition in your home. Happy baking!