Imagine the aroma of a freshly baked loaf filling your kitchen – warm, inviting, and utterly irresistible. Now, picture that loaf being incredibly simple to make, using just a few humble ingredients you likely already have, and transforming that seemingly useless sourdough discard into something truly magical. This isn’t just bread; it’s a celebration of resourcefulness and the pure, unadulterated joy of homemade goodness. Welcome to the world of Simple Sourdough Discard Bread Delight!
This recipe is designed for everyone. Whether you’re a seasoned sourdough baker or a complete beginner who’s never even looked at a loaf of bread before, this straightforward approach will have you enjoying the satisfying crunch of a crusty exterior and the tender, airy crumb inside in no time. Forget complicated techniques or fancy equipment – this is about harnessing the natural power of your sourdough starter to create something utterly delicious and uniquely yours.
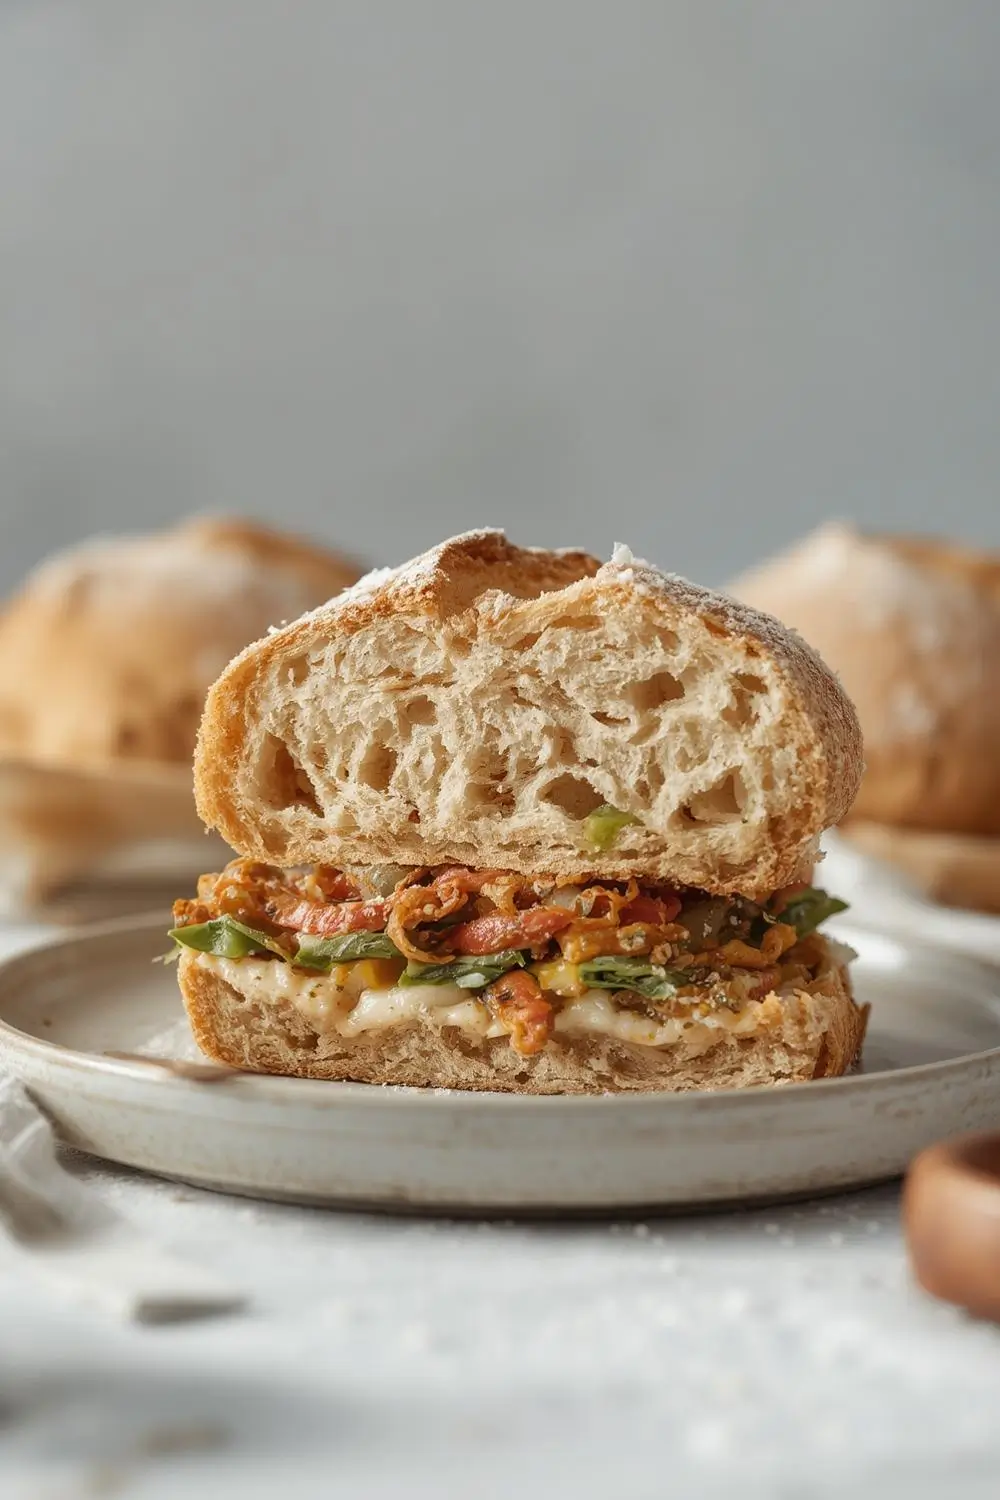
The beauty of this bread lies in its simplicity and its foundation: your sourdough discard. That tangy, bubbly mixture you often find yourself with after feeding your starter? Instead of letting it languish in the fridge, it becomes the heart of this recipe. It lends incredible flavor, a beautiful open crumb structure, and a subtle tang that pairs perfectly with everything from classic peanut butter and jelly to a simple slice of sharp cheddar. Best of all, it requires no added oils, fats, or fancy sauces – just pure, wholesome ingredients working together harmoniously.
So, let’s dive in. We’ll explore the ingredients, break down the process step-by-step with helpful tips, discuss delicious variations, and ensure you know exactly how to store and enjoy your creation to the fullest. By the end, you’ll not only have a fantastic loaf of bread but also the confidence to experiment and make it your own. Let’s get baking!
Ingredients: The Building Blocks of Flavor
The magic of this bread rests on just a handful of ingredients, each playing a crucial role:
1. Sourdough Discard: This is the star! Typically made from equal parts flour and water mixed with your active sourdough starter, discard is the portion you remove before feeding your starter to keep it healthy. It’s tangy, bubbly, and packed with flavor. Use your discard at its peak tanginess, usually 5-7 days old and refrigerated. The amount needed depends on your starter’s hydration and the desired loaf size, but we’ll guide you precisely.
2. All-Purpose Flour: This provides the structure and texture. While bread flour offers extra chew, all-purpose works wonderfully here, creating a tender crumb that’s perfect for sandwiches. You can even use a mix of all-purpose and whole wheat for added nuttiness and fiber if you prefer.
3. Water: Filtered or spring water is best, as tap water can sometimes interfere with yeast activity. The temperature matters too – lukewarm (around 100-110°F or 38-43°C) is ideal for activating the yeast in your discard and ensuring a good rise.
4. Salt: Essential for flavor development and controlling yeast activity. It strengthens the gluten structure, leading to better texture and a more stable loaf. Use fine sea salt or table salt.
5. Active Dry Yeast (Optional but Recommended): While sourdough discard contains wild yeast, adding a small amount of active dry yeast gives the dough an extra boost, especially helpful for beginners or in cooler environments. It ensures a reliable rise and helps the bread develop a slightly larger crumb. Use about 1/4 teaspoon per loaf.
Why these ingredients? They work together synergistically. The discard provides the sourdough flavor and natural leavening. The flour and water form the dough matrix. Salt enhances flavor and texture. The optional yeast gives confidence and speed. No need for complicated additives – just pure, natural ingredients creating pure flavor.
Step-by-Step Instructions: From Bowl to Beautiful Loaf
Now, let’s transform those ingredients into a stunning loaf. This process is straightforward and forgiving, perfect for beginners.
1. Preparing the Dough:
* In a large mixing bowl, combine your measured sourdough discard, lukewarm water, and active dry yeast (if using). Stir gently until the yeast is mostly dissolved and the mixture looks slightly bubbly. Let it sit for 5-10 minutes – this is called “proofing” the yeast. You should see some foam forming on top, confirming the yeast is active.
* Add the salt and stir to combine.
* Gradually add the measured all-purpose flour, stirring with a wooden spoon or your hands until a shaggy, sticky dough forms. Don’t worry about it being perfectly smooth yet; it will come together as you knead.
2. Kneading for Structure:
* Turn the dough out onto a lightly floured surface. Begin kneading. This is where you develop the gluten, giving the bread its structure and chew.
* Push the dough away from you with the heel of your hand, fold it back over itself, give it a quarter turn, and repeat. Knead for about 8-10 minutes. The dough will start smooth and elastic. It should feel slightly tacky but not sticky. If it’s too sticky, add a tiny bit more flour; if too dry, add a sprinkle of water. The goal is a smooth, springy dough that passes the “windowpane test” – you can stretch a small piece thin enough to see light through it without tearing.
Tip:* Kneading by hand is therapeutic! If you prefer, you can use a stand mixer fitted with a dough hook on low speed for 5-7 minutes.
3. First Rise (Bulk Fermentation):
* Lightly oil a clean bowl. Place the kneaded dough inside, turning it once to coat it lightly with oil. Cover the bowl tightly with plastic wrap or a damp kitchen towel.
* Let the dough rise in a warm, draft-free spot. This is the bulk fermentation stage. It usually takes 1.5 to 2.5 hours, but watch for it to roughly double in size. The exact time depends on your room temperature and the activity of your discard. Don’t rush it; patience here develops flavor and texture.
4. Shaping the Loaf:
* Once risen, gently punch down the dough to release the large air bubbles. Turn it out onto a lightly floured surface.
* Shape it into a smooth, tight ball. This helps create surface tension, which is crucial for a good rise and crust. You can also shape it into a simple oval loaf for a standard sandwich loaf shape.
* Place the shaped dough seam-side down into a lightly greased 9×5 inch loaf pan. Cover loosely with plastic wrap or a towel.
5. Second Rise (Proofing):
* Let the dough rise again in a warm spot. This time, it should rise until it crowns just above the rim of the pan, usually taking 45 minutes to 1.5 hours. The dough should feel puffy and spring back slowly when gently poked. Avoid letting it rise too much, or it might collapse in the oven.
6. Preheating and Scoring:
* About 30 minutes before baking, preheat your oven to 375°F (190°C). Place a baking sheet or cast iron skillet on the bottom rack to create steam.
* Just before putting the loaf in the oven, use a sharp knife or razor blade to make 2-3 shallow diagonal slashes across the top of the dough. This allows steam to escape and helps control the bread’s expansion, preventing unsightly cracks and ensuring an even crust.
7. Baking:
* Place the loaf pan on the middle oven rack. Pour about 1 cup of hot water into the preheated baking sheet or skillet on the bottom rack. This creates instant steam, which is vital for a crisp crust and good oven spring.
* Bake for 35-45 minutes. The bread is done when it’s deeply golden brown on top and the bottom sounds hollow when tapped. An instant-read thermometer inserted into the center should read 190-200°F (88-93°C).
8. Cooling:
* Carefully remove the loaf from the pan and place it on a wire rack. Crucially, resist the urge to slice it immediately! Let it cool completely, at least 1-2 hours. Cutting into hot bread traps steam inside, making it gummy and dense. Cooling allows the crumb to set beautifully, resulting in the perfect texture.
Variations and Substitutions: Making it Your Own
The beauty of this recipe is its adaptability. Here are some ideas to customize your Simple Sourdough Discard Bread Delight:
- Adding Flavor: Mix in 1/2 cup of seeds (sunflower, pumpkin, sesame) or chopped herbs (dill, rosemary, thyme) into the dough after the first rise but before shaping. Sprinkle seeds on top before baking.
- Whole Wheat Twist: Substitute up to 50% of the all-purpose flour with whole wheat flour for a nuttier flavor and denser crumb.
- Sweet Treat: Add 1/4 cup of honey or maple syrup and 1 teaspoon of vanilla extract to the dough for a slightly sweet sandwich bread.
- Olive Oil Loaf: Replace the water with lukewarm olive oil for a richer, moister crumb and a distinct flavor.
- Gluten-Free Option: Unfortunately, this specific sourdough discard method relies on wheat flour for structure. A dedicated gluten-free sourdough discard bread recipe would use a different base flour blend.
Storage and Reheating Tips: Keeping it Fresh
You’ll want to enjoy this bread for days! Here’s how to keep it at its best:
- Room Temperature: Store the cooled, completely unwrapped loaf in a paper bag or a bread box at room temperature. It will stay fresh and crusty for 2-3 days. The paper bag helps absorb excess moisture without trapping it.
- Refrigeration: If you live in a very humid climate or want to extend freshness slightly, wrap the cooled loaf tightly in plastic wrap or place it in a resealable bag before refrigerating. However, refrigeration can make the crust softer faster. Use within 4-5 days.
- Freezing: For long-term storage, wrap the cooled, sliced loaf tightly in plastic wrap, then place it in a freezer bag or airtight container. Freeze for up to 3 months. To thaw, unwrap and let it thaw at room temperature on a wire rack. To refresh, toast slices directly from frozen.
Reheating: Bring back that fresh-baked crispness!
- Oven Method (Best for Whole Loaf): Preheat oven to 350°F (175°C). Place the unwrapped loaf directly on the middle rack and heat for 5-10 minutes until warmed through and the crust is crisp again.
- Toaster or Toaster Oven: Perfect for individual slices. Toast until heated through and crisp.
- Microwave (Quick Fix): Place a slice on a microwave-safe plate, cover loosely with a damp paper towel, and microwave on high for 15-20 seconds. The towel helps prevent drying out, but the crust won’t regain its original crispness.
Common Mistakes to Avoid: Baking Wisdom
Even experienced bakers encounter hiccups. Here’s how to sidestep common pitfalls:
- Over-Kneading: While kneading is important, over-kneading develops too much gluten, leading to a tough, chewy loaf. Knead until smooth and elastic (8-10 minutes by hand), but stop before it becomes stiff and difficult to work with.
- Under-Kneading: A dough that isn’t kneaded enough won’t develop proper structure, resulting in a dense, flat loaf that collapses easily. Ensure it passes the windowpane test.
- Rushing the Rise: Yeast needs time to work its magic. Don’t skip or shorten the bulk fermentation or proofing stages. Patience develops flavor and texture.
- Over-Proofing: Letting the dough rise too long after shaping can cause it to collapse in the oven. Watch for it to just crown above the pan rim.
- Skipping the Steam: Forgetting to create steam in the oven is a major culprit for a soft, pale crust. The water in the pan is essential.
- Cutting Too Soon: Slicing into hot bread traps steam, making it gummy. Always wait for complete cooling.
- Using Cold Ingredients: Using cold water or discard can slow down the yeast activity significantly. Use lukewarm liquids.
Frequently Asked Questions: Your Sourdough Questions Answered
- Q: What if my discard isn’t very active or tangy? A: That’s perfectly fine! This recipe works well with discard at any stage of activity or tanginess. Less active discard might mean a slightly slower rise, but the flavor will still be delicious. If it’s very inactive, you can add a pinch more active dry yeast.
- Q: Can I use my discard straight from the fridge? A: Yes, but it might take a bit longer to activate the yeast. Let it sit at room temperature for 30-60 minutes before mixing it with the water to help it come to life faster.
- Q: Why is my bread dense? A: This is often due to under-kneading (not enough gluten development), under-proofing (not enough rise), or over-proofing (collapse). Check your kneading time, rise times, and oven steam.
- Q: How do I know when it’s done baking? A: The golden brown color is a good sign, but the best test is tapping the bottom – it should sound hollow. An instant-read thermometer is the most reliable, aiming for 190-200°F (88-93°C).
- Q: Can I make this without active dry yeast? A: Absolutely! This is a sourdough bread, relying on the wild yeast and bacteria in your discard. The active dry yeast is optional and mainly for a boost. The bread will still be flavorful and delicious, just potentially slower rising.
- Q: My loaf has a sour smell. Is that normal? A: Yes! The tangy aroma comes from the sourdough fermentation. It’s a sign of a healthy, active starter and a delicious, flavorful bread. It shouldn’t smell unpleasant, just pleasantly tangy.
- Q: Can I use a different type of flour? A: You can experiment! Bread flour will give a slightly chewier crumb. Whole wheat flour adds nuttiness and fiber. Rye flour can be used in small amounts for flavor, but it requires adjustments. Start with all-purpose for the best beginner results.
- Q: How do I store sourdough discard properly? A: Keep it in a clean jar in the fridge. Feed it regularly (equal parts flour and water by weight) to keep it active. Use it within a week or two for best flavor, or freeze portions for later use.
Conclusion: The Joy of Simple Sourdough
Creating your own Simple Sourdough Discard Bread Delight is more than just baking; it’s a journey into the heart of homemade goodness. It transforms what might seem like kitchen waste into a cornerstone of delicious, nutritious meals. The process is accessible, the rewards are immense, and the results are a loaf that speaks of patience, resourcefulness, and pure flavor.
This bread isn’t just for sandwiches; it’s a canvas for your culinary creativity. Spread it with butter and honey, toast it for breakfast, or use it to make the ultimate grilled cheese. Each slice carries the story of your starter, your hands, and the simple magic of sourdough.
So, gather your discard, measure your flour, and let’s get baking. The aroma of your first Simple Sourdough Discard Bread Delight is waiting to fill your home. Enjoy every crusty bite of this rewarding and utterly delightful creation!


