Sheet PanHoney Garlic Chicken: The Ultimate Easy Dinner
Imagine a dinner that practically cooks itself, leaving you with minimal cleanup and maximum flavor. That’s the magic of Sheet Pan Honey Garlic Chicken. This one-pan wonder combines tender, juicy chicken thighs or breasts coated in a sticky-sweet, savory honey garlic sauce with vibrant roasted vegetables, all baked to perfection. It’s the epitome of effortless, delicious weeknight cooking that your whole family will love. Forget complicated recipes and hours in the kitchen – this is dinner made simple, yet incredibly satisfying.
Why This Recipe is a Game-Changer
Sheet pan dinners are a lifesaver for busy weeknights. They streamline the cooking process, reduce the number of dishes you have to wash, and often result in beautifully caramelized, flavorful food. This Honey Garlic Chicken takes that concept to the next level. The honey garlic sauce, with its perfect balance of sweetness and umami, clings beautifully to the chicken and vegetables, creating a mouthwatering glaze. Roasting the chicken and veggies together allows them to share flavors and textures, resulting in tender chicken, crisp-tender vegetables, and a sauce that thickens deliciously in the oven. It’s a complete, balanced meal in one pan.
The Perfect Ingredients for Success
The beauty of this recipe lies in its simplicity and the quality of its core ingredients. Here’s what you’ll need:
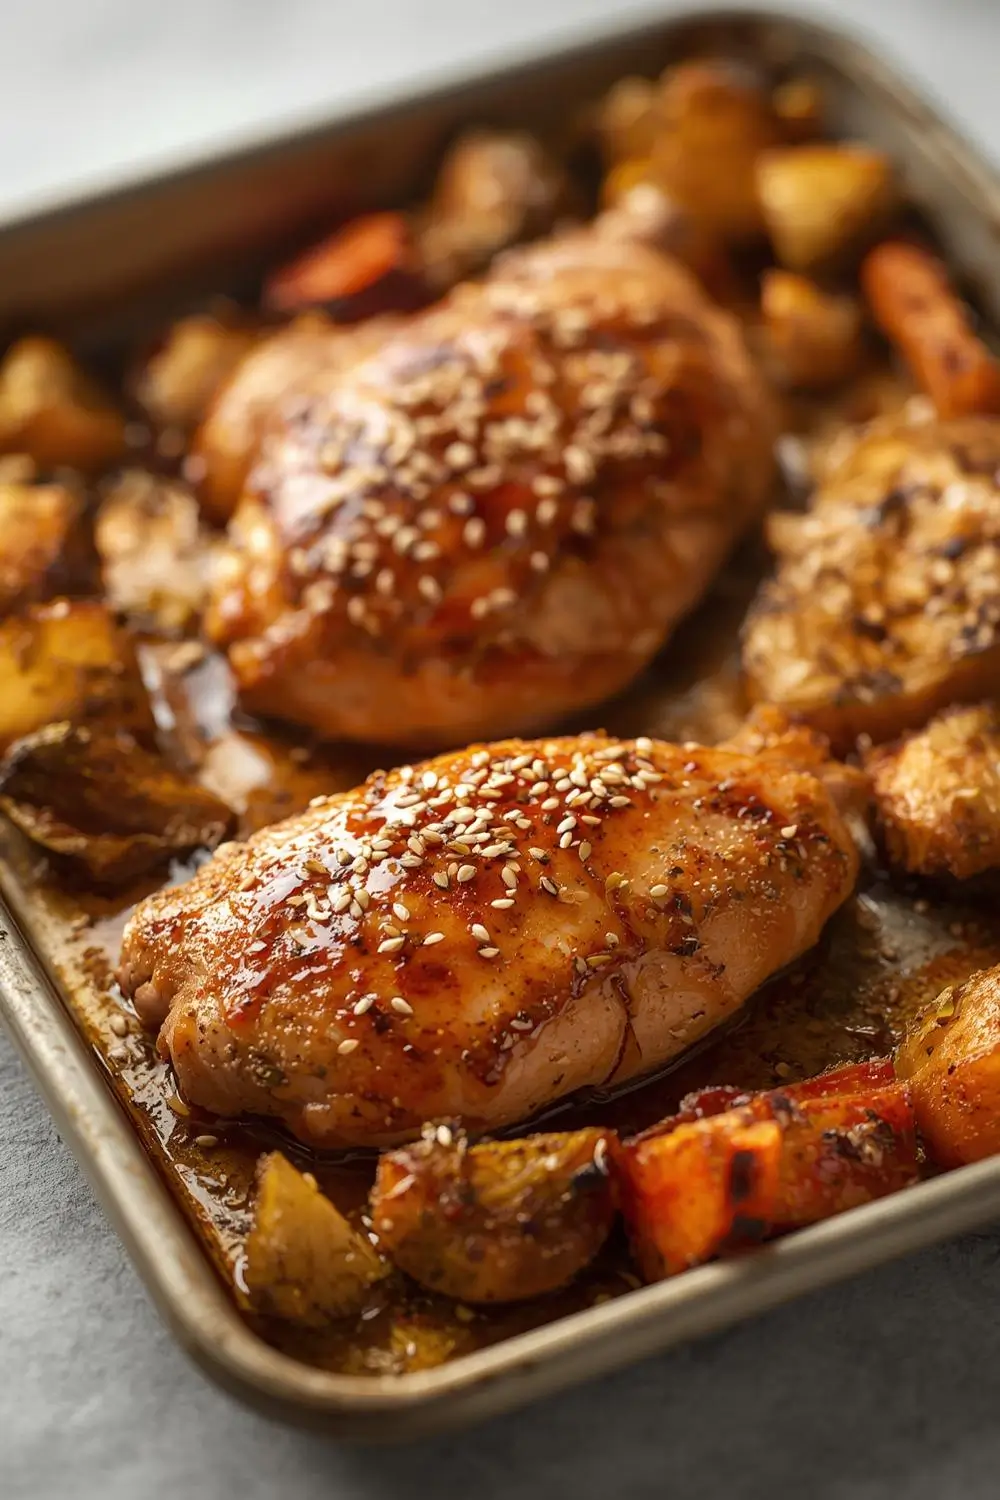
- Chicken: Boneless, skinless chicken thighs are our top choice. They are incredibly juicy and forgiving, less likely to dry out than breasts, and their slightly higher fat content contributes fantastic flavor. Chicken breasts work too, but be extra vigilant about not overcooking them. Avoid chicken tenders or cutlets as they can dry out quickly.
- Honey: Use pure honey for the best flavor. It adds the essential sweetness that balances the garlic and soy sauce. Avoid honey substitutes like agave or maple syrup for the authentic taste.
- Soy Sauce: Regular soy sauce provides the savory, salty base. For a gluten-free option, use tamari.
- Garlic: Fresh garlic, minced or finely grated, is non-negotiable. It provides the pungent, aromatic backbone of the sauce. Bottled minced garlic just won’t deliver the same depth.
- Olive Oil: Extra virgin olive oil is ideal for roasting the vegetables and chicken. It has a nice flavor and helps with browning.
- Vegetables: The star vegetables are broccoli florets and bell peppers (any color). They roast beautifully alongside the chicken, absorbing the honey garlic sauce. Feel free to add onion wedges (red or yellow), zucchini slices, or asparagus spears for extra variety and color. Avoid very watery vegetables like mushrooms or tomatoes, which can make the pan soggy.
- Seasonings: A pinch of salt and black pepper enhances all the flavors. A dash of red pepper flakes adds a subtle kick if you like a little heat. Sesame seeds (white or black) are a fantastic garnish for extra crunch and nuttiness.
- Optional Thickener: A teaspoon of cornstarch or tapioca starch mixed with a tablespoon of water can be whisked into the sauce towards the end of cooking if you prefer a slightly thicker glaze.
Step-by-Step: From Pan to Plate
1. Prep the Chicken & Veggies: Pat the chicken thighs dry with paper towels. This is crucial for achieving a good sear. Cut them into 1.5-2 inch chunks if they are large. Toss the broccoli florets and bell pepper slices with olive oil, salt, and pepper on a large rimmed baking sheet. Spread them out in a single layer.
2. Make the Honey Garlic Sauce: In a small bowl, whisk together the honey, soy sauce, minced garlic, salt, pepper, and red pepper flakes (if using). This is your magic sauce!
3. Combine & Bake: Place the chicken chunks on the baking sheet with the vegetables, leaving a bit of space around each piece. Pour the honey garlic sauce evenly over the chicken and vegetables. Using tongs, gently toss everything together until the chicken and veggies are well coated. Ensure the chicken pieces are not overcrowded; they need space for the skin to crisp up if using thighs.
4. Roast to Perfection: Place the sheet pan in a preheated oven (350°F / 175°C is ideal) for 25-30 minutes. After 25 minutes, carefully remove the pan. Check the chicken: it should be cooked through (internal temperature of 165°F / 74°C) and the vegetables tender-crisp. If the sauce looks too thin, whisk the cornstarch slurry and drizzle it over the chicken and veggies, tossing gently. Return to the oven for 3-5 more minutes to thicken the sauce slightly.
5. Rest & Serve: Let the sheet pan chicken rest for 5 minutes before serving. This allows the juices to redistribute, keeping the chicken extra juicy. Garnish generously with sesame seeds and perhaps a sprinkle of chopped fresh cilantro or green onions if desired.
Tips for Sheet Pan Success
- Don’t Overcrowd: This is the #1 mistake! Give the chicken and veggies plenty of room on the pan. Crowding leads to steaming instead of roasting, resulting in soggy chicken and vegetables.
- Pat Dry: Dry chicken is key for browning and crispiness.
- Uniform Size: Cut chicken and veggies into similar-sized pieces so they cook at the same rate.
- High Heat: A hot oven (350°F is a good starting point) ensures proper caramelization and browning.
- Toss Gently: When adding the sauce, toss gently but thoroughly to coat everything without breaking the chicken pieces.
- Check Doneness: Use a meat thermometer for the chicken. Visual cues (juices running clear, no pink) are helpful but a thermometer is most reliable.
- Sauce Thickening: If the sauce is too thin after roasting, the cornstarch slurry trick works wonders.
Variations & Substitutions: Make it Your Own
- Protein Swap: Use boneless, skinless chicken breasts (watch cooking time closely). For a vegetarian option, try firm tofu cubes or tempeh (press tofu well first). Ensure tofu/ tempeh is well-coated in the sauce.
- Vegetable Swaps: Swap broccoli for cauliflower florets, green beans, or asparagus. Use red onion instead of yellow. Add baby carrots or baby potatoes (par-cook potatoes first for even cooking). Avoid adding too many soft vegetables like mushrooms or tomatoes.
- Sauce Flavor Boost: Add a teaspoon of grated ginger to the sauce for extra zing. A splash of rice vinegar or apple cider vinegar adds brightness. For a deeper umami, a teaspoon of fish sauce (use sparingly) or miso paste can be added.
- Gluten-Free: Use tamari instead of soy sauce.
- Lower Sugar: Reduce the honey by 1-2 tablespoons if you prefer less sweetness. The sauce will be tangier.
- Spice It Up: Increase the red pepper flakes or add a pinch of cayenne pepper to the sauce.
Storage & Reheating: Enjoy Leftovers
- Cooling: Let the sheet pan chicken and veggies cool completely before storing.
- Storage: Transfer leftovers to an airtight container. Store in the refrigerator for up to 3-4 days.
- Reheating: Reheat individual portions in the microwave for 1-2 minutes, stirring halfway, until steaming hot. For best texture, reheat in a skillet over medium-low heat with a splash of water or broth, stirring occasionally, for 5-7 minutes. Avoid reheating in the oven as it can dry out the chicken.
Avoiding Common Pitfalls
- Dry Chicken: Overcooking is the enemy. Use a thermometer and remove chicken at 165°F. Resting is essential.
- Soggy Chicken/Veggies: Crowding the pan is the primary culprit. Ensure good airflow.
- Thin Sauce: Not roasting long enough or not thickening properly. Use the cornstarch slurry trick if needed.
- Underseasoned: Taste the sauce before adding it to the chicken! Season the sauce well before tossing.
- Burned Sauce: If the sauce seems to be thickening too quickly or browning too much, tent the pan loosely with foil.
Your Burning Questions Answered
- Can I make this ahead? Yes! Prep the chicken and veggies, mix the sauce, and store them separately in the fridge. Assemble and bake when ready.
- Can I freeze it? Yes, freeze the assembled chicken and veggies (without sauce) and the sauce separately. Thaw overnight in the fridge before baking.
- What if I don’t have honey? Substitute with maple syrup or agave nectar (use slightly less as they are sweeter). The flavor will be different.
- Can I use chicken breasts? Absolutely, but cook them for less time initially (15-20 mins) and check frequently. They can dry out faster.
- Is this kid-friendly? Yes! The honey garlic flavor is generally appealing. You can adjust the spice level by reducing or omitting the red pepper flakes.
- Can I add pasta or rice? Definitely! Serve the sheet pan chicken and veggies over cooked rice, quinoa, or pasta for a complete one-pan meal.
- What sides go well? Simple steamed rice, quinoa, or crusty bread to soak up the delicious sauce. A side salad adds freshness.
The Final Bite
Sheet Pan Honey Garlic Chicken is more than just a recipe; it’s a revelation in easy, flavorful cooking. It embodies the joy of a complete, satisfying meal coming together with minimal effort and maximum taste. The sticky-sweet sauce, the tender chicken, and the perfectly roasted vegetables create a symphony of flavors and textures that will have everyone asking for seconds. It’s the ultimate weeknight hero, ready to transform your dinner routine. Give it a try tonight – your future self (and your taste buds) will thank you. Pin this recipe and make sheet pan dinners your new go-to!
Pin this recipe for later!