Table of Contents
Introduction to Rising Recipes
When it comes to baking, one of the most exciting and essential processes is the rise. Whether you’re crafting a warm loaf of bread, a soft cake, or a flaky pastry, the science of rising recipes can make all the difference. The transformation that occurs when dough or batter rises is nothing short of magical. It’s the moment when your humble ingredients take shape, filling your kitchen with delightful smells and anticipation. In this guide, we’ll walk you through everything you need to know about rising recipes: from understanding leavening agents to troubleshooting common baking problems.
Baking isn’t just about mixing flour and water—it’s about activating the right ingredients to create texture and flavor that will make your recipes a hit. So, whether you’re a seasoned baker or a newbie looking to dive into the world of rising, you’ve come to the right place. We’ll explore the types of rising recipes, the ingredients that help them rise, and share a few tips and tricks along the way. Let’s get ready to see dough rise, cakes soar, and pastries puff up!
Essential Ingredients in Rising Recipes
When it comes to creating a perfectly risen dish, the right ingredients are key. While we’ve discussed leavening agents like yeast and baking powder, there are other essential ingredients that play a critical role in helping your recipes rise to the occasion. Let’s dive into the ingredients that can make all the difference in your rising recipes, from flours to liquids.
Flour
Flour is the backbone of most rising recipes. Different types of flour will affect how well your dough or batter rises. For instance, bread flour contains higher levels of protein, which leads to more gluten formation, making it ideal for recipes like bread or pizza dough. On the other hand, cake flour has a lower protein content, which is perfect for softer, more delicate items like cakes and pastries.
Flour types also affect how much liquid is absorbed, which can impact the rise. The right flour combined with proper hydration can lead to a perfect dough with enough structure to trap air bubbles produced by leavening agents.
Liquids
The liquid in your recipe is vital to activating your leavening agents and creating a smooth dough or batter. Water is the most common liquid used, but many recipes call for milk, buttermilk, or even fruit juices. These liquids help dissolve the flour’s starches, which is essential for activating gluten (the protein that gives dough its structure) and ensuring the proper rise.
For yeast-based recipes, the temperature of the liquid is crucial—warm water activates the yeast, while too hot of a liquid can kill the yeast, stalling the rising process. Be sure to follow temperature guidelines in your recipes for optimal results.
Sweeteners and Fats
Sweeteners like sugar, honey, and maple syrup not only add flavor but can also help yeast thrive by providing the sugars it needs to ferment and produce gas. Fats, such as butter, oil, and coconut oil, play a role in creating a tender crumb and enriching the flavor of your baked goods. Fats also aid in keeping your baked goods moist, ensuring they don’t dry out after they’ve risen and baked.
Techniques for Achieving Optimal Rise
Now that you have the essential ingredients for your rising recipes, let’s talk about the techniques that can ensure you achieve the perfect rise every time. Whether you’re making fluffy bread or light-as-air cupcakes, the technique you use is just as important as the ingredients. Here’s a breakdown of the methods that will help you perfect your rise.
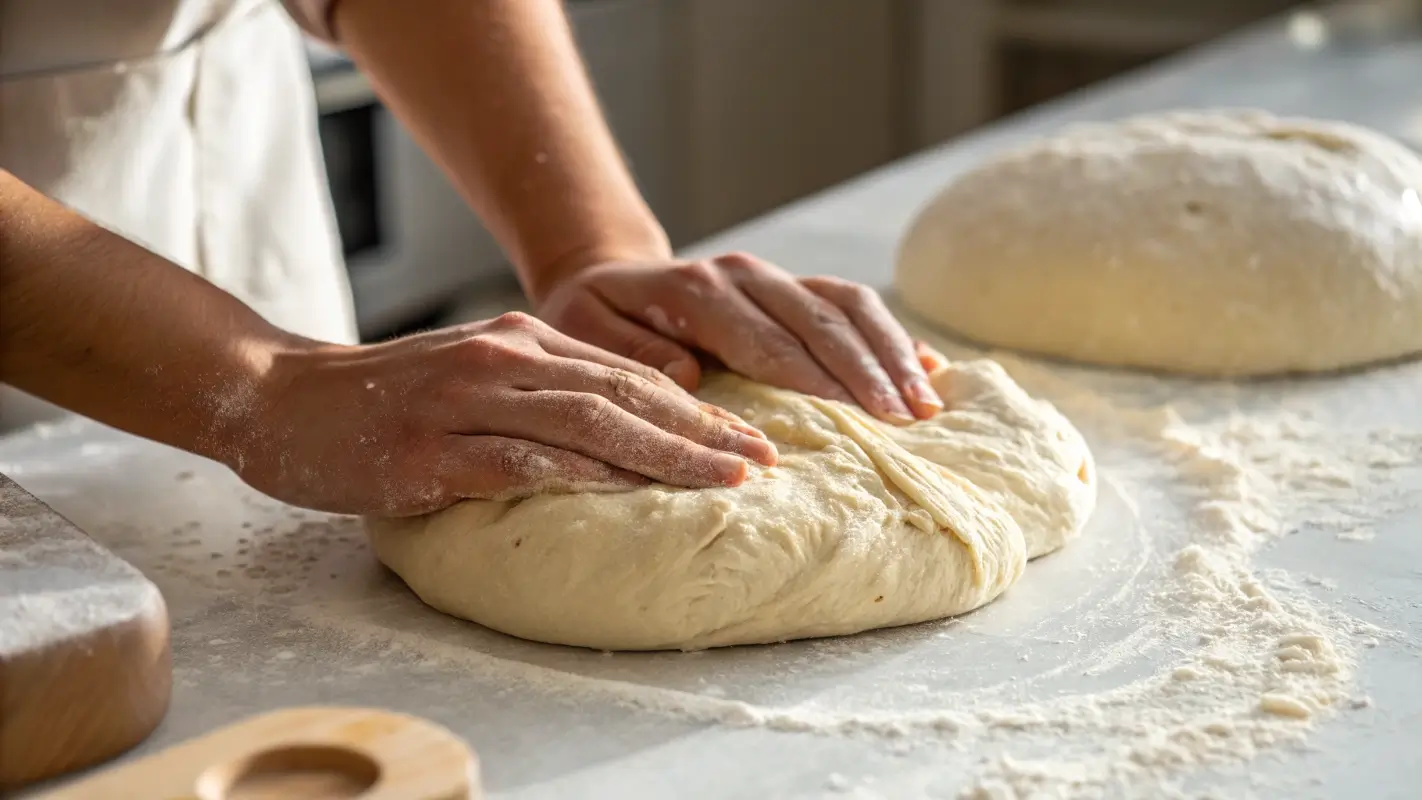
Kneading the Dough
Kneading is the process of working the dough with your hands (or a stand mixer) to develop the gluten network. Gluten is essential for trapping the gas produced by leavening agents, and kneading helps activate this protein structure. This step is vital when you’re working with yeast-based recipes like bread, rolls, or pizza dough.
You should knead your dough until it becomes smooth and elastic, usually around 8-10 minutes. Proper kneading will give your dough enough structure to hold its rise and ensure it bakes into a perfect texture. Over-kneading can lead to tough bread, so make sure not to overdo it.
Proofing and Resting
Proofing (also known as fermentation) is the process of letting your dough rest after it has been mixed and kneaded. This resting period allows the yeast to ferment, producing gas that causes the dough to rise. Proofing also helps develop the flavor of your bread or baked goods.
For optimal proofing, place your dough in a warm, draft-free area, covering it with a damp cloth or plastic wrap. Depending on the recipe, proofing can take anywhere from 30 minutes to 2 hours. Some recipes even call for cold fermentation, where dough is left to rise slowly in the refrigerator overnight.
Shaping the Dough
Once your dough has proofed and doubled in size, it’s time to shape it. Proper shaping is essential to achieve an even rise during baking. For bread, rolls, and other shaped dough, make sure to gently punch down the dough to release any large air pockets, then shape it into the desired form. When you shape the dough, don’t compress it too much—this could inhibit its rise.
For sweet doughs, try rolling the dough out gently to avoid deflating the air bubbles. And when you’re working with delicate batters (like cakes), be careful not to overmix, as this can lead to a dense texture instead of a light, airy result.
Popular Rising Recipes and Their Variations
Rising recipes are incredibly versatile and can span from savory to sweet, giving you endless opportunities to get creative in the kitchen. Let’s dive into some of the most popular rising recipes and their variations, so you can explore different approaches to your baking.
Classic Yeast Bread
Yeast bread is perhaps the most well-known rising recipe, and for good reason. The process of fermenting yeast to create bubbles that give bread its airy, light texture has been around for centuries. A basic loaf of bread is made using yeast, flour, water, and salt.
Variations:
- Whole Wheat Bread: Swap out some or all of the white flour for whole wheat flour. This adds a nutty flavor and extra fiber.
- Sourdough Bread: This variation relies on wild yeast and bacteria to naturally rise, creating a more tangy flavor.
- Garlic Herb Bread: Add minced garlic, rosemary, or thyme for an aromatic twist.
Pizza Dough
Pizza dough is another popular rising recipe, and it’s essential for a perfect crust. The right rise can make all the difference between a doughy, heavy pizza and a thin, crispy crust. The process is quite similar to bread-making but with added olive oil for richness.
Variations:
- Thin Crust Pizza Dough: Roll the dough out thinner for a more crispy texture.
- Gluten-Free Pizza Dough: Use a gluten-free flour blend to create a similar texture without gluten.
- Whole Wheat Pizza Dough: For a healthier option, replace all-purpose flour with whole wheat flour for a chewier texture.
Cinnamon Rolls
Cinnamon rolls are a sweet, indulgent treat that requires a perfect rise. They’re made with a rich, buttery dough that’s rolled up with cinnamon sugar before baking. These rolls rise slowly, creating fluffy layers and a sweet, caramelized finish.
Variations:
- Nutella Cinnamon Rolls: Add Nutella instead of cinnamon for a chocolatey, hazelnut twist.
- Pumpkin Spice Cinnamon Rolls: Perfect for fall, adding pumpkin puree and spices like nutmeg and cinnamon into the dough creates a delicious seasonal flavor.
- Vegan Cinnamon Rolls: Swap the butter and milk for plant-based alternatives like coconut oil and almond milk for a dairy-free version.
Brioche
Brioche is a French pastry that’s rich, buttery, and incredibly soft. This rising recipe requires multiple rises to create its signature light texture. Brioche dough can be used for everything from dinner rolls to decadent desserts like French toast.
Variations:
- Chocolate Brioche: Add chocolate chips or cocoa powder to the dough for a sweeter, chocolatey take.
- Fruit Brioche: Fold in dried fruit like raisins or cranberries for extra flavor and texture.
- Savory Brioche: Incorporate herbs and cheese into the dough for a savory twist.
Focaccia
Focaccia is a savory Italian bread that’s flat and fluffy with dimpled pockets. It’s often topped with herbs, olives, or other ingredients for added flavor. This is a fun and quick bread to make since it doesn’t require shaping into a loaf.
Variations:
- Rosemary Focaccia: A classic version, with fresh rosemary and sea salt.
- Olive Focaccia: Add black or green olives for a Mediterranean-inspired twist.
- Cheese Focaccia: Top with mozzarella or parmesan for a cheesy version of this simple bread.
Troubleshooting Common Rising Issues
Despite your best efforts, sometimes rising recipes don’t go as planned. But don’t worry! There are several common issues that can arise when baking with yeast or other rising agents, and knowing how to troubleshoot them can save your recipe.
Dough Won’t Rise
One of the most common issues when making rising recipes is dough that won’t rise. This can happen for several reasons, including improper yeast activation or the wrong temperature.
What to Do:
- Check the Yeast: Make sure your yeast is fresh and hasn’t expired. If you’re using active dry yeast, always activate it in warm water before adding it to your dough.
- Check the Temperature: Yeast thrives in a warm environment. If your kitchen is too cold, the dough may not rise. Try proofing the dough in a warm (but not hot) area, or place it in the oven with the light on.
Overproofed Dough
Overproofing happens when dough rises for too long, which causes it to lose its ability to rise during baking, leading to a dense texture.
What to Do:
- Watch the Time: Keep track of how long your dough is proofing. If you notice the dough is getting too puffy and collapsing, it’s time to shape it and bake.
- Gently Punch Down the Dough: If your dough has over-proofed, gently punch it down to release some of the gas and then shape it again.
Dense, Heavy Texture
Sometimes, your dough may rise but end up with a dense or heavy texture. This can happen due to improper kneading, too much flour, or not enough liquid.
What to Do:
- Knead Properly: Make sure you’re kneading your dough enough to activate the gluten properly. If the dough isn’t kneaded enough, it won’t trap enough gas to rise properly.
- Adjust the Flour: If your dough is too dry or tough, add a little more liquid, a tablespoon at a time. If it’s too sticky, add small amounts of flour.
- Use the Right Type of Flour: For certain rising recipes, like pizza or bread, ensure you’re using the correct flour type for the recipe, such as bread flour for chewy, high-rise results.
Flat Pizza Dough
If your pizza dough isn’t rising as expected, it can lead to a flat, dense crust.
What to Do:
- Ensure Proper Yeast Activation: Make sure you’re activating your yeast correctly and not using water that’s too hot, as this can kill the yeast.
- Allow Adequate Resting Time: Give your pizza dough enough time to rise before shaping and baking, typically around 1 to 2 hours. If you have the time, a slow rise in the refrigerator overnight can enhance the flavor and texture.
FAQs about Rising Recipes
Rising recipes can seem complicated at first, but with the right knowledge and techniques, anyone can master them. To help you overcome some common questions and concerns, we’ve put together a list of frequently asked questions about rising recipes.
What is the best temperature for rising dough?
The ideal temperature for rising dough is around 75°F to 80°F (24°C to 27°C). Yeast thrives in warm environments, but it’s important not to let the dough get too hot, as temperatures above 120°F (49°C) can kill the yeast.
Tip: If your kitchen is too cold, you can create a warm environment for the dough by placing it in the oven with just the light on or near a warm stove.
How can I speed up the rising process?
If you’re in a rush, there are several ways to speed up the rising process:
- Use warm water to activate the yeast quickly.
- Increase the warmth of the environment by placing the dough in a warmer spot, like on top of the fridge or near a space heater.
- Use fast-acting yeast: This type of yeast can reduce the rising time by half.
However, be cautious not to rush it too much, as a slow rise will result in better flavor and texture in most recipes.
Can I freeze dough for later use?
Yes, you can freeze dough for later use. After the first rise, punch the dough down and shape it into the desired form, such as a loaf or pizza dough. Wrap it tightly in plastic wrap and store it in a freezer-safe bag or container. When ready to use, let the dough thaw in the fridge overnight and then allow it to rise before baking.
Tip: Some doughs, such as pizza or bread dough, freeze well, while others, like pastry dough, may not perform as well after freezing.
Why didn’t my dough rise properly?
If your dough didn’t rise as expected, there could be several reasons:
- Expired yeast: Always check the expiration date before using yeast.
- Incorrect water temperature: Water that’s too hot or too cold can affect yeast activity.
- Over or under-kneading: Too little kneading won’t activate the gluten, while over-kneading can lead to tough dough.
- Poor environmental conditions: Dough needs to rise in a warm, draft-free place.
How do I know when my dough has risen enough?
Dough is ready for baking when it has doubled in size. You can also do the “poke test” by gently pressing two fingers into the dough. If the indentation remains and doesn’t spring back, the dough is fully risen and ready to be shaped.
Conclusion
Rising recipes are a rewarding and enjoyable aspect of cooking, allowing you to create everything from fluffy breads to delicious pizza crusts. Whether you’re a beginner or an experienced baker, mastering the art of dough rising can open up a world of culinary possibilities.
By understanding the essential ingredients, techniques, and common challenges, you’ll be better equipped to troubleshoot and perfect your recipes. With the right tools and a little practice, you’ll soon be making delicious, perfectly risen creations with ease. Remember, patience is key, and don’t be afraid to experiment with different variations to suit your tastes.
Now that you’re armed with the knowledge to rise to the occasion, get in the kitchen and start baking your way to fluffy, airy, and delicious creations!
For expert tips on improving your dough rising techniques and mastering yeast-based recipes, check out this comprehensive guide on working with yeast dough.


