Table of Contents
- 1 The Irresistible Allure of Cinnamon Rolls (Without the Mixer Hassle!)
- 2 Gathering Your Ingredients: The Foundation of Flavor
- 3 Step-by-Step Instructions: From Bowl to Beautiful Rolls
- 4 Variations and Substitutions: Making it Your Own
- 5 Storage and Reheating: Keeping the Magic Alive
- 6 Common Mistakes to Avoid: Ensuring Success Every Time
- 7 Your FAQs Answered: All Your Cinnamon Roll Questions
- 8 The Final Touch: A Warm Welcome to Your Kitchen
The Irresistible Allure of Cinnamon Rolls (Without the Mixer Hassle!)
There’s something undeniably magical about a warm, gooey cinnamon roll. That tender, pillowy dough, the sweet, spiced filling melting into every bite, the sticky glaze dripping down… it’s pure comfort. Traditionally, achieving that perfect texture often involves a stand mixer and a fair bit of elbow grease. But what if I told you you could create these breakfast treasures right in your own kitchen, without any special equipment? No bulky mixer, no complicated steps, just pure, simple joy. This recipe unlocks the secret to quick homemade cinnamon rolls using nothing more than your hands and a few basic pantry staples. It’s the ultimate solution for a last-minute sweet breakfast craving or a special weekend treat that feels entirely indulgent.
The beauty lies in the simplicity of the dough. By hand-mixing and kneading, you develop the gluten just enough to create that signature softness and chew without overworking it. The result? Rolls so tender and fluffy, they practically melt in your mouth. And the best part? You likely have everything you need already tucked away in your pantry. So, forget about complicated techniques or fancy gadgets. Let’s dive into creating these super soft, simple cinnamon rolls that will have everyone asking for the recipe.
Gathering Your Ingredients: The Foundation of Flavor
Before we get our hands messy, let’s ensure we have everything ready. This recipe relies on quality ingredients to achieve that perfect balance of sweetness, spice, and tenderness. Here’s what you’ll need:
- All-Purpose Flour (or Bread Flour): The backbone of the dough. All-purpose works wonderfully, but bread flour, with its higher protein content, yields an even chewier, more structured roll. I recommend bread flour for the best texture.
- Warm Milk: Crucial for activating the yeast and creating a pliable dough. Use whole milk for the richest flavor and tenderness, though 2% or even skim will work in a pinch. Ensure it’s comfortably warm (about 110°F / 43°C) – too hot will kill the yeast, too cold won’t activate it.
- Active Dry Yeast: The leavening agent that makes the dough rise. Make sure it’s fresh and within its expiration date. If you’re unsure, a quick proof in the warm milk (with a pinch of sugar) before adding the rest of the ingredients is a good idea.
- Granulated Sugar: Adds sweetness and helps feed the yeast. A small amount is also used in the filling.
- Salt: Essential for balancing the sweetness and enhancing all the other flavors. Don’t skip it!
- Large Eggs: Adds richness, structure, and helps bind the dough. Use room temperature eggs for easier mixing.
- Unsalted Butter: Melted and cooled slightly. This is key for tenderness and flavor. Use good quality butter.
- Cinnamon: The star of the filling! Use pure ground cinnamon for the best flavor. A blend like Saigon or Ceylon is excellent.
- Softened Butter (for filling): Melted butter brushed onto the rolled dough helps the cinnamon sugar stick and creates that beautiful, gooey layer.
- Brown Sugar (for filling): Packed light or dark brown sugar adds a deeper molasses flavor and caramelizes beautifully during baking.
- Cream Cheese (for glaze): The classic pairing. Full-fat cream cheese gives the best texture and flavor. You can use a dairy-free alternative if needed, but the texture might differ slightly.
- Powdered Sugar: For the sweet, smooth glaze.
- Vanilla Extract: Enhances the overall flavor profile.
- Milk or Heavy Cream (for glaze): Helps thin the glaze to the perfect drizzling consistency.
Ingredient Explanations:
- Flour Choice: Bread flour = chewier, more structure. All-purpose = tender, slightly less chewy. Either works.
- Yeast Proofing: If your yeast is old or you’re unsure, mix it with 1/4 cup warm milk (110°F), 1 tsp sugar, and 1 tsp flour. Let sit for 5-10 minutes until foamy. If it doesn’t foam, your yeast is dead – start over.
- Milk Temperature: Test with your finger – it should feel comfortably warm, like bathwater, not hot. A thermometer is ideal (110°F).
- Butter Temperature: Melted butter should be just warm, not hot. Hot butter can scramble eggs if added directly.
- Cinnamon: Use the real stuff! Pre-ground cinnamon loses potency quickly. A teaspoon is usually sufficient, but adjust to taste.
Step-by-Step Instructions: From Bowl to Beautiful Rolls
Now, let’s transform these ingredients into fluffy, cinnamon-scented rolls. This process is surprisingly straightforward and deeply satisfying when done by hand.
1. Activating the Yeast (If Not Pre-Proofed):
* In a small bowl or large measuring cup, combine 1/4 cup warm milk (110°F), 1 tsp granulated sugar, and 1 tsp active dry yeast. Stir gently. Let sit for 5-10 minutes until foamy and bubbly. If it doesn’t foam, discard and start with fresh yeast.
2. Mixing the Dough:
In a large mixing bowl (or the bowl of your stand mixer, if you do* have one), whisk together 3 1/2 cups bread flour (or all-purpose), 1/2 cup granulated sugar, and 1 1/2 tsp salt.
* Pour in the activated yeast mixture (or the 1 cup warm milk, 1/4 cup granulated sugar, 1 tbsp melted butter, 1 tsp salt, and 1 large egg, beaten) and the remaining 1/2 cup warm milk.
* Using a sturdy wooden spoon or your clean hands, stir vigorously until a shaggy dough forms and all the flour is incorporated. It will be sticky at first.
3. Kneading the Dough (The Key to Softness):
Turn the dough out onto a lightly floured surface. This is where the magic happens! Knead the dough for about 8-10 minutes. Push the dough away from you with the heel of your hand, fold it back over itself, give it a quarter turn, and repeat. Add only minimal* extra flour if absolutely necessary to prevent sticking – too much flour makes the rolls tough. The dough is ready when it becomes smooth, elastic, and springs back when you gently poke it. It should feel soft and slightly tacky but not sticky.
Hand-Kneading Tip:* Don’t rush this step. Proper kneading develops the gluten network, which is essential for the rolls’ structure and tenderness. Listen for the satisfying “slap” sound as you push the dough.
4. First Rise (Letting the Dough Breathe):
* Lightly grease a large bowl with a little oil or butter. Place the kneaded dough ball in the bowl, turning it once to coat it lightly with oil. Cover the bowl tightly with plastic wrap or a damp kitchen towel.
* Place the bowl in a warm, draft-free spot (like an off oven with the light on, or near a sunny window). Let the dough rise until doubled in size, which usually takes 1 to 1.5 hours. The time can vary slightly depending on room temperature.
5. Preparing the Filling:
* While the dough rises, make the cinnamon sugar filling. In a small bowl, combine 1/2 cup packed brown sugar, 2 tbsp granulated sugar, 2 tbsp ground cinnamon, and a pinch of salt (optional). Stir until well combined. Set aside.
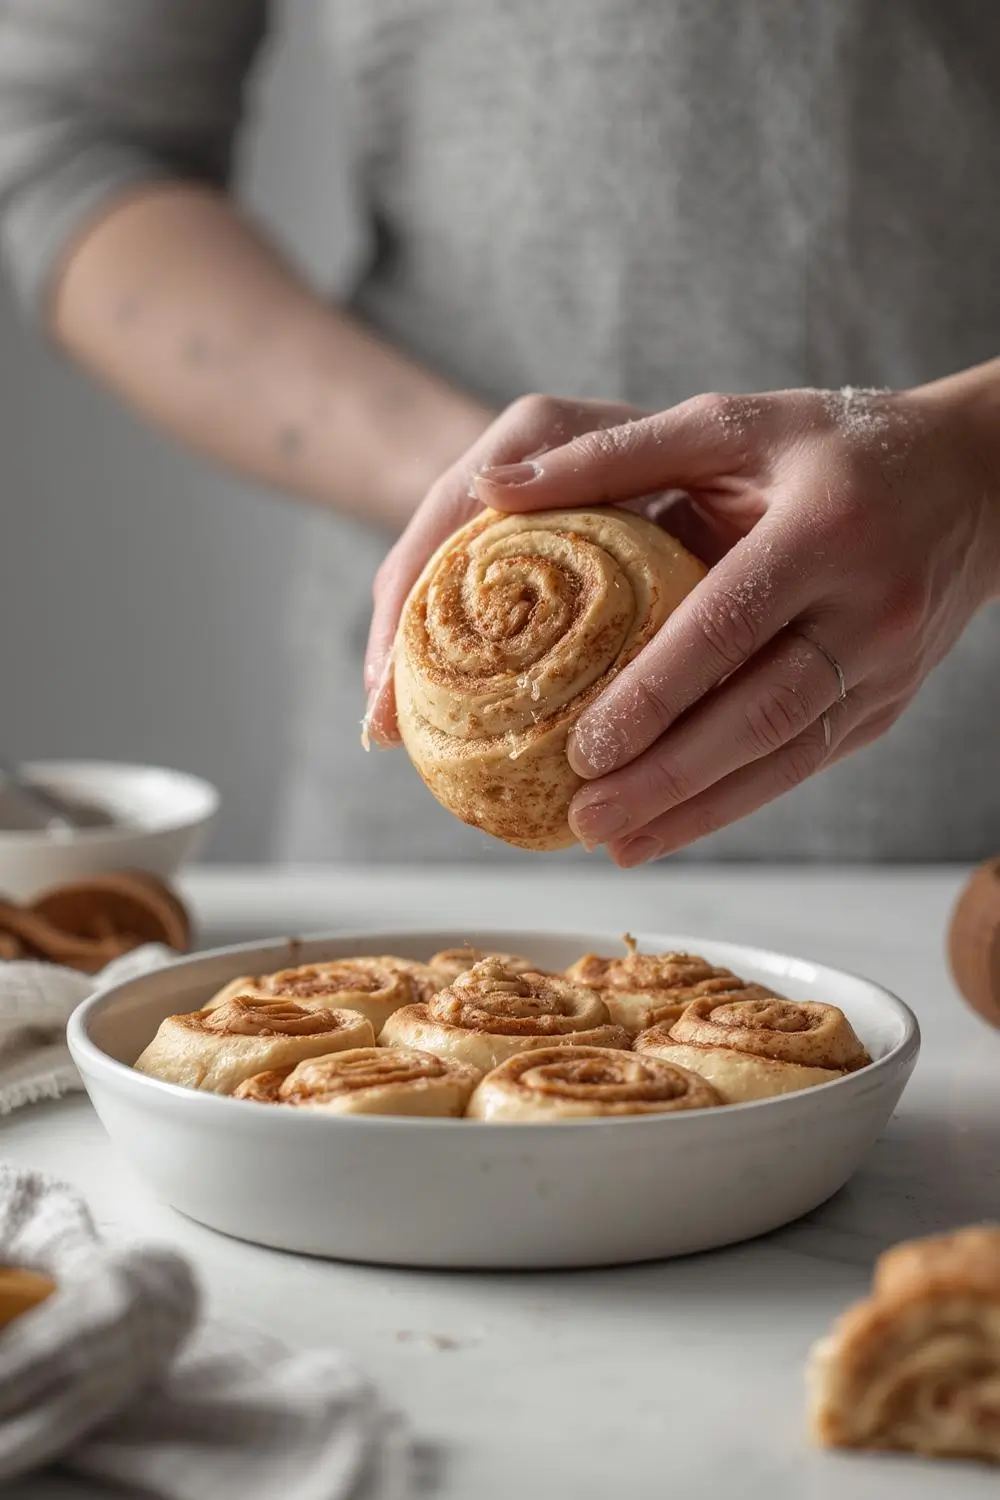
6. Rolling and Filling:
* Once the dough has doubled, punch it down gently to release the air. Turn it out onto a lightly floured surface.
* Roll the dough into a large rectangle, roughly 12 inches by 18 inches. Aim for an even thickness.
* Spread the softened (but not melted) butter evenly over the entire surface of the dough, leaving a small border around the edges.
* Sprinkle the cinnamon sugar filling evenly over the buttered dough, pressing it gently so it adheres.
* Starting from the long side, carefully roll the dough up tightly into a log. Pinch the seam closed firmly to seal.
* Using a sharp knife or dental floss, cut the log into 12 equal pieces (about 1.5 inches thick each). Place the rolls cut-side up in a lightly greased 9-inch round or square baking pan, or an 8×8 inch pan. They should fit snugly.
7. Second Rise (The Final Proof):
* Cover the pan loosely with plastic wrap or a damp towel. Let the rolls rise again in a warm place until they are noticeably puffy and have nearly doubled in size, about 30-45 minutes. They should look very soft and full.
8. Baking to Golden Perfection:
* Preheat your oven to 350°F (175°C) while the rolls are rising.
* Bake the rolls for 25-30 minutes, or until they are deeply golden brown on top and the edges look set. The internal temperature should reach about 190°F (88°C) when measured with a thermometer inserted into the center of a roll. They should sound hollow when tapped on the bottom.
9. Making the Glaze:
* While the rolls bake, make the cream cheese glaze. In a medium bowl, beat together 4 oz (1/2 cup) softened cream cheese, 1 cup powdered sugar, and 1 tsp vanilla extract until smooth. Gradually add 2-3 tbsp milk or heavy cream, beating until you reach a thick but pourable consistency. You may not need all the milk.
10. Glazing and Serving:
* As soon as the rolls come out of the oven, spread or drizzle the warm glaze evenly over the hot rolls. The glaze will melt into the crevices, creating an irresistible, glossy finish. Let the rolls cool in the pan for 10-15 minutes before serving. They are best enjoyed warm!
Variations and Substitutions: Making it Your Own
One of the joys of baking is putting your personal stamp on a recipe. Here are some delightful ways to customize your quick homemade cinnamon rolls:
- Nutty Delight: Fold 1/2 to 1 cup chopped pecans, walnuts, or almonds into the cinnamon sugar filling before spreading. Sprinkle extra nuts on top before baking.
- Fruitful Twist: Add 1/2 cup finely chopped apples (tossed with a little lemon juice to prevent browning), raisins, or dried cranberries to the filling mixture.
- Spice It Up: Experiment with spices! Add 1/2 tsp ground cardamom, nutmeg, or ginger to the cinnamon sugar filling for a unique flavor profile.
- Cream Cheese Glaze Alternative: For a different glaze, try a simple vanilla glaze (powdered sugar + milk + vanilla) or a maple glaze (powdered sugar + maple syrup + milk).
- Sweetener Swap: Use coconut sugar or honey in place of some or all the granulated sugar in the dough or filling (adjust liquid slightly if using honey).
- Dairy-Free Option: Use almond milk or oat milk instead of dairy milk. For the glaze, use a dairy-free cream cheese alternative and a dairy-free butter in the dough. The texture might be slightly different, but it’s still delicious.
- Whole Wheat Twist: Substitute up to 1 cup of the bread flour with whole wheat flour for a heartier, nuttier roll (may require a tiny bit more liquid).
Storage and Reheating: Keeping the Magic Alive
These rolls are best enjoyed fresh and warm on the day they are baked. However, you can store them for later enjoyment:
- Room Temperature: Cool completely, then store tightly covered at room temperature for up to 2 days. Reheat gently in the microwave (10-15 seconds) or a low oven (300°F / 150°C for 5-10 minutes) to restore softness.
- Refrigerator: Cool completely, then wrap tightly in plastic wrap or place in an airtight container. Store for up to 4 days. Reheat as above.
- Freezing: Freeze the unbaked rolls! After cutting the rolls and placing them in the pan, cover tightly with plastic wrap and foil. Freeze for up to 1 month. When ready to bake, thaw the rolls in the refrigerator overnight. Remove from the fridge, let them come to room temperature (about 1 hour), then bake as directed, adding 5-10 minutes to the baking time. You can also freeze baked* rolls: cool completely, wrap tightly, and freeze for up to 1 month. Reheat from frozen in the microwave or oven as above.
Common Mistakes to Avoid: Ensuring Success Every Time
Even experienced bakers can run into hiccups. Here’s how to sidestep the most common pitfalls:
- Too Hot Milk: Killing the yeast is a frequent issue. Always test the milk temperature – it should be warm, not hot.
- Over-Kneading: Overworking the dough develops too much gluten, leading to tough, chewy rolls instead of tender, fluffy ones. Knead just until smooth and elastic (8-10 minutes by hand).
- Under-Kneading: Under-kneaded dough won’t rise properly and will be dense. Ensure the dough is smooth and springs back when poked.
- Insufficient Rising Time: Rushing the rise results in dense rolls. Be patient! The dough needs time to develop flavor and structure.
- Too Much Flour: Adding excessive flour during kneading or shaping makes the rolls tough. Use minimal flour on your surface and hands.
- Filling Too Loose: If the filling is too runny, it can leak out. Ensure the butter is softened but not melted, and press the filling gently onto the dough.
- Glaze Too Thick: If the glaze is too thick, it won’t spread nicely. Add milk or cream a little at a time until it’s the perfect drizzling consistency.
- Baking Too Long: Overbaking dries out the rolls. Watch for the golden brown color and internal temperature (190°F).
Your FAQs Answered: All Your Cinnamon Roll Questions
Q1: Can I make these rolls ahead of time?
Absolutely! You can prepare the dough through the first rise, punch it down, shape it into rolls, and let them rise in the pan overnight in the refrigerator. In the morning, let them come to room temperature for about an hour, then bake as directed. You can also freeze the shaped rolls before the second rise.
Q2: Why are my rolls dense and not fluffy?
This usually happens if the dough wasn’t kneaded enough, didn’t rise long enough, or was over-floured. Ensure proper kneading time, give the dough ample time to rise in a warm spot, and use minimal flour on your surface.
Q3: Can I use all-purpose flour instead of bread flour?
Yes! While bread flour gives a slightly chewier texture, all-purpose flour works perfectly fine and will still yield soft, delicious rolls. You might need a tiny bit more liquid (milk) if using all-purpose.
Q4: How do I know when the rolls are done baking?
They should be a deep golden brown on top, sound hollow when tapped on the bottom, and an internal temperature of 190°F (88°C) when measured with a thermometer inserted into the center of a roll.
Q5: Can I make the dough in a bread machine?
Yes! You can use your bread machine’s dough cycle. Add the ingredients in the order recommended by your machine (usually liquids first, then dry ingredients, with yeast last). Once the cycle finishes, proceed with shaping, rising, and baking as directed.
Q6: How do I store leftover rolls?
Cool completely, then store tightly covered at room temperature for up to 2 days, or in the refrigerator for up to 4 days. Reheat gently in the microwave or a low oven to restore softness. Freeze baked or unbaked rolls for longer storage.
Q7: Can I use a different type of milk?
Yes! While whole milk is ideal for richness, you can use 2% milk, skim milk, or even plant-based milks like almond or oat milk. The texture and flavor will be slightly different, but it will still work.
Q8: Why is my glaze too thick?
Add milk or heavy cream a little at a time, beating well after each addition, until you reach the desired drizzling consistency. Start with 1-2 teaspoons.
Q9: Can I add nuts or fruit to the filling?
Definitely! Fold 1/2 to 1 cup of chopped nuts (pecans, walnuts) or dried fruit (raisins, cranberries) into the cinnamon sugar filling before spreading it on the dough. Press gently to adhere.
Q10: How can I make these rolls sweeter?
Increase the brown sugar in the filling to 3/4 cup, or add 1-2 tablespoons of granulated sugar to the dough itself. You can also brush the tops with melted butter before baking and sprinkle with extra sugar.
The Final Touch: A Warm Welcome to Your Kitchen
There you have it – the secret to creating incredibly soft, fluffy, and utterly irresistible cinnamon rolls, all without a mixer. This recipe is designed for simplicity and success, perfect for bakers of all skill levels. The aroma that fills your kitchen as these rolls bake is pure magic, and the taste? Well, that’s pure comfort. Whether you’re treating yourself on a cozy weekend morning, surprising the family with a special breakfast, or bringing a batch to share, these quick homemade cinnamon rolls are sure to become a cherished tradition. So, gather your ingredients, roll up your sleeves, and get ready to experience the joy of baking something truly special with your own two hands. Enjoy every warm, gooey, cinnamon-scented bite!