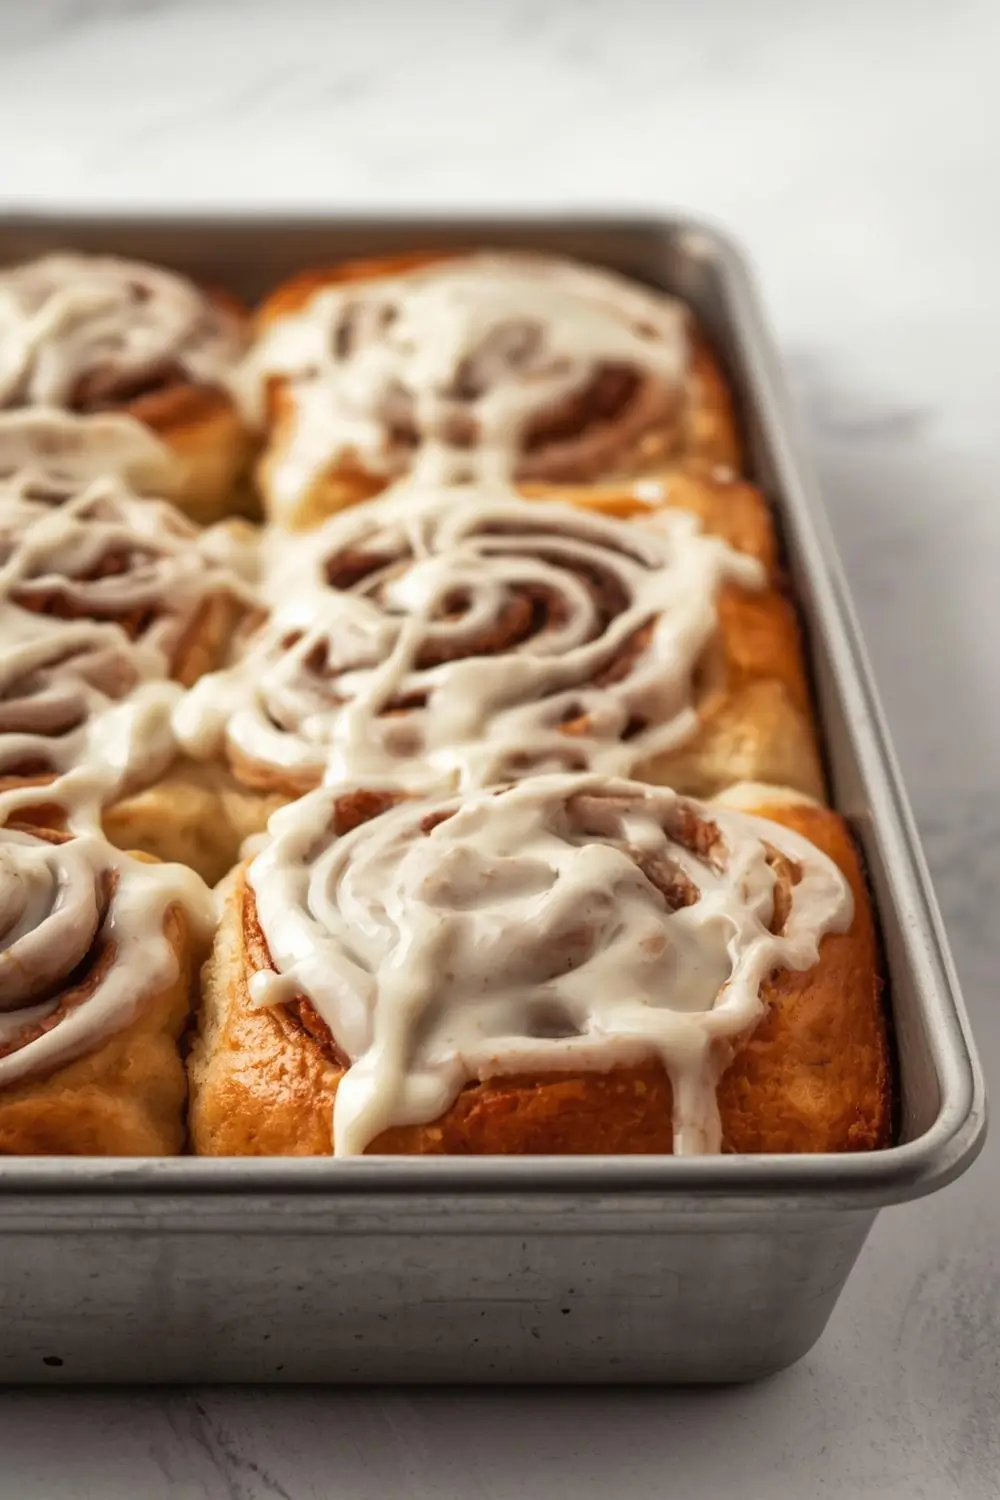
Imagine the aroma of warm cinnamon and buttery sweetness filling your kitchen, the promise of soft, pillowy rolls waiting to be devoured. Traditional cinnamon rolls often demand patience, requiring two rises to achieve that perfect, cloud-like texture. But what if you could skip the second rise without sacrificing that beloved fluffiness? Today, we’re unlocking the secret to One Rise Cinnamon Rolls – a game-changing recipe that delivers all the comfort and flavor you crave, in a fraction of the time. Perfect for busy mornings, unexpected guests, or simply satisfying that cinnamon roll craving without the hours of waiting, this fast and foolproof method is about to become your new baking obsession.
Why One Rise Works Wonders
The magic lies in the dough. By using a slightly enriched dough and a strategic baking technique, we create the perfect environment for the rolls to rise beautifully during the initial proofing and then puff up dramatically in the hot oven. The result? Rolls that are incredibly soft, tender, and generously filled with cinnamon sugar, all achieved without the second lengthy rise. This isn’t just a shortcut; it’s a revelation in efficient, delicious baking.
Your Pantry Staples, Simplified
Before we dive into the process, let’s gather what you’ll need. This recipe relies on common pantry items, ensuring you can whip these up without a special trip to the store.
- All-Purpose Flour: The backbone of the dough. It provides the right structure and chewiness. Avoid bread flour unless specified for a slightly different texture.
- Granulated Sugar: Used in both the dough and the cinnamon filling for sweetness and to feed the yeast.
- Instant Yeast: This is crucial. It doesn’t need to be dissolved in warm water first; it can be mixed directly into the dry ingredients. This speeds up the process significantly.
- Salt: Enhances all the flavors and helps control yeast activity.
- Warm Milk: Warm (not hot!) milk activates the yeast and adds richness. Whole milk is ideal for the richest flavor and softest texture, but 2% works well too. Avoid skim milk.
- Unsalted Butter: Melted butter adds incredible richness and tenderness to the dough. Use high-quality butter for the best flavor.
- Large Eggs: Adds structure, richness, and helps the dough rise. Ensure they are at room temperature for easier mixing.
- Vanilla Extract: A touch of pure vanilla extract elevates the overall flavor profile.
- Brown Sugar: Packed brown sugar is key for the cinnamon filling. Its molasses content adds a deeper, caramel-like sweetness and helps create a lovely, gooey texture as it melts.
- Ground Cinnamon: The star of the show! Use a generous amount for a truly aromatic experience.
- Cream Cheese: For the ultimate finishing touch – a thick, luscious cream cheese glaze. Full-fat cream cheese yields the best results.
- Powdered Sugar: Sweetens the glaze and gives it that perfect smooth consistency.
- Milk or Heavy Cream: Used to thin the glaze to the desired drizzling consistency.
The Art of Mixing and Kneading (No Fancy Equipment Needed)
Don’t be intimidated! This dough is incredibly forgiving and easy to handle. You can mix it by hand in a large bowl or use a stand mixer fitted with a dough hook.
1. Combine Dry Ingredients: In your mixing bowl, whisk together the flour, granulated sugar, instant yeast, and salt. This ensures even distribution.
2. Warm the Wet Ingredients: In a separate small saucepan or microwave-safe bowl, gently warm the milk and melted butter until it’s just warm to the touch (about 110°F / 43°C). It should feel comfortably warm, like bathwater, not hot enough to scald. Stir in the vanilla extract.
3. Incorporate Eggs: Crack the room-temperature eggs into the warm milk mixture and whisk vigorously until fully combined.
4. Make the Dough: Pour the wet ingredients into the bowl with the dry ingredients. Using a sturdy spatula or your mixer on low speed, mix until a shaggy dough forms. If using a mixer, switch to the dough hook and knead on medium-low speed for about 5-7 minutes until the dough becomes smooth, elastic, and pulls away from the sides of the bowl. If kneading by hand, turn the dough out onto a lightly floured surface and knead for 8-10 minutes until smooth and elastic.
5. First Rise (The Crucial Proof): Lightly grease a large bowl with a little oil or non-stick spray. Place the dough ball in the bowl, turning it once to coat lightly with oil. Cover the bowl tightly with plastic wrap or a damp kitchen towel. Let it rise in a warm, draft-free spot for about 60-75 minutes, or until it has doubled in size. This is the primary rise. The dough should look puffy and feel soft and springy when gently pressed.
Rolling, Filling, and Cutting: Creating Cinnamon Roll Magic
Now comes the fun part – transforming that risen dough into beautiful, cinnamon-filled rolls.
1. Prepare the Filling: In a small bowl, combine the packed brown sugar, ground cinnamon, and a pinch of salt. Stir until well blended. Set aside.
2. Shape the Dough: Once the dough has risen, gently punch it down to release any large air bubbles. Turn it out onto a lightly floured surface. Using a rolling pin, roll the dough into a large rectangle, roughly 12 inches by 18 inches. Aim for an even thickness, about 1/4 to 1/2 inch thick. The exact size isn’t critical, just ensure it’s large enough to roll up neatly.
3. Spread the Butter: Using a spatula or your fingers, spread the remaining softened butter evenly over the entire surface of the rolled-out dough, leaving a small border (about 1/2 inch) along one of the longer edges.
4. Add the Cinnamon Sugar: Sprinkle the cinnamon sugar mixture evenly over the buttered dough, again leaving that small border clean. Press the sugar gently into the butter with your fingertips to help it adhere.
5. Roll it Up: Starting from the long edge that has butter, carefully roll the dough up tightly into a log. Pinch the seam along the edge to seal it closed. Try to roll it as tightly as possible without tearing the dough.
6. Cut the Rolls: Using a sharp knife or dental floss (for a cleaner cut), slice the log into 12 equal pieces. A piece of unflavored dental floss works wonders for getting clean cuts through sticky dough. Each piece should be about 1.5 inches thick.
7. Prepare the Pan: Lightly grease a 9-inch round or square baking pan, or an 8×8 inch square pan. Arrange the cut rolls, cut-side up, in the pan, placing them close together to allow them to rise and touch slightly. They will expand significantly during baking.
8. Second Rise (The Final Proof): Cover the pan loosely with plastic wrap or a damp kitchen towel. Let the rolls rise again in a warm, draft-free spot for another 30-45 minutes. They should look noticeably puffy and almost doubled in size. This second rise happens quickly in the warm oven later.
Baking: The Transformation Begins
The moment of truth! Baking transforms the soft, risen dough into golden, fragrant cinnamon rolls.
1. Preheat: While the rolls are rising, preheat your oven to 375°F (190°C). This ensures the oven is perfectly hot when the rolls go in.
2. Bake: Place the pan in the center of the preheated oven. Bake for 20-25 minutes, or until the rolls are deeply golden brown on top and the edges look set. The internal temperature should reach around 190°F (88°C) when measured with a quick-read thermometer inserted into the center of a roll. The tops should be beautifully caramelized.
3. Cool Slightly: Remove the pan from the oven and let the rolls cool in the pan for at least 10-15 minutes. This allows them to set slightly and makes them easier to handle when glazing.
The Cream Cheese Glaze: The Perfect Finishing Touch
A thick, creamy glaze is what takes these rolls from good to unforgettable.
1. Make the Glaze: In a medium bowl, beat the softened cream cheese until smooth and creamy. Add the powdered sugar and beat until combined. Gradually add milk or heavy cream, a tablespoon at a time, beating well after each addition, until you reach a thick but pourable consistency. Taste and adjust sweetness if needed.
2. Apply the Glaze: Once the rolls have cooled slightly in the pan, drizzle or spread the cream cheese glaze generously over the warm rolls. The heat from the rolls will help the glaze melt slightly and seep into the crevices, creating an extra layer of decadence. The glaze will set as it cools.
Variations and Substitutions: Making it Your Own
- Nutty Twist: Fold 1/2 to 3/4 cup of chopped pecans, walnuts, or almonds into the cinnamon sugar filling before spreading.
- Fruitful Addition: Add 1/2 cup of finely chopped apples, pears, or raisins to the cinnamon sugar filling for a fruity burst.
- Spice It Up: Add 1/2 teaspoon of ground cardamom or nutmeg to the cinnamon sugar filling for a warm, complex flavor.
- Butterless Option: While butter adds incredible flavor and tenderness, you can substitute up to 2 tablespoons of the melted butter in the dough with milk or water. The rolls will be slightly less rich but still delicious.
- Gluten-Free: Use a high-quality gluten-free all-purpose flour blend (1:1 ratio) and ensure your yeast is gluten-free. The dough may be slightly more delicate; handle it gently. Expect slightly different rise times and texture.
- Dairy-Free: Substitute dairy milk with a fortified plant-based milk (like soy or oat milk). Use a dairy-free cream cheese and a dairy-free butter alternative in the glaze. The flavor and texture will be very close.
Storage and Reheating: Keeping the Magic Alive
- Room Temperature: Store leftover rolls in an airtight container at room temperature for up to 2 days. The glaze helps keep them moist.
- Refrigerator: For longer storage (up to 5 days), refrigerate the rolls in an airtight container. Reheat gently in the microwave for 15-20 seconds or in a low oven (300°F / 150°C) for 5-7 minutes to restore warmth and softness.
Freezing: Freeze the unbaked rolls (after cutting and placing in the pan, but before the second rise). Wrap the pan tightly in plastic wrap and foil. Freeze for up to 1 month. When ready to bake, thaw the rolls in the refrigerator overnight. Remove from the fridge, let them come to room temperature for 30 minutes, then let them rise for 30-45 minutes (they may not double fully). Bake as directed, adding 5-10 minutes to the baking time. You can also freeze baked* rolls. Wrap tightly and freeze for up to 3 months. Reheat in the microwave or oven as above.
Common Mistakes to Avoid: Baking Success
- Water Too Hot: Killing the yeast is a common pitfall. Ensure your milk mixture is warm, not hot (110°F / 43°C max).
- Over-Kneading: While kneading is important, over-kneading can make the dough tough. Knead just until smooth and elastic.
- Under-Rising: The dough needs sufficient time to rise. If it’s cold or drafty, it will take longer. Don’t rush it; the texture depends on it.
- Rolling Too Thin: Rolling the dough too thin can make the rolls dense and prevent the cinnamon sugar from melting properly. Aim for that 1/4 to 1/2 inch thickness.
- Cutting Without Floss: Using a knife to cut sticky dough often crushes the rolls. Dental floss provides a clean, straight cut.
- Skipping the Second Rise: This rise is crucial for the final puff. Don’t skip it, even if the rolls look puffy after the first rise.
- Glaze Too Thin: Adding too much milk to the glaze makes it runny. Add it gradually until you reach the perfect thick, pourable consistency.
- Glazing Too Early: Wait until the rolls have cooled slightly in the pan before applying the glaze. Applying it while the rolls are piping hot can cause it to melt off.
Frequently Asked Questions (FAQs)
- Q: Can I use active dry yeast instead of instant yeast? A: Yes, but you need to activate it first. Dissolve 1 packet (2 1/4 tsp) of active dry yeast in 1/4 cup of warm milk (110°F / 43°C) with 1 tsp of sugar. Let it sit for 5-10 minutes until foamy. Then proceed with the recipe as written, using the remaining milk.
- Q: Why didn’t my rolls rise enough? A: Check your yeast (is it expired?), the temperature of your milk (too hot kills yeast, too cold doesn’t activate it), and the rising environment (is it warm enough and draft-free?).
- Q: Can I make these ahead of time? A: Absolutely! You can make the dough through the first rise, shape the rolls, let them do their second rise, and then bake them in the morning. You can also freeze the unbaked rolls for later baking.
- Q: How do I know when the rolls are done baking? A: They should be a deep golden brown on top, sound hollow when tapped on the bottom, and a thermometer inserted into the center should read 190°F (88°C).
- Q: Can I use a different pan size? A: Yes, but the baking time will change. A smaller pan (like 8×8) will yield taller, slightly denser rolls that might need 5-10 minutes less baking time. A larger pan (like 9×13) will yield flatter, potentially slightly less moist rolls that might need 5-10 minutes more baking time.
- Q: Why is my glaze too runny? A: Add more powdered sugar, a tablespoon at a time, until it thickens to your desired consistency. If it’s too thick, add a tiny bit more milk or cream.
- Q: Can I add nuts or fruit to the filling? A: Yes! Fold 1/2 to 3/4 cup of chopped nuts or 1/2 cup of chopped fruit (like apples or raisins) into the cinnamon sugar mixture before spreading.
The Final Verdict: Pure Cinnamon Roll Bliss
There you have it – the secret to incredibly soft, fluffy, and utterly delicious One Rise Cinnamon Rolls. This recipe proves that sometimes, a clever shortcut can lead to even greater rewards. The rich, buttery dough, the gooey cinnamon-sugar filling, and the luxurious cream cheese glaze come together in a symphony of flavor that will have everyone asking for seconds. Best of all, you can have these warm, homemade treats on the table in under 2 hours, making them perfect for weekend brunches, holiday mornings, or simply a special treat any day. So, gather your ingredients, preheat your oven, and get ready to experience cinnamon roll perfection without the long wait. Enjoy every heavenly bite!