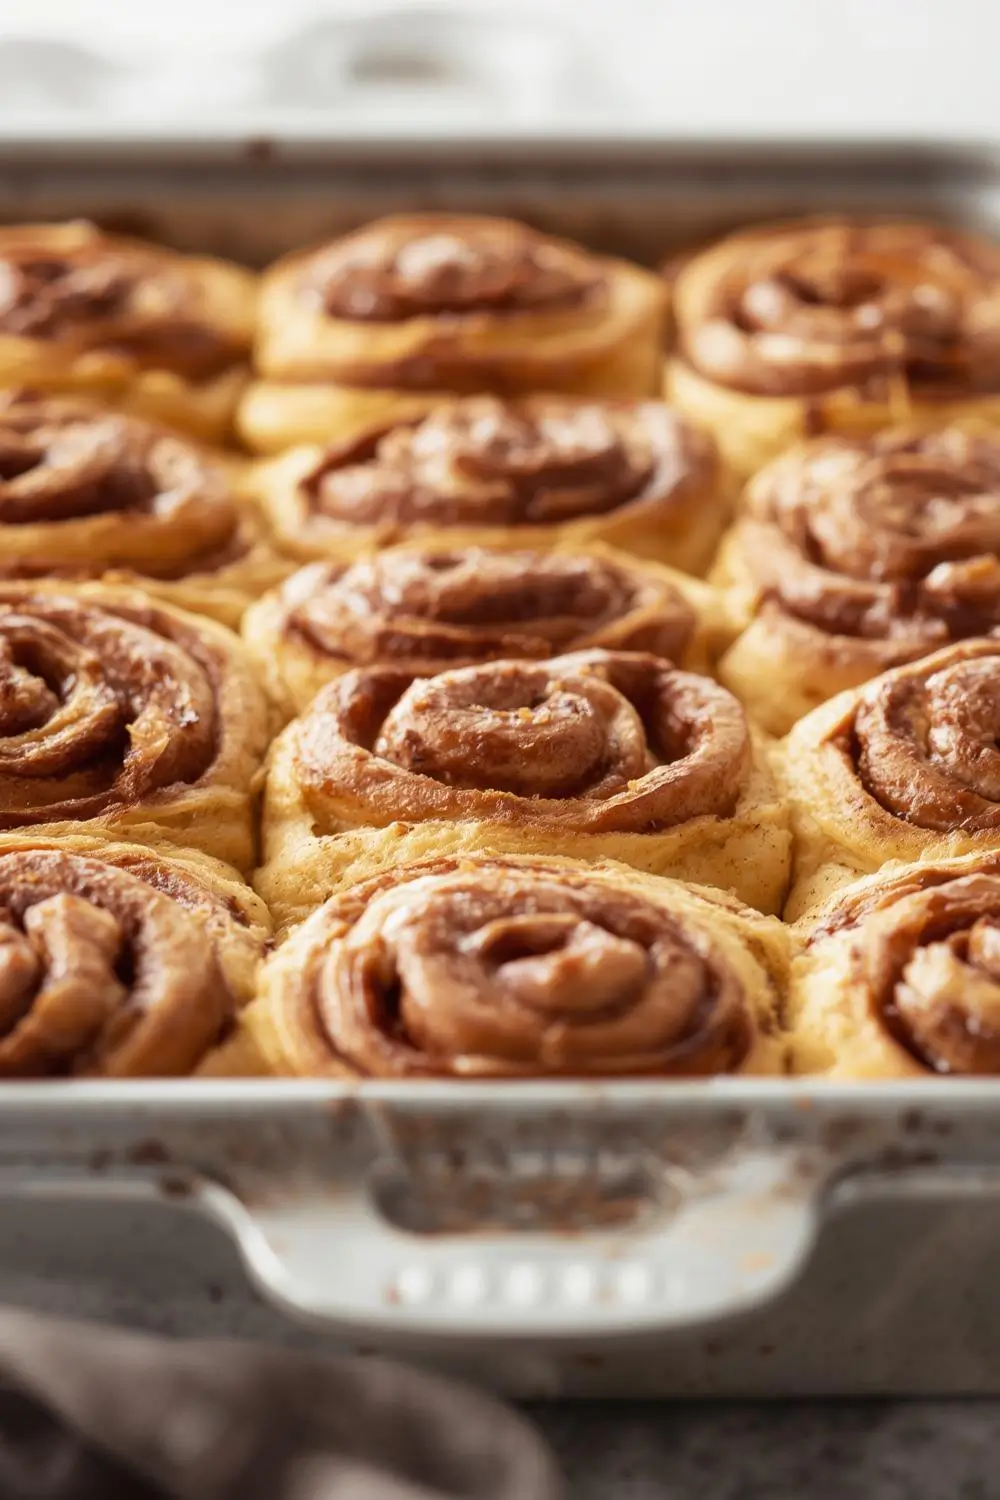
Imagine the aroma of warm cinnamon and buttery sweetness filling your home. Picture golden-brown rolls, tender and pillowy soft, emerging from your oven in just one hour. No overnight rises, no complicated kneading, no special equipment required. These One Hour Quick Rise Cinnamon Rolls are your secret weapon for bakery-style perfection on a busy weekday or a spontaneous weekend treat. Forget the hours of waiting; this recipe delivers the comforting, indulgent experience of homemade cinnamon rolls faster than you ever thought possible.
Why This Recipe Works Wonders
The magic lies in a few key techniques. First, we harness the power of instant yeast, which activates quickly in warm liquid. Second, we use a warm milk mixture to gently warm the dough during its short rise, encouraging rapid fermentation. Finally, we incorporate a touch of sugar and a pinch of salt to balance the flavors and strengthen the dough structure. The result? A tender, slightly chewy interior with a perfectly crisp exterior, all wrapped around a gooey cinnamon-sugar filling. These rolls are soft, flavorful, and utterly irresistible – a testament to how smart shortcuts can yield extraordinary results.
Your Pantry Staples, Transformed
Before we dive into the process, let’s gather what you likely already have. This recipe relies on common pantry items, making it incredibly accessible. You won’t need any exotic ingredients or specialized tools. Here’s what you’ll need:
- All-Purpose Flour: The foundation of your dough. All-purpose works beautifully here, though bread flour can yield an even chewier texture if you prefer.
- Granulated Sugar: Used in both the dough and the filling for sweetness and to feed the yeast.
- Instant Yeast: The hero of the quick rise. It dissolves instantly in the warm liquid, kickstarting fermentation immediately.
- Salt: Essential for flavor balance and controlling yeast activity.
- Warm Milk: Crucial for activating the yeast and warming the dough during proofing. Whole milk adds richness, but 2% or even skim milk will work.
- Unsalted Butter: Melted and cooled slightly for the dough and generously for the filling and glaze. Real butter makes all the difference in flavor.
- Large Eggs: Adds richness, structure, and helps bind the dough.
- Vanilla Extract: A classic pairing with cinnamon. Use pure vanilla for the best flavor.
- Brown Sugar: Packed light or dark brown sugar adds a deeper molasses note to the filling compared to just granulated sugar.
- Ground Cinnamon: The star spice. Use high-quality cinnamon for the best flavor.
- Cream Cheese: For the luscious, tangy glaze. Full-fat cream cheese is recommended.
- Powdered Sugar: For the smooth, sweet glaze.
- Milk or Heavy Cream: To thin the glaze to the perfect drizzling consistency.
The Art of the Quick Rise: Step-by-Step Mastery
Now, let’s transform these ingredients into glorious rolls. This process is surprisingly straightforward, designed for success even for baking novices. Follow these steps carefully, and you’ll be rewarded with perfection.
1. Warming the Milk & Activating the Yeast: In a small saucepan or microwave-safe bowl, gently warm the milk until it’s just warm to the touch (about 110°F / 43°C). It should feel comfortably warm, like a baby’s bottle, not hot enough to scald. Remove from heat or take out of the microwave. Stir in 1 tablespoon of the granulated sugar and the instant yeast. Let this mixture sit for 5-10 minutes. You’ll see it become foamy and bubbly – this is the yeast happily waking up and getting to work. If it doesn’t foam, your yeast might be expired, and you’ll need fresh yeast.
2. Combining the Dough Base: In the bowl of a stand mixer fitted with the dough hook attachment (or a large mixing bowl if kneading by hand), combine the all-purpose flour, the remaining 1/4 cup granulated sugar, and the salt. Whisk them together briefly to distribute evenly.
3. Incorporating the Wet Ingredients: Pour the warm, foamy yeast mixture, the melted and slightly cooled butter, and the large egg into the flour mixture. Mix on low speed (or stir vigorously with a sturdy spoon or spatula) just until a shaggy dough begins to form and all the dry ingredients are incorporated. The dough will be sticky at this stage – that’s perfectly normal.
4. Kneading for Tenderness: If using a stand mixer, knead the dough on medium-low speed for about 5-7 minutes. If kneading by hand, turn the dough out onto a lightly floured surface and knead vigorously for 8-10 minutes. The goal is to develop the gluten just enough to create a smooth, elastic dough that springs back when gently poked. It should be soft and pliable, not tough. Add only the tiniest amount of extra flour (a teaspoon at a time) if absolutely necessary to prevent sticking, but avoid making it too dry.
5. The First Rise (The Quick One): Lightly grease a large bowl with a little oil or nonstick spray. Place the kneaded dough ball into the bowl, turning it once to coat it lightly with oil. Cover the bowl tightly with plastic wrap or a clean kitchen towel. Place it in a warm, draft-free spot (like an off oven with the light on, or near a sunny window). This is the “quick rise” phase. The dough needs about 30-45 minutes to double in size. It won’t take nearly as long as traditional rolls because of the instant yeast and the warm environment. Check it after 30 minutes; it should look noticeably puffy.
6. Preparing the Filling: While the dough rises, make the cinnamon-sugar filling. In a small bowl, combine the brown sugar, the remaining 1 tablespoon granulated sugar, and the ground cinnamon. Stir until well blended. Set aside. Melt the remaining 2 tablespoons of butter and set aside.
7. Shaping the Rolls: Once the dough has doubled, punch it down gently to release the air. Turn it out onto a lightly floured surface. Roll the dough into a 12×18 inch rectangle. It should be about 1/4 inch thick. Spread the melted butter evenly over the entire surface of the dough, leaving a 1/2 inch border around the edges. Sprinkle the cinnamon-sugar filling mixture evenly over the buttered dough.
8. Rolling and Cutting: Starting from the long edge (the 18-inch side), carefully roll the dough up tightly into a log. Pinch the seam closed firmly to seal. Using a sharp knife or dental floss, cut the log into 12 equal pieces (about 1.5 inches thick each). Place the rolls cut-side up into a lightly greased 9-inch round or square baking pan. They can be placed fairly close together; they’ll spread slightly as they bake.
9. The Second Rise (The Final Proof): Cover the pan of rolls loosely with plastic wrap or a clean kitchen towel. Let them rise again in that warm spot for another 20-30 minutes. They should puff up noticeably, almost doubling in size again. This final proof is crucial for maximum tenderness and flavor development.
10. Baking to Golden Perfection: Preheat your oven to 375°F (190°C) while the rolls are proofing. Once the oven is hot, bake the rolls for 18-22 minutes, or until they are deeply golden brown on top and sound hollow when tapped on the bottom. The internal temperature should reach about 190°F (88°C) if you have a thermometer. They should look irresistible and smell divine!
11. Making the Glaze: While the rolls are baking, make the cream cheese glaze. In a medium bowl, beat the softened cream cheese until smooth. Gradually beat in the powdered sugar until combined. Add the vanilla extract and enough milk or heavy cream to achieve a thick but pourable consistency. Set aside.
12. Glazing and Serving: As soon as the rolls come out of the oven, spread or drizzle the warm glaze evenly over the tops. The heat from the rolls will help the glaze melt and seep slightly into the crevices, creating an extra layer of decadence. Let them cool in the pan for 5-10 minutes before serving. Enjoy them warm for the ultimate experience!
Variations to Suit Your Cravings
While the classic cinnamon roll is perfection, feel free to experiment:
- Nutty Delight: Fold 1 cup of chopped pecans, walnuts, or almonds into the cinnamon-sugar filling before spreading.
- Fruitful Twist: Add 1 cup of finely chopped apples (tossed with a bit of lemon juice to prevent browning), raisins, or dried cranberries to the filling.
- Spice It Up: Add 1/2 teaspoon of ground cardamom or nutmeg to the cinnamon-sugar filling for a unique flavor profile.
- Chocolate Indulgence: Replace half the brown sugar in the filling with cocoa powder, or swirl in chocolate chips with the cinnamon sugar.
- Orange Zest: Add 1-2 teaspoons of grated orange zest to the filling for a bright, citrusy note.
- Cream Cheese Filling: For an extra layer, pipe a small amount of cream cheese filling (just softened cream cheese mixed with a little powdered sugar) into the center of each rolled dough piece before slicing and baking.
Storage and Reheating: Keeping the Magic Alive
- Room Temperature: Store leftover rolls in an airtight container at room temperature for up to 2 days. They are best enjoyed fresh, but will still be quite good.
- Refrigeration: For longer storage (up to 4 days), refrigerate the rolls in an airtight container. Let them come to room temperature before reheating.
- Freezing: Excellent for make-ahead! After the rolls have cooled completely (after baking and glazing), wrap individual rolls or the whole pan tightly in plastic wrap, then place in a heavy-duty freezer bag or airtight container. Freeze for up to 3 months. To reheat, thaw overnight in the refrigerator if frozen, then warm in a preheated 350°F (175°C) oven for 10-15 minutes, or until warmed through. Alternatively, reheat individual rolls in the microwave for 15-20 seconds.
- Reheating Tips: For the best texture, reheat refrigerated or frozen rolls in a low oven (300-325°F / 150-160°C) for 10-15 minutes. Microwaving can make them slightly chewy, but is fine for a quick warm-up.
Avoiding Common Pitfalls: Tips for Roll-Perfect Results
- Yeast Check: Ensure your yeast is fresh and active. Expired yeast won’t foam.
- Temperature is Key: The milk mixture needs to be warm (110°F / 43°C), not hot. Hot liquid kills yeast.
- Don’t Over-Knead: Knead just until the dough is smooth and elastic. Over-kneading develops too much gluten, leading to tough rolls.
- Avoid Excess Flour: Use only enough flour to prevent sticking during kneading and shaping. Too much flour makes the dough dry and dense.
- Proper Rising Environment: Place the dough in a consistently warm spot. Drafts or cold temperatures will slow or halt rising.
- Don’t Rush the Second Rise: Allow the rolls to rise sufficiently before baking. They should look noticeably puffy.
- Don’t Over-Bake: Bake until golden brown and set. Over-baking dries them out.
- Glaze While Warm: Applying the glaze while the rolls are still warm allows it to melt beautifully into the crevices.
Frequently Asked Questions (FAQs)
- Can I use active dry yeast instead of instant yeast? Yes, but you need to activate it first. Dissolve it in the warm milk (110°F / 43°C) with 1 tablespoon of sugar and let it sit for 5-10 minutes until foamy before proceeding with the recipe.
- My dough is too sticky to knead. What should I do? Add flour very* sparingly, a teaspoon at a time, while kneading. Over-flouring is the enemy of tender rolls. The dough should be soft and slightly tacky, not dry.
- Why didn’t my rolls rise enough? Check the yeast freshness, ensure the milk wasn’t too hot, and verify the rising environment was warm enough and draft-free. The dough might need more time.
- Can I make these rolls ahead of time? Absolutely! You can shape and let them rise overnight in the refrigerator (place the covered pan in the fridge after the second rise). Bake them in the morning. You can also freeze the baked, cooled rolls and reheat them later.
- How do I know when the rolls are done baking? They should be a deep golden brown on top and sound hollow when tapped on the bottom. An internal temperature of 190°F (88°C) is ideal.
- Can I use a different type of milk? Yes, whole milk, 2%, or even skim milk will work. Whole milk adds the most richness, but any will suffice.
- What if I don’t have a stand mixer? You can knead the dough by hand on a lightly floured surface for 8-10 minutes until smooth and elastic. It requires a bit more effort but is perfectly achievable.
- Can I use a bread machine? Yes, you can use the dough cycle on your bread machine. Follow your machine’s instructions for the dough cycle, then proceed with shaping, rising, and baking as directed.
- How long do leftover rolls last? Stored in an airtight container at room temperature, they are best enjoyed within 2 days. For longer storage, refrigerate for up to 4 days or freeze for up to 3 months.
- Can I double the recipe? Yes, simply double all the ingredients and use a larger baking pan. Adjust baking time slightly if needed (check for doneness around 25-30 minutes).
The Final Proof: A Warm Embrace
There’s something deeply satisfying about pulling a pan of warm, fragrant cinnamon rolls from your oven. These One Hour Quick Rise Cinnamon Rolls capture that magic without demanding hours of your time. They are a celebration of simplicity, speed, and pure, unadulterated comfort. The tender crumb, the gooey cinnamon center, the sweet, tangy glaze – it’s a symphony of flavor that speaks directly to the soul. Whether you’re treating yourself on a busy weekday, surprising loved ones on a weekend, or bringing a little joy to a gathering, these rolls deliver. They prove that sometimes, the best things in life truly do come quickly. So preheat your oven, gather your ingredients, and get ready to experience the pure, golden bliss of homemade cinnamon rolls in just one hour. Enjoy every warm, buttery, cinnamon-scented bite!