Table of Contents
- 1 Introduction to Mini-ppover Recipe
- 2 Ingredients for Making Mini-ppover Recipe
- 3 Step-by-Step Guide to Making Mini-ppover Recipe
- 4 Serving and Storing Mini-Popovers
- 5 Creative Variations and Flavors
- 6 Troubleshooting Common Popover Problems
- 7 Healthier Alternatives to Classic Mini-ppover Recipe
- 8 FAQs About Mini-Ppover Recipe
- 9 Conclusion
If you’ve ever tried a popover, you know exactly how magical they are. They’re light, airy, and perfect for any occasion. Now, imagine all of that in a miniature version—cute, bite-sized, and oh-so-perfect for snacking or serving as an elegant side. Mini-ppover Recipe are the perfect blend of simple ingredients and delicious results. Whether you’re hosting a party, preparing a family dinner, or just craving a savory treat, these little bites will never disappoint. In this article, we’ll walk you through everything you need to know—from the ingredients to tips on baking and serving them in the best possible way. Ready to embark on this Mini-ppover Recipe adventure? Let’s dive in!
Introduction to Mini-ppover Recipe
What Are Mini-ppover Recipe?
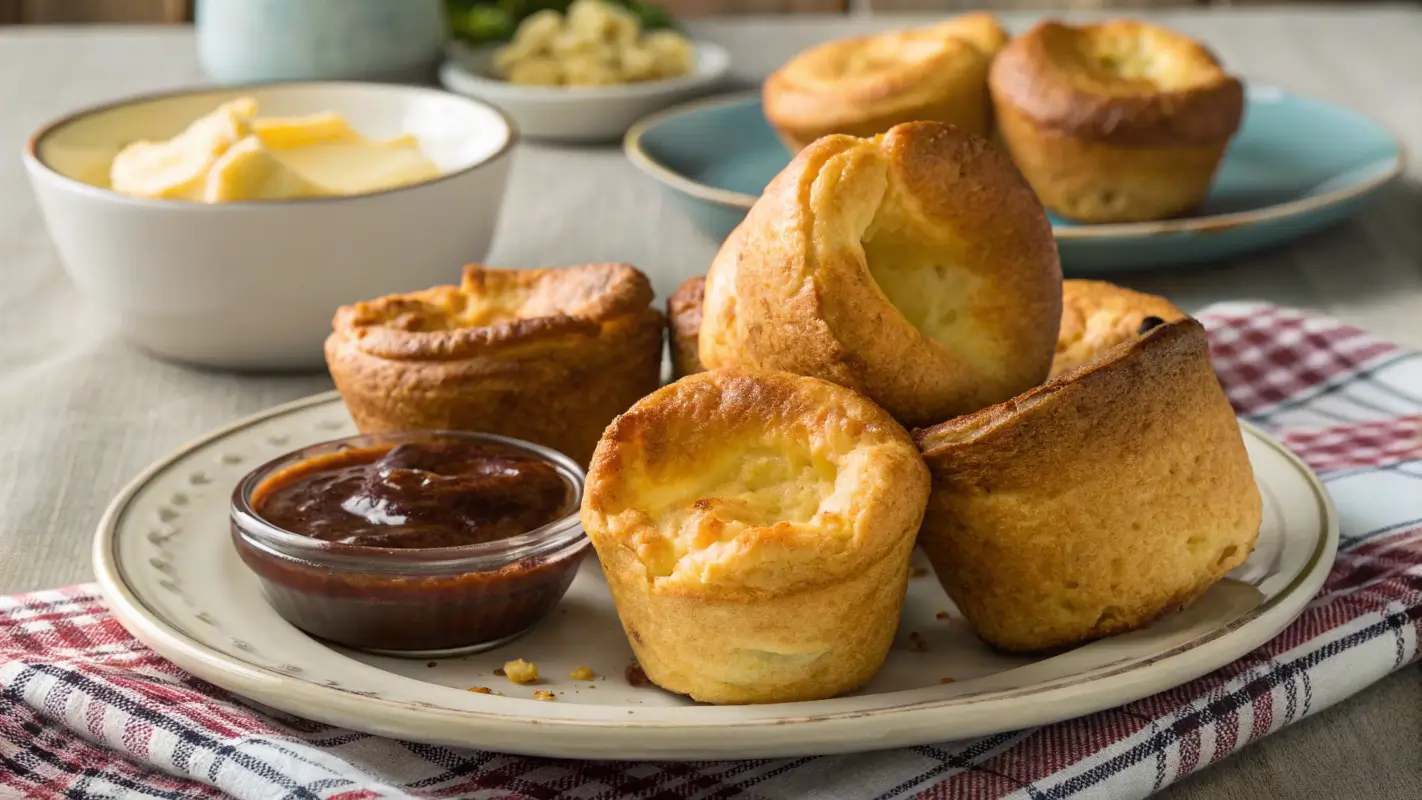
Mini-popovers are a delightful, bite-sized version of the traditional popover, a beloved pastry known for its light, airy texture. These fluffy delights are made from a simple batter of eggs, milk, flour, and butter, which creates a slightly crispy, golden exterior while maintaining a soft, airy inside. The key to a perfect popover lies in the steam created as the batter bakes—this is what gives them that signature puffed-up texture. Mini-ppover Recipe are just like their full-sized cousins, but they’re easier to handle, quicker to bake, and perfect for any occasion.
Originating in New England, popovers have long been a staple at brunches, holiday gatherings, and elegant dinners. But with Mini-ppover Recipe, you get all the indulgence of the original but in a convenient, fun-sized form. Mini-ppover Recipe are ideal for snacking, pairing with soups, or serving as a side dish with your main course.
Why Mini-Popovers Are Perfect for Any Occasion
The beauty of mini-popovers lies in their versatility. These adorable bites can serve as an appetizer, a side dish, or even a snack on their own. Imagine a warm, buttery mini-popover alongside a steaming bowl of soup—heavenly, right? Or picture them as the perfect side at your next brunch, where guests can grab one (or five) without missing a beat.
Since mini-popovers are easy to make and bake in less than 30 minutes, they’re great for casual get-togethers or impromptu dinner parties. They can be served warm straight from the oven, or cooled and served later, making them ideal for prepping ahead.
If you’re looking to impress your guests with minimal effort, mini-popovers should be on your list. Their light texture and satisfying crunch make them irresistible—whether you’re pairing them with savory flavors or even adding a sweet touch.
Ready to get started with the ingredients for your mini-popovers? Stay tuned for Part 2, where we’ll walk you through the essential and optional ingredients to make the perfect batch. You won’t believe how easy it is!
Ingredients for Making Mini-ppover Recipe
Essential Ingredients for Mini-ppover Recipe
To make your own Mini-ppover Recipe, you only need a few basic ingredients. The magic lies in these simple staples, so let’s break it down:
- Flour: All-purpose flour works best for popovers. It helps give them that classic airy texture. You’ll need around 1 cup for a basic batch.
- Eggs: Eggs are essential to the structure and puff of your mini-popovers. They add richness and act as a binding agent for the batter.
- Milk: Milk helps create that perfect soft and fluffy interior. Whole milk is ideal for a creamy consistency, but you can also use plant-based options like almond or oat milk.
- Butter: Melted butter not only adds flavor but helps achieve that crispiness on the outside of your mini-popovers.
- Salt: Just a pinch of salt helps balance the flavors and adds depth to the taste.
With these simple ingredients, you’re well on your way to creating a perfect batch of mini-popovers.
Optional Ingredients and Variations
While the basic ingredients are all you need, Mini-ppover Recipe are extremely versatile, so you can get creative with your additions. Here are a few ideas to customize your mini-popovers:
- Herbs: Fresh or dried herbs like rosemary, thyme, or parsley can be mixed into the batter for a savory flavor.
- Cheese: Add shredded cheddar, parmesan, or goat cheese to the batter for a cheesy twist. The cheese will melt and add a rich flavor to each bite.
- Spices: Try adding a pinch of garlic powder, onion powder, or paprika for an extra layer of flavor.
- Sweet Variations: For a sweet twist, you can add sugar, cinnamon, or even some vanilla extract to the batter.
Don’t be afraid to experiment and make the recipe your own. Whether you want your mini-popovers to be savory or sweet, you can easily switch up the flavors to fit your tastes.
Step-by-Step Guide to Making Mini-ppover Recipe
Preparing the Popover Batter
Making the batter for Mini-ppover Recipe is as simple as it gets. Here’s how you can do it:
- Preheat your oven to 425°F (220°C). This high heat is essential for creating those lovely, airy popovers.
- Mix the wet ingredients: In a bowl, whisk together your eggs, milk, and melted butter. Make sure they’re well combined.
- Add the dry ingredients: Slowly sift the flour and salt into the wet ingredients. Use a whisk to combine the ingredients gently until the batter is smooth and lump-free. The batter should be thin and runny—this is a good thing! It’s the secret to the perfect popover.
- Let the batter rest: Allow the batter to rest for about 5-10 minutes. This helps with the puffing process.
Prepping the Mini-Popover Pan
Now that your batter is ready, it’s time to prep the pan. A mini-popover pan works best, but if you don’t have one, don’t worry! You can use a regular muffin tin as an alternative.
- Grease the pan: Generously grease the mini-popover cups with butter or oil to prevent sticking.
- Preheat the pan: Place the greased pan in the oven for about 5 minutes before filling it with batter. This ensures the batter hits a hot surface right away, which helps them rise perfectly.
Baking the Mini-Popovers
- Fill the cups: Carefully pour the batter into the preheated mini-popover cups, filling them about halfway.
- Bake: Place the pan back in the oven and bake for 20-25 minutes. The high heat will cause the popovers to rise dramatically. Don’t open the oven door during the first 15 minutes of baking—this can cause them to collapse.
- Golden perfection: Your mini-popovers should be golden and crisp on the outside, with a light and airy interior. If they look a little puffy and beautifully brown, you’re on the right track!
Checking for Doneness
You’ll know your mini-popovers are done when they’re golden-brown and crispy on the outside. To check, simply tap the top lightly with a spoon. It should sound hollow, indicating that they’re cooked through and full of air. If you’re unsure, you can always cut one open to check its texture. If it’s airy inside with no wet batter, you’ve nailed it.
Serving and Storing Mini-Popovers
How to Serve Mini-Popovers
Mini-popovers are best enjoyed fresh out of the oven, but they’re also perfect for serving in a variety of ways. Here are a few ideas:
- With soup or salad: They pair perfectly with hearty soups, creamy bisques, or a light salad. The crispiness of the mini-popovers complements these dishes beautifully.
- At brunch or dinner: Serve them alongside roasted meats, like chicken or lamb, or at your next brunch spread with scrambled eggs and fresh fruit. They’re versatile enough to fit almost any meal.
- As a snack: Mini-popovers are great for snacking. Serve them with a little butter or your favorite dipping sauce, such as garlic butter or cream cheese.
You can also get creative and experiment with fillings—try stuffing mini-popovers with cheese or a savory mixture of herbs, garlic, and spinach for an extra boost of flavor.
Storing and Reheating Leftovers
Mini-popovers are best enjoyed warm, but if you have leftovers, here’s how to keep them fresh:
- Store them: Place mini-popovers in an airtight container and store them at room temperature for up to 2 days. They’ll stay crisp, but they’re definitely at their best within the first day or two.
- Reheat them: To reheat, simply place them in a preheated oven at 350°F (175°C) for 5-7 minutes. This will help restore their crispy texture. Avoid using the microwave, as it can make them soggy.
Creative Variations and Flavors
Savory Mini-ppover Recipe Variations
While the classic Mini-ppover Recipe is fantastic on its own, there’s a world of flavors you can explore. Here are a few savory variations to try:
- Cheese-filled popovers: Add grated cheddar or parmesan to the batter, or even tuck a small piece of cheese in the center of each popover before baking. The cheese melts as it bakes, creating a gooey, cheesy center.
- Garlic and herb popovers: Add finely chopped garlic and fresh rosemary to the batter for a flavorful twist. These are perfect when served with soup or as an accompaniment to roasted meats.
- Spinach and cheese: Add spinach and shredded mozzarella to your batter. This makes for a savory, cheesy popover that’s perfect for brunch or a light lunch.
Sweet Mini-ppover Recipe Variations
If you prefer a sweeter treat, you can easily turn mini-popovers into a dessert. Here’s how:
- Cinnamon sugar: After baking, brush the popovers with melted butter and sprinkle with a cinnamon-sugar mix. They’ll be a delightful, sweet bite perfect with a cup of tea.
- Chocolate popovers: Add chocolate chips to the batter for a sweet and indulgent treat. They’re great for breakfast or dessert and pair wonderfully with whipped cream or vanilla ice cream.
- Fruit-filled popovers: Consider adding fresh berries or dried fruit to the batter for a burst of sweetness. You can also add a dollop of jam in the center of each popover for a fun surprise.
No matter your flavor preference, the possibilities are endless when it comes to customizing your mini-popovers. So go ahead, get creative, and make them your own!
Troubleshooting Common Popover Problems
Why Your Mini-ppover Recipe Didn’t Rise
If your mini-popovers didn’t rise to their expected fluffy, golden glory, don’t worry—you’re not alone! Several factors can cause this issue, but with a little tweaking, you can perfect your popovers next time.
- Oven Temperature Too Low: Popovers need high heat to rise. If your oven is too cool, they won’t puff up properly. Make sure your oven is preheated to at least 425°F (220°C).
- Opening the Oven Door: It’s tempting to peek in on your mini-popovers, but opening the door before the first 15 minutes of baking can cause them to collapse. Keep the oven door closed until they’ve had time to rise.
- Incorrect Ratio of Ingredients: The batter needs the right balance of liquid and flour to rise correctly. If the batter is too thick, it won’t puff up. Try adjusting the amounts of milk or flour to get a thinner, runnier consistency.
If you encounter any of these issues, don’t worry—it’s all part of the learning process. With practice, you’ll get the hang of the perfect batter consistency and oven temperature!
Fixing Mini-ppover Recipe That Collapse After Baking
It’s incredibly disappointing to see your beautifully risen popovers fall flat after they come out of the oven. However, this can happen for several reasons, and here’s how to prevent it:
- Underbaking: Make sure your mini-popovers are fully baked. If they’re underdone, they can collapse as they cool. Always check for a golden-brown color and a hollow sound when you tap them.
- Not Allowing Proper Cooling: When you take your popovers out of the oven, they need time to cool off. If you remove them from the pan and place them on a flat surface immediately, they might collapse due to the shift in temperature. Let them rest for a few minutes in the pan before transferring.
- Too Much Air in the Batter: While you want air in the batter to help it rise, overmixing the batter can result in a dense interior that lacks the structural integrity needed to hold its shape. Be gentle while mixing to keep that light and fluffy texture intact.
With a few adjustments, you’ll be able to avoid these popover pitfalls and achieve the perfect puff every time!
Healthier Alternatives to Classic Mini-ppover Recipe
Gluten-Free Mini-ppover Recipe
Whether you’re baking for someone with dietary restrictions or simply want to try something new, making gluten-free Mini-ppover Recipe is totally doable. The key is in substituting the all-purpose flour with a suitable gluten-free alternative.
- Flour Alternatives: Use a gluten-free flour blend that’s designed for baking, such as rice flour, almond flour, or tapioca flour. These blends will help mimic the structure and texture of traditional popovers while keeping them light and airy.
- Xanthan Gum: Many gluten-free flours need an added binder like xanthan gum or guar gum. Check the instructions on your gluten-free flour to ensure you’re adding the right amount to maintain the right texture.
- Eggs and Milk: These ingredients remain the same in a gluten-free version. You can stick with whole eggs and milk, or use plant-based milk and egg substitutes if needed.
Baking gluten-free Mini-ppover Recipe can be a little trial and error, but with a bit of patience, you’ll end up with a batch that’s just as delicious as the original.
Low-Fat or Dairy-Free Mini-ppover Recipe
If you’re looking for a lighter option or need to avoid dairy, don’t fret! You can still make Mini-ppover Recipe without compromising on taste.
- Low-Fat Options: Substitute the butter with unsweetened applesauce or a light oil like canola oil. You can also use low-fat milk or almond milk to cut down on the fat content.
- Dairy-Free Popovers: For a completely dairy-free version, swap out regular milk and butter for plant-based milk (like almond, oat, or soy milk) and dairy-free margarine or coconut oil. These ingredients will keep the popovers light while also making them suitable for those with lactose intolerance or vegan diets.
Don’t be afraid to make these swaps—your Mini-ppover Recipe will still come out perfectly fluffy and delicious!
FAQs About Mini-Ppover Recipe
Frequently Asked Questions
How long should mini-popovers be baked?
Mini-popovers should bake for about 20-25 minutes at 425°F (220°C). Keep an eye on them; they’ll puff up and turn golden brown. If they’re not quite there yet, give them a few extra minutes. Just make sure not to open the oven door too soon, as that could cause them to collapse.
Can I use a regular muffin tin for Mini-ppover Recipe?
Absolutely! If you don’t have a mini-popover pan, a regular muffin tin works just fine. However, a mini-popover pan gives you the ideal shape and rise. If using a muffin tin, make sure to grease each cup well and follow the same baking instructions.
How do I prevent mini-popovers from deflating?
To prevent collapse, avoid opening the oven door during the first 15 minutes of baking. Make sure the oven is preheated to a high temperature, and give the mini-popovers enough time to fully bake. After removing them, let them cool slightly in the pan before transferring them to a serving dish.
Can I freeze mini-popovers?
Yes! You can freeze mini-popovers to enjoy later. After baking, let them cool completely, then place them in an airtight container or freezer bag. They can stay in the freezer for up to 3 months. To reheat, bake at 350°F (175°C) for about 5-7 minutes.
Can I add cheese to the popover batter?
Definitely! Cheese is a fantastic addition to Mini-ppover Recipe. You can fold in grated cheddar, parmesan, or any cheese you love. It’ll melt into the batter and create a delicious, cheesy interior. Just make sure to reduce the amount of butter slightly to balance the extra fat.
Conclusion
Mini-popovers are a true delight to make and eat. Whether you’re looking for a savory snack, a simple side dish, or a fun way to spice up your next meal, mini-popovers are always a great choice. Their versatility, light texture, and delicious flavor make them a favorite in any kitchen. Plus, with all the variations and tips we’ve shared, you can make them to suit any taste or dietary need.
Now that you know all the secrets to perfect mini-popovers, it’s time to roll up your sleeves, preheat your oven, and bake a batch (or two)! You’ll love the way they puff up, golden and crisp, filling your home with that irresistible, mouthwatering aroma.
Happy baking, and enjoy your delicious mini-popovers!
For additional baking tips and techniques, check out this helpful guide from The Kitchn’s Baking Guide.