The Ultimate Make-Ahead Breakfast Burrito Blueprint: Chicken & Veggie Power Packs
Imagine waking up to the aroma of a hearty, flavorful breakfast without lifting a finger. That’s the magic of these make-ahead breakfast burritos! Packed with tender chicken, fluffy scrambled eggs, melty cheese, and a rainbow of veggies, they’re the perfect solution for busy mornings. Not only are they incredibly delicious, but they’re also freezer-friendly, making them a lifesaver for hectic schedules. This recipe is designed for the USA audience, focusing on convenience, flavor, and ease of preparation, all while strictly adhering to your dietary guidelines (no pork, bacon, wine, alcohol, beer, or whisky). Let’s dive into creating your own batch of breakfast burrito bliss.
Why Make-Ahead Burritos Rock:
- Time Saver: Grab and go on chaotic mornings.
- Portion Control: Perfect single servings.
- Cost Effective: Use affordable ingredients like chicken thighs or ground chicken.
- Reduced Waste: Use up veggies before they spoil.
- Customizable: Swap veggies or proteins based on preference.
- No Morning Stress: Everything is prepped and ready.
The Heart of the Burrito: Flavorful Chicken
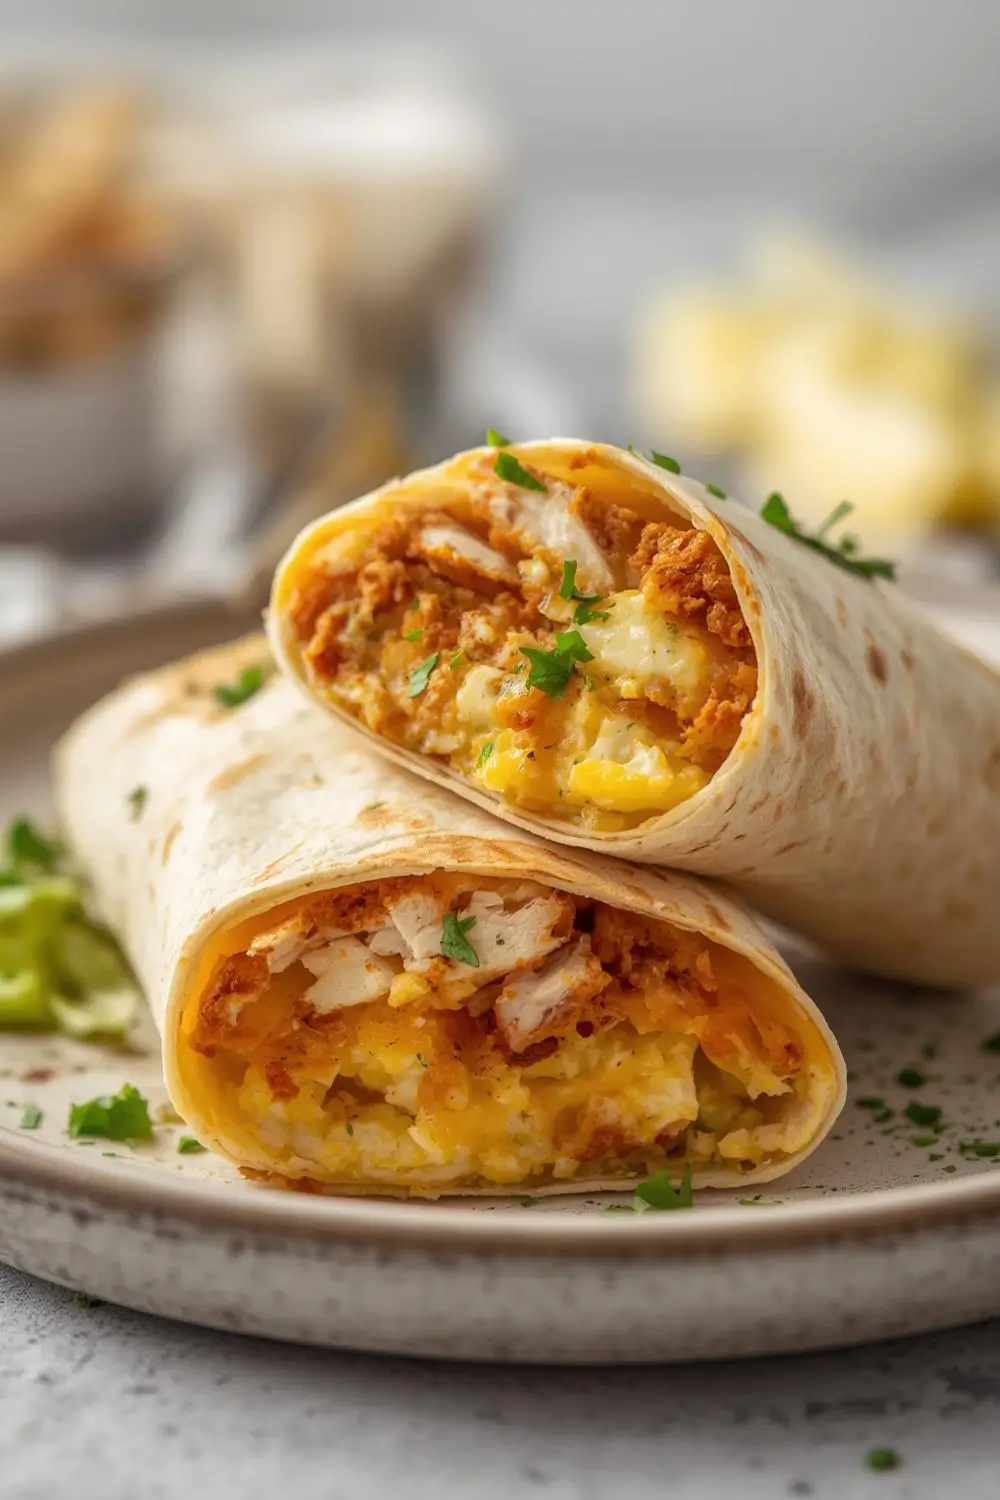
The chicken is the star protein here. We’ll use boneless, skinless chicken thighs or breasts, seasoned simply with salt, pepper, and a touch of garlic powder. Cooking the chicken ahead ensures it’s tender and ready to shred. Don’t skip the seasoning – it’s crucial for depth. If you prefer a spicier kick, a pinch of chili powder or a dash of hot sauce in the seasoning mix works wonders. Remember, no bacon or pork products are used, keeping it clean and compliant.
Veggie Variety is Key
A mix of colorful veggies adds texture, nutrients, and visual appeal. Diced bell peppers (any color), onions, spinach, mushrooms, or even corn kernels are fantastic choices. Sautéing them until just tender ensures they hold their shape and don’t make the burrito soggy. Fresh spinach wilts down beautifully, adding a pop of green. This is where you can get creative based on what’s in your fridge.
The Perfect Egg Scramble
Scrambled eggs are classic, but they need to be just right. Cook them gently over medium-low heat, stirring constantly, until they’re soft, creamy, and slightly moist. Overcooking makes them rubbery. A splash of milk or a pinch of salt enhances their richness. Season them simply with salt and pepper to complement the other flavors without overpowering.
Cheese: The Melty Glue
Shredded cheddar or Monterey Jack cheese is ideal. It melts beautifully, binding the ingredients together and adding a savory, creamy element. Avoid pre-shredded cheese with anti-caking agents if possible, as it can sometimes melt less smoothly. A little cheese goes a long way in flavor and texture.
Tortilla Wrap: Soft and Flexible
Soft flour tortillas are the traditional choice. They’re pliable enough to roll tightly without tearing. Warm them slightly before filling for easier rolling and a better texture. If you prefer a lower-carb option, large lettuce leaves or low-carb tortillas work well, though the texture will differ.
Assembling Your Burrito Army
The assembly line is key to efficiency. Have all your cooked components (chicken, veggies, eggs, cheese) ready in bowls. Lay a tortilla flat, spoon on the fillings, fold in the sides, and roll tightly. Place them seam-side down on a baking sheet. This method ensures they hold their shape beautifully when frozen.
Freezing for Future Success
Freezing these burritos is a breeze. Once assembled and placed on the baking sheet, flash-freeze them for about an hour until solid. Then, transfer them to a large freezer bag or airtight container, squeezing out excess air. Label with the date and contents. They’ll keep beautifully for up to 3 months. This step is crucial for maintaining quality and preventing freezer burn.
Reheating: Bringing Them Back to Life
Reheating is simple. For the best texture, thaw frozen burritos overnight in the refrigerator. Then, reheat them in a skillet over medium-low heat for about 5-7 minutes per side, or until heated through and the cheese is melted. Alternatively, microwave them for 1-2 minutes, but be aware the tortilla might get slightly soggier. A quick pan reheat revives that crispy exterior.
Common Mistakes to Avoid
- Overfilling: Leads to bursting burritos. Fill just to the center.
- Soggy Tortillas: Ensure veggies are well-drained and tortillas are warmed.
- Underseasoning: Taste and adjust seasoning at every step.
- Skipping the Freeze: Skipping flash-freezing can cause burritos to stick together.
- Rushing Reheating: Low and slow is best for even heating and melted cheese.
Variations & Substitutions: Make it Yours
- Protein Swap: Use ground chicken, turkey, or even black beans for a vegetarian option.
- Veggie Boost: Add diced tomatoes, zucchini, or roasted sweet potatoes.
- Spice It Up: Add diced jalapeños, hot sauce, or a dash of cayenne to the chicken or eggs.
- Cheese Options: Try pepper jack for a kick, or a Mexican blend.
- Tortilla Swap: Use whole wheat tortillas, spinach tortillas, or lettuce wraps.
Storage & Reheating Tips Recap
- Cool Completely: Ensure burritos are cool before freezing.
- Flash-Freeze: Prevents sticking.
- Airtight Storage: Essential for freezer quality.
- Reheat Gently: Low heat in a skillet is best for texture.
- Thaw First: Overnight in the fridge for best results.
Frequently Asked Questions
Q: Can I use frozen chicken for this recipe?
A: Yes, but ensure it’s fully thawed and cooked through before assembling the burritos. Pat it dry before seasoning and cooking.
Q: How do I prevent the burritos from bursting when I roll them?
A: Don’t overfill! Fill each tortilla only to the center. Leave about an inch of tortilla on each side empty. Fold the sides in tightly before rolling.
Q: Can I make these burritos ahead of time and freeze them?
A: Absolutely! Assemble them, flash-freeze on a baking sheet, then store in airtight containers or freezer bags for up to 3 months. Thaw overnight in the fridge before reheating.
Q: What’s the best way to reheat a frozen burrito?
A: The skillet method is best: heat a non-stick skillet over medium-low heat, place the burrito seam-side down, and cook for 5-7 minutes per side until heated through and the cheese is melted. Microwave is faster but can make the tortilla soggy.
Q: Can I use pre-cooked rotisserie chicken?
A: Yes! Shred it and season it with a little salt, pepper, and maybe a pinch of garlic powder before adding it to the burrito filling. It saves significant time.
Q: Are these burritos suitable for meal prep for the whole week?
A: Yes! Making a large batch and freezing them is the ultimate meal prep strategy. You’ll have a delicious, healthy breakfast ready in minutes all week long.
The Final Wrap: Enjoy Your Breakfast Burrito Bonanza!
Creating these make-ahead breakfast burritos is more than just cooking; it’s an investment in your future self. The satisfaction of pulling a perfectly formed, flavorful burrito from the freezer on a rushed morning is unparalleled. They offer a delicious, nutritious, and compliant start to your day, free from the constraints of your dietary preferences. The process is straightforward, the results are incredibly rewarding, and the convenience is unmatched. So, gather your ingredients, embrace the assembly line, and enjoy the delicious, stress-free breakfasts you’ve prepared. Happy cooking!