Table of Contents
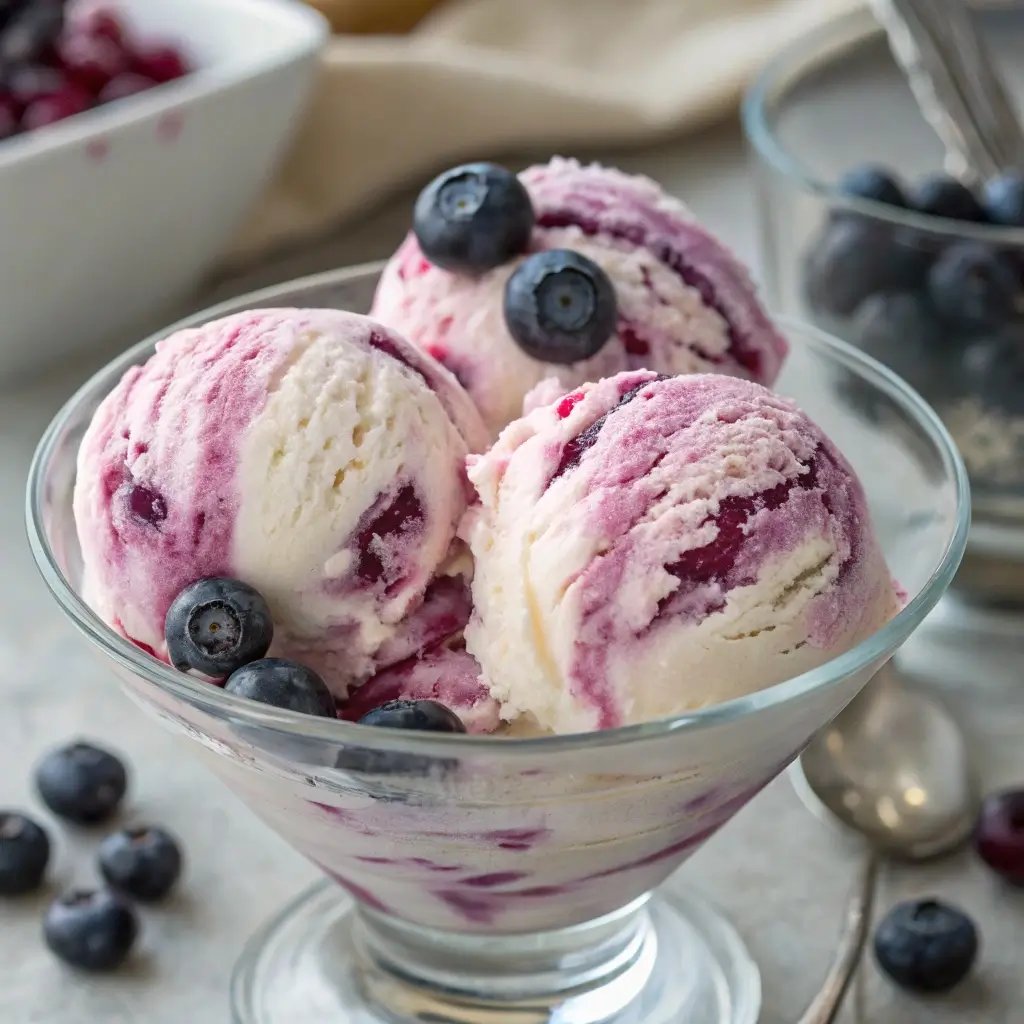
No-churn ice cream is a revelation for home cooks: all the creamy, dreamy satisfaction of homemade ice cream—with zero need for a machine. This Homemade Huckleberry Ice Cream recipe celebrates summer’s star berry in a deliciously simple way. Swirls of sweet-tart huckleberry compote ripple through a rich, vanilla base made with just whipped cream and sweetened condensed milk.
Whether you’re enjoying it at a family picnic, serving it up at a BBQ, or cooling down after dinner, this dessert is both a breeze to make and absolutely unforgettable.
Why You’ll Love No-Churn Ice Cream
No special equipment needed: Just a whisk or hand mixer and a loaf pan.
Velvety texture: The combination of whipped cream and condensed milk gives it a luscious, scoopable texture.
Customizable: Add swirls, crunch, or extra flavors.
Make-ahead friendly: Lasts up to 2 months in the freezer.
Kid-friendly: No raw eggs or alcohol—just clean, simple ingredients.
What Makes Huckleberries So Special?
Huckleberries are often described as blueberries’ wild cousins—but with more vibrant flavor and intense sweetness. Native to the Pacific Northwest and mountain regions, they can be difficult to cultivate, which makes them a seasonal treasure.
Benefits of using huckleberries:
Packed with antioxidants and vitamin C
Add a deep magenta-purple hue
Their bold tart-sweet balance is ideal for ice cream
Offer flavor intensity that stands up to rich dairy
Ingredients & Substitutions
Here’s everything you’ll need for the perfect batch of no-churn huckleberry ice cream:
Ice Cream Base:
2 cups (475 ml) heavy whipping cream, cold
1 can (14 oz / 396 g) sweetened condensed milk
1 tsp pure vanilla extract
Pinch of salt (enhances flavor)
Huckleberry Swirl:
2 cups (300 g) huckleberries, fresh or frozen
⅓ cup (67 g) granulated sugar
1 Tbsp lemon juice
1 tsp cornstarch (optional, for thickening)
Substitutions:
If you can’t find huckleberries, try a 50/50 mix of blueberries and blackberries.
For a dairy-free option, use full-fat coconut cream and sweetened condensed coconut milk.
To reduce sweetness, use unsweetened condensed milk and adjust sugar in the swirl.
Tools You’ll Need
Medium saucepan
Whisk or hand mixer
Mixing bowl
Rubber spatula
9×5 inch loaf pan or freezer-safe container
Parchment paper or plastic wrap
Step-by-Step Instructions
Make the Huckleberry Swirl
In a saucepan over medium heat, combine huckleberries, sugar, and lemon juice.
Stir occasionally and cook for 5–7 minutes, until berries burst and juices release.
Optional: Add cornstarch slurry (1 tsp cornstarch + 1 Tbsp water) and cook 1–2 more minutes until thickened.
Let it cool completely before swirling into ice cream base.
❄️ Pro Tip: You can prepare the compote up to 3 days in advance and refrigerate it.
Whip the Cream
In a large bowl, whip cold heavy cream with a hand mixer on high until stiff peaks form (about 2–3 minutes).
Don’t overwhip—it should be firm but still smooth.
Combine the Ice Cream Base
In another bowl, whisk together sweetened condensed milk, vanilla, and a pinch of salt.
Gently fold in the whipped cream in batches using a spatula.
Mix until just combined—don’t deflate the cream!
Swirl and Freeze
Pour half the ice cream mixture into your loaf pan.
Spoon over half of the huckleberry compote and swirl with a knife.
Repeat with remaining base and swirl.
Cover tightly with parchment paper or wrap and freeze for at least 6 hours, preferably overnight.
Serving & Storage Tips
Serve in bowls, cones, or sandwiched between cookies.
Store tightly covered in freezer for up to 2 months.
Soften at room temperature for 5–10 minutes before scooping.
🍦 Bonus idea: Drizzle with extra berry compote before serving for maximum wow!
Expert Tips for Perfect No-Churn Ice Cream
Use cold cream: Warmer cream won’t whip well.
Chill your bowl: Cold tools help cream whip faster.
Let the compote cool completely: Warm compote will melt your base.
Don’t over-swirl: Swirls should look artistic, not mixed in.
Variations and Add-Ins
Love to customize? Try these tasty spins:
🍫 Chocolate Chip Huckleberry Ice Cream
Add ½ cup mini chocolate chips during folding.
🍯 Honey Lavender Huckleberry
Add 1 Tbsp honey and ½ tsp dried culinary lavender to the base for a floral twist.
🥥 Coconut Huckleberry Ice Cream (Dairy-Free)
Use coconut cream + condensed coconut milk, and swirl with berries.
🍪 Huckleberry Crumble
Top scoops with crushed graham crackers or oat crumble.
Frequently Asked Questions (FAQs)
Can I use frozen huckleberries?
Absolutely. Thaw them first, then use as directed in the swirl.
Can I make this without condensed milk?
Condensed milk is key to the no-churn base. You could try a DIY version or substitute with condensed coconut milk for a dairy-free option.
How long does this ice cream last in the freezer?
Up to 2 months in a sealed container. For best flavor, enjoy within 3–4 weeks.
Is this ice cream kid-friendly?
100%! No raw eggs or alcohol. It’s sweet, fruity, and totally safe for kids.
Can I make it sugar-free?
Use a sugar-free condensed milk and adjust the berry swirl with stevia or erythritol. The texture may vary slightly.
Final Thoughts
Homemade huckleberry ice cream is proof that luxurious summer desserts don’t need complicated tools. This no-churn method is easy enough for beginners and delicious enough to impress everyone at the table. Whether you’re harvesting fresh huckleberries or using