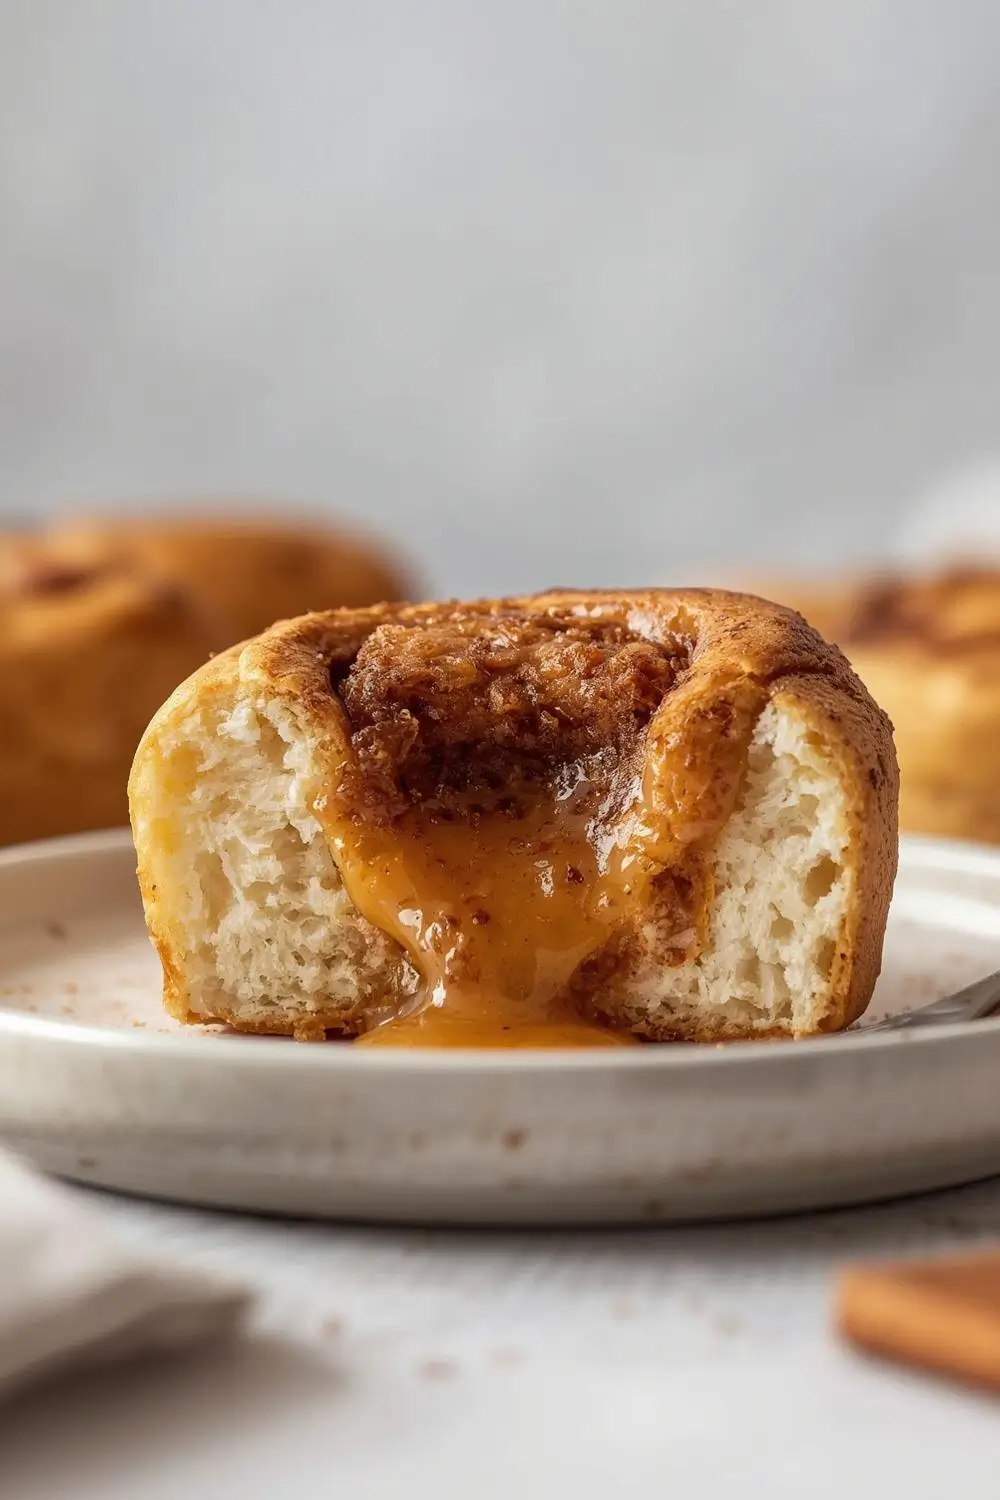
There’s something undeniably magical about biting into a cinnamon roll. That first, warm, sugary crunch gives way to a tender, pillowy crumb, and then… wow. A molten, cinnamon-sugar river floods your mouth. It’s pure, unadulterated comfort. Forget the store-bought versions that promise gooey centers but deliver only disappointment. Today, we’re unlocking the secret to truly Gooey Center Cinnamon Rolls – homemade, rich, and utterly irresistible. This isn’t just a recipe; it’s a journey into the heart of cinnamon roll perfection, designed for the home baker and guaranteed to become your new weekend ritual.
Why These Cinnamon Rolls Are Special
What sets these apart? It’s the meticulous attention to detail, starting with the dough. We’re using a blend of bread flour for structure and all-purpose flour for tenderness, creating the perfect balance. The star, however, is the gooey center. Unlike traditional rolls where the filling is merely a layer, our technique ensures a dense, sweet, cinnamon-sugar core that oozes with every bite. This magic comes from a carefully crafted filling and a specific baking method that traps the moisture. Paired with a silky, vanilla-infused cream cheese frosting, these rolls are a symphony of flavor and texture. They’re soft, they’re sweet, they’re utterly decadent, and they’re entirely achievable right in your own kitchen.
Gathering Your Ingredients: The Foundation of Flavor
Before we dive into the process, let’s assemble everything you’ll need. This recipe yields a generous batch, perfect for sharing (or not – we won’t judge!).
For the Dough:
- Warm Milk (1 cup / 240ml): Whole milk is ideal for richness, but any milk works. It needs to be warm (about 110°F / 43°C) to activate the yeast.
- Active Dry Yeast (2 1/4 tsp / 1 packet): The leavening agent that makes the dough rise.
- Granulated Sugar (1/4 cup / 50g): Feeds the yeast and adds sweetness.
- Salt (1 1/4 tsp / 6g): Enhances flavor and controls yeast activity.
- Large Eggs (2, room temperature): Adds richness, structure, and moisture.
- Unsalted Butter (1/2 cup / 115g, melted): Provides flavor and tenderness. Let it cool slightly before adding.
- Bread Flour (4 cups / 500g): For structure and chew.
- All-Purpose Flour (1 cup / 125g): For tenderness and softness. You might need a bit more during kneading.
For the Gooey Center Filling:
- Brown Sugar (1 cup / 200g, packed): Adds deep molasses notes and moisture.
- Granulated Sugar (1/2 cup / 100g): Balances the brown sugar sweetness.
- Ground Cinnamon (2 tbsp / 12g): The essential spice.
- Salt (1/4 tsp / 1g): Enhances the cinnamon flavor.
- Unsalted Butter (1/2 cup / 115g, softened): Creates the gooey texture and helps the filling adhere.
For the Cream Cheese Frosting:
- Cream Cheese (8 oz / 225g, softened): The star of the frosting.
- Unsalted Butter (1/4 cup / 57g, softened): Adds richness and smoothness.
- Vanilla Extract (1 tsp): Pure vanilla for depth.
- Powdered Sugar (2 1/2 cups / 300g): Sweetens and thickens the frosting.
- Heavy Cream or Milk (2-4 tbsp): Adjusts consistency.
Essential Equipment:
- Stand mixer with dough hook (or large bowl and sturdy arm)
- Rolling pin
- 9-inch round or square baking pan (or 9×13 inch for smaller rolls)
- Parchment paper
- Small saucepan
- Whisk
- Spatula
- Cooling rack
The Dough: Where It All Begins
The journey to gooey perfection starts with a well-developed, slightly sticky dough. This is where patience pays off.
1. Activate the Yeast: Warm the milk gently in a small saucepan over low heat until it reaches 110°F (43°C). Remove from heat. Stir in the granulated sugar and sprinkle the yeast on top. Let it sit undisturbed for 5-10 minutes until it becomes foamy and fragrant. If it doesn’t foam, your yeast might be inactive – start over with fresh yeast.
2. Combine Wet Ingredients: In the bowl of your stand mixer (or a large bowl), whisk together the melted butter, room-temperature eggs, and salt. Pour in the activated yeast mixture and whisk thoroughly.
3. Incorporate Dry Ingredients: Add the bread flour and all-purpose flour to the wet mixture. Using the dough hook on low speed, mix until a shaggy dough forms and most of the flour is incorporated (about 2 minutes).
4. Knead for Elasticity: Increase the speed to medium-low. Knead the dough for 8-10 minutes. It will be very sticky at first. Add small amounts of the remaining all-purpose flour (up to 1/4 cup) only if absolutely necessary to prevent it from sticking excessively to the bowl. The dough is ready when it becomes smooth, elastic, and slightly tacky but not sticky enough to stick to your fingers. It should pass the “windowpane test” – stretch a small piece thin enough to see light through without tearing.
5. First Rise: Lightly grease a large bowl with oil. Place the dough ball in the bowl, turning it once to coat. Cover the bowl tightly with plastic wrap or a damp kitchen towel. Let the dough rise in a warm, draft-free spot until doubled in size, about 1 to 1.5 hours. It should look puffy and feel light.
Rolling Out the Gooey Center
Now comes the fun part – creating the signature gooey core. This step is crucial for achieving that molten center.
1. Prepare the Filling: While the dough rises, make the gooey center filling. In a small bowl, whisk together the brown sugar, granulated sugar, cinnamon, and salt. Set aside. In another small bowl, beat the softened butter until smooth and creamy.
2. Shape the Dough: Once the dough has doubled, gently punch it down to release air bubbles. Turn it out onto a lightly floured surface. Roll the dough into a large rectangle, roughly 18×24 inches. Aim for an even thickness, about 1/4 inch thick.
3. Spread the Butter: Using an offset spatula or the back of a spoon, spread the softened butter evenly over the entire surface of the dough, leaving a 1-inch border along one long edge.
4. Apply the Gooey Center: Sprinkle the cinnamon-sugar mixture evenly over the buttered dough, again leaving that 1-inch border clean. Press the sugar gently into the butter with the palm of your hand to help it adhere.
5. Roll into a Log: Starting from the long edge opposite the clean border, carefully roll the dough up tightly into a log. Pinch the seam firmly to seal. The clean border helps prevent leaking.
6. Cut the Rolls: Using a sharp knife or dental floss (for cleaner cuts), slice the log into 12 equal pieces (about 1.5-2 inches thick). Place the rolls cut-side up in a lightly greased 9-inch round or square baking pan, or a 9×13 inch pan for smaller rolls. They should fit snugly. Cover loosely with plastic wrap or a damp towel.
The Crucial Second Rise & Baking
This is where the magic truly happens. The rolls need time to rise again before baking, ensuring maximum loft and that incredible gooey center.
1. Second Rise: Let the rolls rise in a warm, draft-free spot for another 30-45 minutes, or until they look noticeably puffy and have doubled in size again. They should spring back slowly when gently pressed.
2. Preheat & Bake: While the rolls rise, preheat your oven to 350°F (175°C). Place a rack in the center position.
3. Bake: Uncover the rolls and bake for 25-35 minutes, or until the tops are golden brown and the edges look set. The internal temperature should reach around 190-200°F (88-93°C) when measured with a thermometer inserted into the center of a roll. The gooey center will be molten and hot. Do not overbake! The center should still be soft and gooey, not dry.
Creating the Silky Frosting
The frosting is the crowning glory, adding a tangy counterpoint to the sweet, gooey rolls.
1. Make the Frosting: In a medium bowl, beat the softened cream cheese and butter together with an electric mixer until completely smooth and creamy, about 2-3 minutes. Scrape down the sides of the bowl as needed.
2. Add Flavor & Sweetness: Beat in the vanilla extract.
3. Incorporate Sugar: Gradually add the powdered sugar, about 1/2 cup at a time, beating well after each addition until fully incorporated and smooth. The frosting should be thick but spreadable.
4. Adjust Consistency: If the frosting is too thick, beat in 1-2 tablespoons of heavy cream or milk, one teaspoon at a time, until you reach the desired spreading consistency. It should be thick enough to hold its shape but smooth enough to spread easily.
The Grand Finale: Assembling Your Gooey Center Cinnamon Rolls
1. Cool Slightly: Remove the baked rolls from the oven. Let them cool in the pan for 10-15 minutes. This allows the gooey center to set slightly and makes them easier to handle.
2. Frost Generously: While the rolls are still warm (but not hot), spread the cream cheese frosting evenly over the top of the rolls. The warmth helps the frosting melt slightly and seep into the crevices, enhancing the gooey factor.
3. Serve Immediately: These rolls are best enjoyed fresh and warm! Serve them straight from the pan, or transfer them to a cooling rack for a few minutes before frosting if you prefer a slightly cooler roll. The gooey center is at its peak when warm.
Variations & Substitutions: Making it Your Own
- Dairy-Free: Use almond milk, soy milk, or oat milk for the dough. Substitute vegan cream cheese and a dairy-free butter for the frosting. Ensure your powdered sugar is vegan (some contain bone char).
- Nut-Free: Omit any nuts added to the filling or frosting.
- Different Sugars: Experiment with coconut sugar or maple sugar in the filling for a deeper flavor.
- Spice Variations: Add a pinch of nutmeg or cardamom to the filling for a unique twist.
- Filling Intensity: For a stronger cinnamon punch, increase the cinnamon to 3 tablespoons. For a sweeter roll, increase the brown sugar slightly.
- Frosting Flavor: Add a teaspoon of lemon juice or orange zest to the frosting for a bright note.
Storage & Reheating: Keeping the Gooeyness Alive
- Room Temperature: Store frosted rolls in an airtight container at room temperature for up to 2 days. The frosting might soften slightly.
- Refrigerator: For longer storage (up to 5 days), refrigerate the rolls (unfrosted) in an airtight container. Frost just before serving.
Freezing: Freeze unfrosted* rolls (or frosted rolls individually wrapped) for up to 3 months. Thaw overnight in the refrigerator, then bring to room temperature before frosting and serving.
- Reheating: Reheat individual rolls in the microwave for 15-20 seconds for a warm, gooey center. Alternatively, reheat in a preheated 350°F (175°C) oven for 5-8 minutes until warmed through. Avoid overheating to prevent drying out.
Common Mistakes to Avoid: Mastering the Gooey Center
1. Cold Ingredients: Using cold eggs or milk can shock the yeast or make the dough stiff. Ensure they are room temperature.
2. Over-Kneading: Over-kneading develops too much gluten, resulting in tough rolls. Knead just until smooth and elastic.
3. Under-Proofing: If the dough doesn’t rise enough before baking, the rolls won’t have the light, airy texture and the gooey center might not form properly. Be patient!
4. Over-Baking: This is the enemy of the gooey center! Bake just until the tops are golden and the edges are set. The center should still look soft and slightly underdone.
5. Skipping the Second Rise: The second rise is crucial for maximum height and texture. Don’t skip it!
6. Using Too Much Flour During Kneading: Adding too much flour makes the dough dry and dense. Only add flour if absolutely necessary to prevent sticking, and add it sparingly.
7. Frosting Too Early: Frosting warm rolls can make the frosting melt and slide off. Wait until they are slightly cooled (10-15 minutes) before frosting.
FAQs: Your Gooey Center Cinnamon Roll Questions Answered
- Q: Why are my cinnamon rolls not gooey in the center? A: This is usually due to overbaking or under-proofing. Bake only until the edges are set and the center looks slightly underdone. Ensure the dough had a proper second rise.
- Q: Can I make these ahead of time? A: Yes! You can make the dough through the first rise, shape the rolls, and refrigerate them overnight (covered). Let them come to room temperature and complete their second rise before baking. You can also freeze the shaped rolls.
- Q: How do I know when the dough is ready? A: The dough is ready when it’s smooth, elastic, slightly tacky but not sticky, and passes the windowpane test (stretches thin without tearing).
- Q: Can I use all-purpose flour instead of bread flour? A: Yes, but the rolls will be slightly less chewy and have a finer crumb. They will still be delicious.
- Q: Why did my frosting get runny? A: This often happens if the cream cheese or butter was too warm. Ensure they are softened but cool to the touch. Adding too much liquid (milk/cream) can also cause this. Beat well to incorporate air and thicken.
- Q: Can I add nuts or raisins to the filling? A: Absolutely! Fold in 1/2 cup of chopped pecans, walnuts, or raisins along with the cinnamon-sugar mixture before rolling.
- Q: How do I get the rolls to rise faster? A: Place the covered dough or rolls in a slightly warm oven (with the light on) or near a warm appliance (like a running dishwasher). Avoid drafts.
- Q: Can I use a bread machine? A: Yes! Add all ingredients to the bread machine in the order recommended by the manufacturer (usually wet first, then dry, with yeast last). Select the dough cycle. Once the cycle finishes, proceed with shaping, rising, and baking as directed.
- Q: Why did my rolls stick to the pan? A: Ensure the pan is well-greased. Parchment paper lining the bottom is also highly recommended. Letting the rolls cool slightly in the pan before transferring helps too.
- Q: Can I make a smaller batch? A: This recipe is designed for a full batch. You can easily halve the ingredients and use a smaller pan.
The Final Bite: A Celebration of Gooeyness
There you have it – the blueprint for creating truly exceptional Gooey Center Cinnamon Rolls. It’s a recipe built on patience, precision, and a deep appreciation for the simple, transformative magic of cinnamon and sugar. The journey from sticky dough to golden, molten rolls is deeply satisfying. Each bite delivers that perfect contrast: a crisp, sugary exterior yielding to a tender crumb, all culminating in that unforgettable, warm, cinnamon-scented river of gooeyness. These rolls aren’t just breakfast; they’re a moment of pure, homemade indulgence. So, gather your ingredients, embrace the process, and prepare to be rewarded with the most decadent cinnamon rolls you’ve ever tasted. Enjoy the gooeyness!