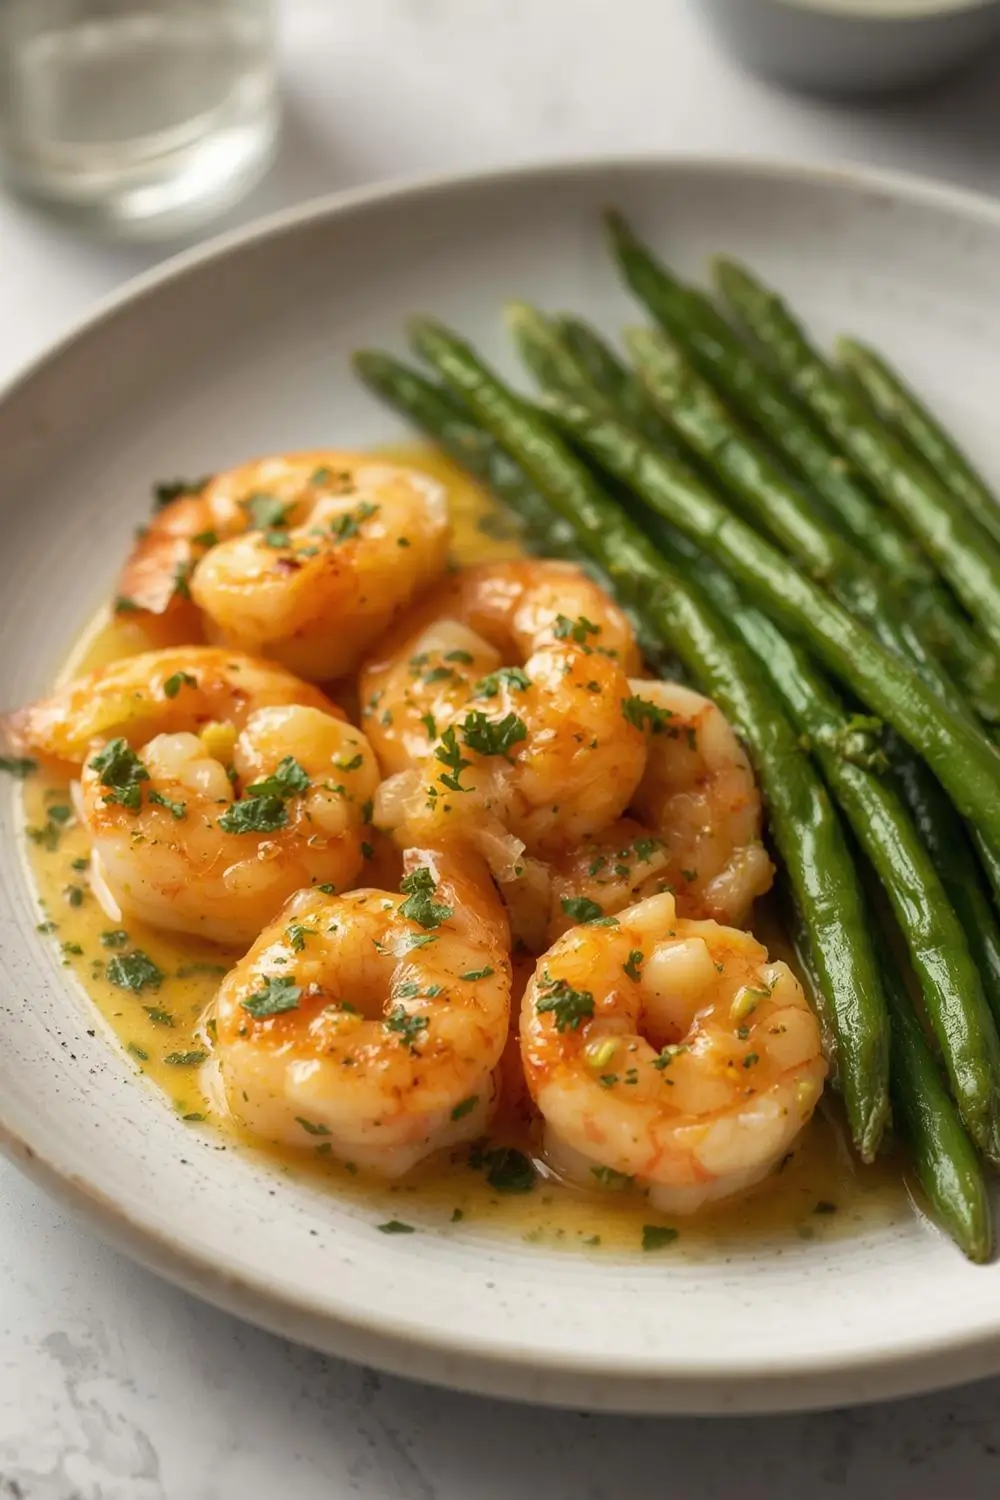
Garlic Butter Shrimp with GreenBeans: A Weeknight Wonder
Imagine a dinner that arrives at your table in under 20 minutes, bursting with savory garlic, rich butter, and the sweet, tender bite of shrimp, all perfectly complemented by crisp, vibrant green beans. This Garlic Butter Shrimp with Green Beans isn’t just a meal; it’s a celebration of simple, fresh ingredients coming together to create something truly special. It’s the kind of dish that feels like a treat but requires minimal effort, making it the ultimate solution for those hectic evenings when you crave something delicious yet don’t want to spend hours in the kitchen. Packed with protein, healthy fats, and fiber, it’s a balanced, satisfying dinner that the whole family will adore. Let’s dive into creating this weeknight hero.
Why This Dish Shines
This recipe hits all the right notes. The shrimp, quickly seared to perfection, locks in its natural sweetness. The garlic butter sauce, infused with aromatic herbs, clings beautifully to the shrimp and beans, adding depth without heaviness. The green beans provide a delightful textural contrast and a pop of color. It’s inherently healthy, naturally gluten-free, and incredibly adaptable. Best of all, it’s a one-pan wonder, minimizing cleanup – a huge win for busy cooks. Whether you serve it over fluffy rice, creamy mashed potatoes, or simply alongside crusty bread, it’s a complete and comforting meal.
Gathering Your Ingredients: Quality Matters
The magic of this dish lies in the freshness of its components. Here’s what you’ll need:
Shrimp: 1 pound (450g) of large, peeled, and deveined shrimp. Look for shrimp that smell fresh and clean, not fishy. Size matters here – 16/20 count shrimp are a great balance of size and value. Pat them very* dry before cooking; moisture is the enemy of a good sear.
- Green Beans: 1 pound (450g) fresh or frozen green beans. Fresh beans are ideal, but good quality frozen work perfectly well. Trim the ends off the fresh beans.
- Butter: 4 tablespoons (1/2 stick / 56g) of unsalted butter. This is the foundation of the sauce. Using unsalted allows you to control the salt content precisely.
- Garlic: 4-5 cloves, minced or finely grated. Fresh garlic is non-negotiable for the best flavor. Avoid pre-minced jarred garlic if possible.
- Lemon: 1 large lemon, juiced and zested. The juice brightens the sauce, while the zest adds a wonderful aromatic depth.
- Olive Oil: 1 tablespoon. Used to prevent the garlic from burning while sautéing.
- Salt: To taste. Start with 1/2 teaspoon and adjust.
- Black Pepper: Freshly ground, to taste.
- Optional Flavor Boosters:
* Red Pepper Flakes: A pinch for a gentle heat.
* Dried Herbs: A teaspoon of dried thyme or oregano adds complexity.
* Fresh Herbs: A handful of chopped parsley or dill stirred in at the end adds freshness.
Preparing Your Ingredients: Mise en Place is Key
Before you turn on the heat, take a moment to prep everything. This makes the cooking process smooth and stress-free. Pat the shrimp dry thoroughly on paper towels. Trim the green beans. Mince the garlic, juice the lemon, and zest it. Measure out your butter and olive oil. Having everything ready means you can focus on the cooking itself, ensuring nothing burns and the shrimp cook perfectly.
The Cooking Process: Step-by-Step with Tips
Now, let’s bring it all together. This is a fast-paced cook, so stay attentive.
1. Heat the Pan: Place a large skillet or sauté pan over medium-high heat. Add the olive oil and let it shimmer.
2. Sear the Shrimp: Working in batches if necessary (don’t overcrowd the pan), add the shrimp in a single layer. Season them lightly with salt and pepper. Sear for 1-2 minutes per side, until they turn opaque and pink. They should curl slightly. Remove the shrimp to a clean plate and cover loosely with foil to keep warm. Tip: Overcooking makes shrimp tough. They finish cooking in the sauce.
3. Sauté the Aromatics: Reduce the heat to medium. Add the butter to the pan. Once melted, add the minced garlic and red pepper flakes (if using). Stir constantly for about 30 seconds to 1 minute, until the garlic is fragrant and just starting to turn golden. Crucial Tip: Don’t let the garlic brown too much or it will become bitter. Keep the heat medium.
4. Deglaze & Build the Sauce: Pour in the lemon juice. Scrape the bottom of the pan with a wooden spoon to lift any delicious browned bits (fond) – this adds incredible flavor. Let the lemon juice bubble for about 30 seconds.
5. Add the Green Beans: Add the trimmed green beans to the pan. Toss them well to coat them in the garlicky butter sauce. Season with salt and pepper.
6. Simmer & Combine: Reduce the heat to medium-low. Cover the pan with a lid and let the green beans steam for 3-5 minutes, or until they are crisp-tender. Tip: If using frozen beans, add them directly to the pan with the lemon juice and butter, and simmer for 5-7 minutes until tender.
7. Reunite with Shrimp: Return the cooked shrimp to the pan. Toss everything together gently to coat the shrimp and beans in the sauce. Heat through for just 1-2 minutes. Tip: Be gentle to avoid breaking the shrimp.
8. Finish & Serve: Remove the pan from the heat. Stir in the lemon zest and any fresh herbs you’re using. Taste and adjust salt and pepper if needed. Serve immediately, spooning the shrimp and beans over rice, pasta, or simply on their own.
Variations & Substitutions: Making it Your Own
This recipe is incredibly flexible. Here are some ideas:
- Protein Swap: Chicken thighs or breast work well. Cook them similarly to the shrimp, ensuring they reach an internal temperature of 165°F (74°C). Pork tenderloin is also delicious.
- Vegetable Swap: Asparagus, zucchini, or bell peppers are excellent alternatives or additions to the green beans. Broccoli florets work too, just add them earlier if they need more time.
- Creamy Twist: Stir in a tablespoon of heavy cream or half-and-half with the lemon juice for a richer, silkier sauce.
- Spicier Kick: Increase the red pepper flakes or add a pinch of cayenne pepper.
- Herb Garden: Experiment with different fresh herbs like dill, basil, or tarragon.
- Gluten-Free: Naturally gluten-free. Ensure any sauces or broths used are certified GF if necessary.
- Low-Carb: Serve over cauliflower rice or zucchini noodles for a lower-carb option.
Storage & Reheating: Keeping the Magic Alive
- Refrigeration: Let the dish cool completely. Store leftovers in an airtight container in the refrigerator for up to 3 days.
- Reheating: Reheat gently on the stovetop over medium-low heat, stirring occasionally, adding a splash of water or broth if it seems dry. Microwave in short bursts (30-60 seconds) stirring in between, also adding a splash of liquid if needed. Important: Avoid reheating the shrimp multiple times.*
- Freezing: This dish doesn’t freeze well once cooked due to the shrimp texture changing. You can freeze the uncooked components (shrimp, beans, sauce base) separately, but cooking after thawing is best.
Common Mistakes to Avoid: Mastering the Technique
- Overcrowding the Pan: This lowers the temperature and steams the shrimp instead of searing them, leading to rubbery results. Cook in batches if needed.
- Not Patting Shrimp Dry: Excess moisture prevents a good sear.
- Burning the Garlic: Keep the heat at medium and stir constantly once the garlic hits the pan.
- Overcooking the Shrimp: They cook very quickly. Remove them from the pan as soon as they turn opaque and pink. They’ll finish cooking in the sauce.
- Using Cold Butter: Adding cold butter to a hot pan can cause it to seize up. Let it melt gently over medium heat.
- Skipping the Lemon Zest: The zest adds a vibrant, aromatic layer that the juice alone can’t provide.
Your Questions Answered: FAQs
- Q: Can I use frozen shrimp? Yes, but ensure they are completely thawed and patted dry before cooking. Thaw in the refrigerator overnight.
- Q: Why are my shrimp tough? Likely overcooked or not patted dry enough. Cook quickly over high heat and remove them as soon as they turn pink.
- Q: Can I make this without garlic? Garlic is essential for the flavor profile. If you must avoid it, consider using garlic-infused oil sparingly, but the dish won’t be the same.
- Q: Is this dish spicy? It has a subtle heat from the red pepper flakes if you use them. You can easily omit them for a milder version.
- Q: Can I add pasta or rice directly to the pan? It’s best to cook pasta or rice separately and serve the shrimp and beans on top. Adding them to the pan with the sauce can make them soggy.
- Q: What can I serve it with besides rice or pasta? Crusty bread for dipping, a simple green salad, or even mashed potatoes are fantastic options.
- Q: Can I double the recipe? Yes, but be careful not to overcrowd the pan when cooking the shrimp. You might need to cook them in two batches.
- Q: Can I use lemon juice instead of zest? While the juice is crucial, the zest adds a unique aromatic dimension. Try to include it if possible.
- Q: How do I know when the green beans are done? They should be crisp-tender – still slightly firm to the bite, not mushy.
- Q: Can I make this ahead of time? The components (shrimp, beans, sauce) can be made separately and reheated together. However, the shrimp texture is best when cooked fresh.
A Final Thought
Garlic Butter Shrimp with Green Beans is more than just a recipe; it’s a testament to the power of simplicity. It proves that a handful of high-quality ingredients, cooked with care and attention, can create a meal that is both deeply satisfying and incredibly easy. It’s a dish that welcomes improvisation, adapts to your pantry, and consistently delivers on flavor and satisfaction. Whether it’s a weeknight miracle or a special occasion dish, this vibrant, aromatic, and utterly delicious meal is sure to become a staple in your cooking repertoire. Enjoy every bite of this culinary delight!