Fluffy Sourdough Discard Chocolate ChipPancakes: Breakfast Bliss from Your Fridge
Imagine waking up to the aroma of warm, golden pancakes, their edges crisp, their centers tender and studded with melty chocolate chips. Now, imagine those pancakes are made from something you’d normally toss out – sourdough discard. This isn’t just a clever kitchen hack; it’s a revelation. Transforming that tangy, bubbly sourdough starter into incredibly fluffy, decadent chocolate chip pancakes that feel like a special treat is pure magic. Perfect for a lazy weekend brunch, a sweet breakfast surprise, or even a decadent dessert, these pancakes blend the wholesome tang of sourdough with rich chocolate and a whisper of warmth from cinnamon. They’re effortless, utterly delicious, and a fantastic way to reduce food waste. Let’s dive into creating this café-style delight right in your own kitchen.
Why Sourdough Discard Makes Magic Pancakes
Sourdough discard isn’t just a byproduct; it’s a flavor powerhouse. Its natural acidity tenderizes the batter, creating pancakes that are light and airy, with a subtle complexity that plain flour can’t match. The tangy notes beautifully balance the sweetness of the chocolate chips and maple syrup. Plus, using discard is incredibly eco-friendly, giving new life to something many bakers discard weekly. These pancakes are naturally gluten-containing, but they’re also naturally free from pork, alcohol, and any animal fats like lard or bacon grease. They’re simply wholesome, homemade goodness.
Gathering Your Pantry Heroes
Before you start whisking, ensure you have these essentials on hand. Don’t worry if you’re a beginner; this recipe is designed to be approachable and forgiving.
- Sourdough Discard: The star! Use about 1 cup (240ml) of discard that’s been fed recently (within the last 24-48 hours is ideal for best flavor and rise). It should be thick and bubbly, not thin and watery. If yours is very thick, you can thin it slightly with a splash of milk or water.
- All-Purpose Flour: Provides the structure. You’ll need 1 1/2 cups (190g). Spoon and level for accuracy.
- Baking Powder: The key leavener for fluffiness. Use 1 1/2 teaspoons.
- Baking Soda: Helps with browning and tenderness. Use 1/4 teaspoon.
- Salt: Enhances all the flavors. Use 1/2 teaspoon.
- Granulated Sugar: Sweetens the batter. Use 2 tablespoons.
- Ground Cinnamon: Adds a warm, comforting note that pairs perfectly with chocolate. Use 1/2 teaspoon.
- Large Eggs: Bind the batter and add richness. Use 2 large eggs.
- Whole Milk (or Buttermilk): Adds moisture and tenderness. Use 1 1/4 cups (300ml). Buttermilk adds extra tang and fluffiness.
- Unsalted Butter: Melted and cooled slightly, adds flavor and richness. Use 3 tablespoons (45g). You can use oil if preferred.
- Pure Vanilla Extract: Enhances the overall flavor profile. Use 1 teaspoon.
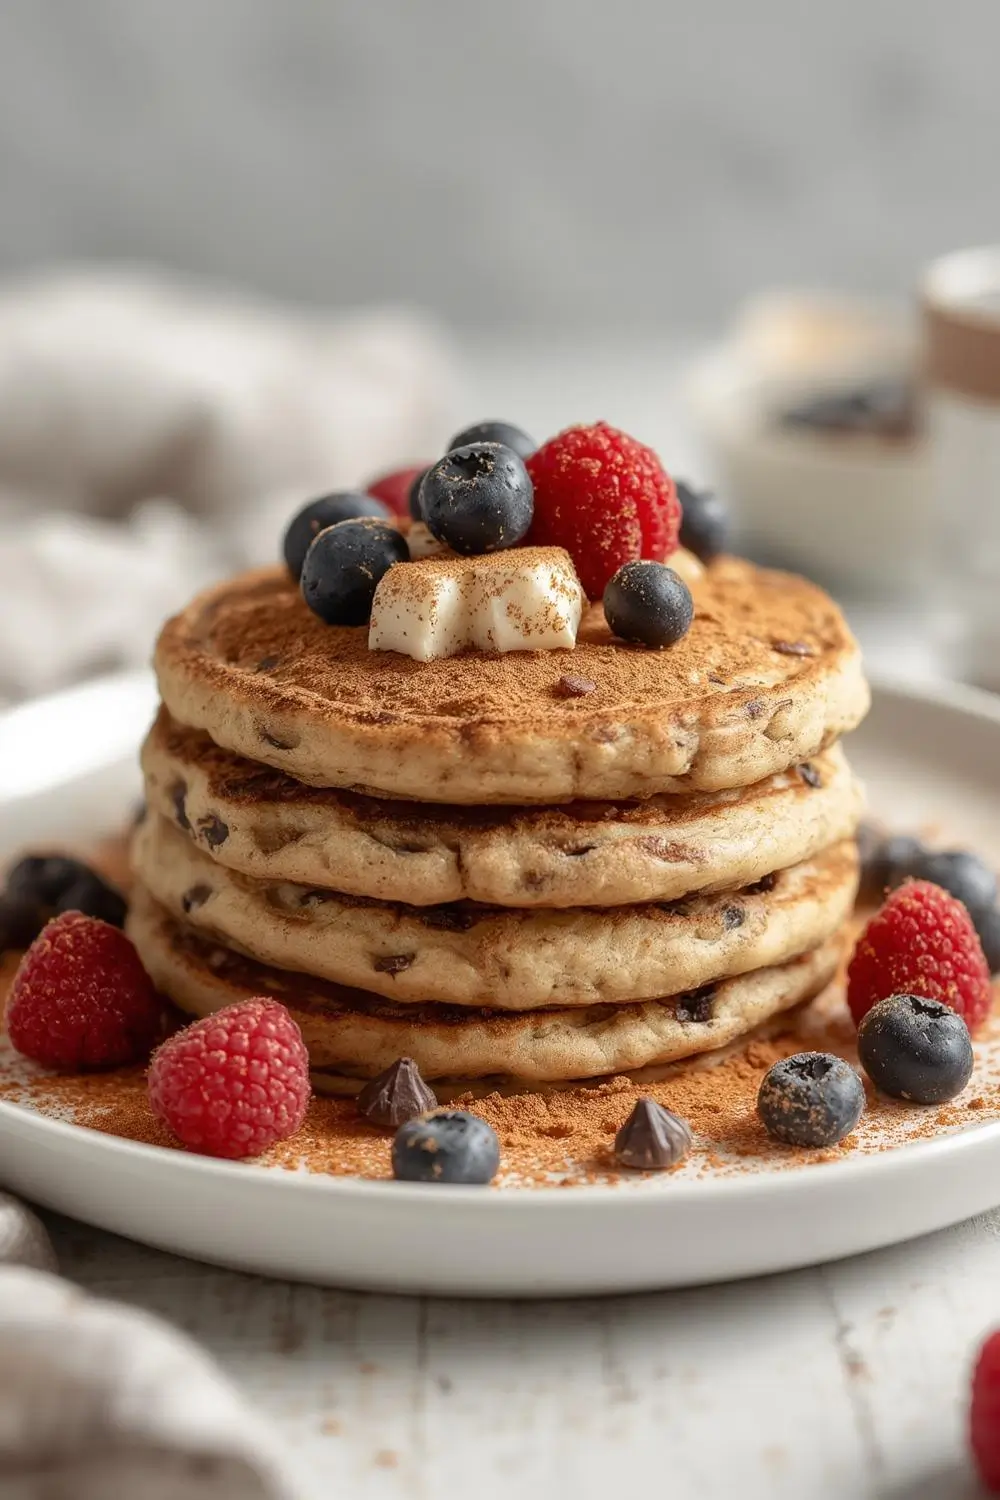
- Chocolate Chips: The star of the show! Use 3/4 cup (120g) of your favorite semi-sweet or dark chocolate chips. They melt beautifully into the pancakes.
- Optional: A pinch of nutmeg or a splash of orange zest can add delightful complexity if you enjoy it.
The Art of Mixing: Creating the Perfect Batter
This is where the magic happens, and it’s surprisingly simple. Patience is key here.
1. Combine Dry Ingredients: In a large mixing bowl, whisk together the flour, baking powder, baking soda, salt, sugar, and cinnamon. This ensures even distribution and prevents lumps.
2. Combine Wet Ingredients: In a separate medium bowl, whisk together the sourdough discard, eggs, milk, melted butter (cooled slightly), and vanilla extract until smooth.
3. The Gentle Fold: Pour the wet ingredients into the dry ingredients. Using a spatula or wooden spoon, gently fold the mixture just until the dry ingredients are mostly moistened. It’s crucial not to overmix! A few small lumps are perfectly fine and actually contribute to a fluffier texture. Overmixing develops gluten, leading to tough, rubbery pancakes.
4. Fold in the Chocolate: Carefully fold in the chocolate chips until they are evenly distributed throughout the batter. Avoid crushing them.
Cooking to Perfection: Your Pancake Masterclass
Now comes the fun part – cooking! This method ensures golden-brown, perfectly cooked pancakes every time.
1. Heat Your Pan: Place a large skillet or griddle over medium-low heat. A non-stick surface is ideal, but a well-seasoned cast iron skillet works beautifully too. You want the pan hot enough to cook the pancakes through but not so hot that they burn before the inside is done. A drop of water flicked onto the pan should skitter and evaporate quickly.
2. Prepare the Pan: Lightly grease the pan with a little butter or oil. You don’t need much – just enough to prevent sticking. A pastry brush works well for a thin, even coat.
3. Pouring the Batter: For consistent size, use a 1/4 cup measuring cup or a ladle. Pour the batter onto the preheated pan. The batter should spread slightly but not run everywhere. If it’s too thick, you can add a tiny splash more milk; if too thin, a touch more flour.
4. The Magic Moment: Bubbles! As the pancake cooks, you’ll see bubbles forming and popping on the surface. This usually takes about 2-3 minutes. When the bubbles are large and the edges look set and slightly dry, it’s time to flip.
5. The Flip: Slide a thin spatula carefully underneath the pancake. Give it a gentle nudge to ensure it’s loose. Flip it over confidently. Cook for another 1-2 minutes on the second side, until golden brown and cooked through. The second side usually cooks faster.
6. Keep Warm: Transfer cooked pancakes to a plate lined with paper towels or a wire rack set over a baking sheet. Cover loosely with foil to keep them warm while you cook the rest. They’re best served hot!
Tips for Pancake Perfection
- Don’t Overmix: This is the golden rule for fluffy pancakes. Lumps are your friend!
- Medium-Low Heat is Key: High heat burns the outside before the inside cooks. Patience pays off.
- Don’t Press Down: Resist the urge to press down on the pancake with your spatula. This squeezes out air and makes them dense.
- Don’t Stack Immediately: Stacking pancakes while cooking the rest traps steam and makes them soggy. Use the foil tent method.
- Adjust Batter Consistency: If your discard is very thick, add a splash more milk. If it’s thin, a touch more flour helps. The batter should be thick enough to hold the chocolate chips without them sinking immediately, but pourable.
- Chocolate Chip Placement: For maximum melty goodness, gently press a few extra chocolate chips onto the top of the pancake right after* you flip it. They’ll sink slightly into the soft surface.
Variations to Delight Your Taste Buds
Once you master the base recipe, feel free to experiment:
- Nutty Delight: Fold in 1/4 cup of chopped walnuts or pecans along with the chocolate chips.
- Berry Burst: Fold in 1/2 cup of fresh or frozen blueberries (thawed if frozen) instead of or alongside the chocolate chips.
- Spiced Up: Increase the cinnamon to 1 teaspoon. Add 1/4 teaspoon of ground ginger or cardamom for extra warmth.
- Citrus Zing: Add the zest of 1/2 an orange or lemon to the wet ingredients for a bright note.
- Caramelized Banana: Top cooked pancakes with slices of caramelized banana (sliced and sautéed in butter with a sprinkle of sugar until golden).
Cream Cheese Swirl: For a decadent twist, mix 2 ounces of softened cream cheese with 2 tablespoons of powdered sugar and a teaspoon of vanilla. Dollop small spoonfuls onto the batter before* flipping, then swirl gently with a knife.
Storage & Reheating: Keeping the Magic Alive
- Refrigeration: Cool completely, then layer pancakes between sheets of parchment paper in an airtight container or resealable bag. They’ll keep well in the fridge for up to 3 days.
- Reheating: Reheat individual pancakes in a toaster, toaster oven, or a dry skillet over medium heat for about 1-2 minutes per side until warmed through. Avoid the microwave as it can make them soggy.
- Freezing: Cool completely, stack with parchment, and freeze in a freezer bag or airtight container for up to 1 month. Reheat directly from frozen in a toaster or skillet.
Common Mistakes to Avoid
- Using Old Discard: Discard that’s been sitting for too long (more than 5-7 days) can be too sour or inactive, leading to flat pancakes. Use discard within 24-48 hours of feeding for best results.
- Overmixing: This is the biggest culprit for tough pancakes. Mix just* until combined.
- Too High Heat: Burns the outside, leaves the inside raw.
- Undercooking: Flip too early when the bubbles haven’t set, and the pancake falls apart. Wait for the edges to look set and bubbles to pop.
- Using Cold Ingredients: Room temperature eggs and milk incorporate more easily and create a smoother batter.
- Skipping the Rest: Letting the batter sit for 5-10 minutes after mixing allows the flour to hydrate fully, resulting in better texture and flavor.
Your Sourdough Discard Chocolate Chip Pancakes FAQs
- Q: Can I use sourdough starter instead of discard? A: Yes! If your starter is thick and bubbly, you can use it directly. You might need to adjust the liquid slightly (add a splash more milk) as starter can be thinner than discard. Discard is often thicker and more concentrated.
- Q: What if my pancakes are too dense? A: Check your mixing – did you overmix? Ensure your baking powder and baking soda are fresh. Did you use the correct heat? Too high heat can cause the outside to set too quickly before the inside cooks.
- Q: Can I make these without chocolate chips? A: Absolutely! They’re delicious plain, or you can add other mix-ins like nuts, berries, or even a sprinkle of sea salt.
- Q: Can I make these gluten-free? A: Unfortunately, this specific recipe relies on all-purpose flour for structure and texture. You would need a dedicated gluten-free pancake mix and adjust the liquid slightly.
- Q: Why are my pancakes browning too fast on the outside? A: Your pan is likely too hot. Reduce the heat to medium-low and let it preheat properly. You can also try lowering the heat slightly during cooking.
- Q: Can I add peanut butter to the batter? A: Yes! Stir in 2-3 tablespoons of creamy peanut butter into the wet ingredients before adding to the dry ingredients. It adds a wonderful flavor twist.
- Q: How do I get perfectly round pancakes? A: Use a consistent measuring cup or ladle. Pour the batter in one spot and let it spread naturally. Avoid jiggling the pan immediately after pouring.
The Sweet Finale: A Pancake Celebration
There’s something deeply satisfying about transforming humble sourdough discard into something so utterly delightful. These Sourdough Discard Chocolate Chip Pancakes are more than just breakfast; they’re a celebration of resourcefulness, flavor, and pure comfort. The tangy sourdough base provides a sophisticated depth that elevates the simple joy of a chocolate chip pancake to new heights. Whether you’re enjoying them for a leisurely weekend brunch, a quick weekday treat, or even as a decadent dessert topped with ice cream and caramel sauce, they deliver on taste and texture every single time. They’re fluffy, they’re flavorful, they’re wonderfully chocolatey, and they’re a brilliant way to reduce food waste. So, dig into your discard, whip up a batch, and experience the magic for yourself. Your taste buds (and your conscience) will thank you.
Pin this recipe now and save it for later!


