The irresistible aroma of freshly baked cinnamon rollswafting through your kitchen is pure comfort. These soft, pillowy rolls, layered with a sweet cinnamon-sugar filling and drizzled with a silky vanilla glaze, are a weekend treat that feels like a special occasion. Perfect for first-time bakers, this foolproof recipe breaks down every step, from activating yeast to achieving that golden-brown perfection, ensuring your kitchen fills with that magical scent without any stress. Let’s transform simple pantry staples into pure joy.
Ingredients: Your Pantry Powerhouse
- Warm Milk (1 cup): The foundation. Use whole milk for richness, but 2% works fine. Ensure it’s warm (about 110°F / 43°C) – too hot kills yeast, too cold won’t activate it.
- Active Dry Yeast (2 1/4 tsp / 1 packet): The rising star. This is crucial for lift. If your yeast is old, proof it first (see tip).
- Granulated Sugar (1/4 cup): Feeds the yeast and adds sweetness. A little goes a long way.
- Unsalted Butter (1/2 cup / 1 stick), melted: Adds tenderness and flavor. Let it cool slightly before mixing.
- Large Eggs (2), room temperature: Bind the dough and add richness. Room temp helps them incorporate smoothly.
- Salt (1 tsp): Balances the sweetness and enhances flavor. Don’t skip it!
- All-Purpose Flour (4 1/2 cups / 20.25 oz / 575g): The structure builder. Measure accurately (spoon and level is best).
- Brown Sugar (1 cup), packed: Adds deep molasses notes to the filling. Essential for flavor.
- Ground Cinnamon (2 tbsp): The star of the filling. Use high-quality for best results.
- Cream Cheese (4 oz / 115g), softened: For the ultimate glaze. Full-fat is best.
- Powdered Sugar (2 cups): Creates the smooth, drizzle-able glaze.
- Vanilla Extract (1 tsp): Pure vanilla elevates everything.
- Salt (1/4 tsp): Enhances the glaze’s flavor.
Step-by-Step: From Bowl to Bliss
1. Activate the Yeast (The First Step to Success): In a large mixing bowl, combine the warm milk, 1/4 cup granulated sugar, and the active dry yeast. Stir gently and let it sit for 5-10 minutes. You should see it become foamy on top – this means your yeast is alive and ready! If it doesn’t foam, your yeast might be expired, and you’ll need a fresh packet.
2. Mix the Wet Ingredients: Add the melted butter (cooled slightly), room temperature eggs, and salt to the yeast mixture. Whisk until well combined.
3. Incorporate the Flour: Gradually add the all-purpose flour, about 1 cup at a time, stirring with a wooden spoon or sturdy spatula after each addition. The dough will start to come together but will be very sticky. Don’t be tempted to add more flour yet!
4. Knead the Dough (Developing the Gluten): Turn the dough out onto a lightly floured surface. Using floured hands, knead the dough for about 8-10 minutes. Push the dough away with the heel of your hand, fold it over, give it a quarter turn, and repeat. The dough is ready when it becomes smooth, elastic, and springs back when you gently poke it. It should be soft but not overly sticky (add a tiny bit more flour if absolutely necessary during kneading).
5. First Rise (The Magical Expansion): Place the kneaded dough ball into a large, lightly oiled bowl, turning it once to coat. Cover the bowl tightly with plastic wrap or a damp kitchen towel. Let it rise in a warm, draft-free spot (like an oven with the light on) for 1 to 1.5 hours, or until it has doubled in size. This is where the yeast works its magic, creating air pockets for a light, fluffy texture.
6. Prepare the Filling: While the dough rises, make the cinnamon-sugar filling. In a small bowl, combine the brown sugar, 2 tablespoons of ground cinnamon, and a pinch of salt. Mix well. Set aside.
7. Roll Out the Dough: Once the dough has doubled, punch it down gently to release air bubbles. Turn it out onto a lightly floured surface. Roll the dough into a large rectangle, roughly 18×12 inches and about 1/4 inch thick. Aim for an even thickness.
8. Spread the Butter & Sprinkle the Filling: Spread the softened butter evenly over the entire surface of the dough, leaving a small border around the edges. Sprinkle the cinnamon-sugar filling mixture evenly over the butter.
9. Roll Up & Cut: Starting from the long edge closest to you, carefully roll the dough up tightly into a log. Pinch the seam gently to seal. Using a sharp knife or dental floss (for cleaner cuts), slice the log into 12 equal pieces (about 1.5 inches thick). Place the rolls cut-side up in a lightly greased 9×13 inch baking pan, leaving a little space between them.
10. Second Rise (The Final Proof): Cover the pan loosely with plastic wrap or a towel. Let the rolls rise again in a warm spot for 30-45 minutes, or until they look puffy and have expanded significantly. They should look much fuller than before.
11. Bake to Golden Perfection: Preheat your oven to 350°F (175°C). Bake the rolls for 20-25 minutes, or until they are a deep golden brown on top. They should sound hollow when tapped on the bottom. The aroma will be incredible!
12. Make the Glaze: While the rolls bake, make the glaze. In a medium bowl, beat the softened cream cheese until smooth. Gradually add the powdered sugar, beating well after each addition. Beat in the vanilla extract and a pinch of salt. The glaze should be thick but spreadable. If it’s too thick, add a tiny splash of milk; if too thin, add a bit more powdered sugar.
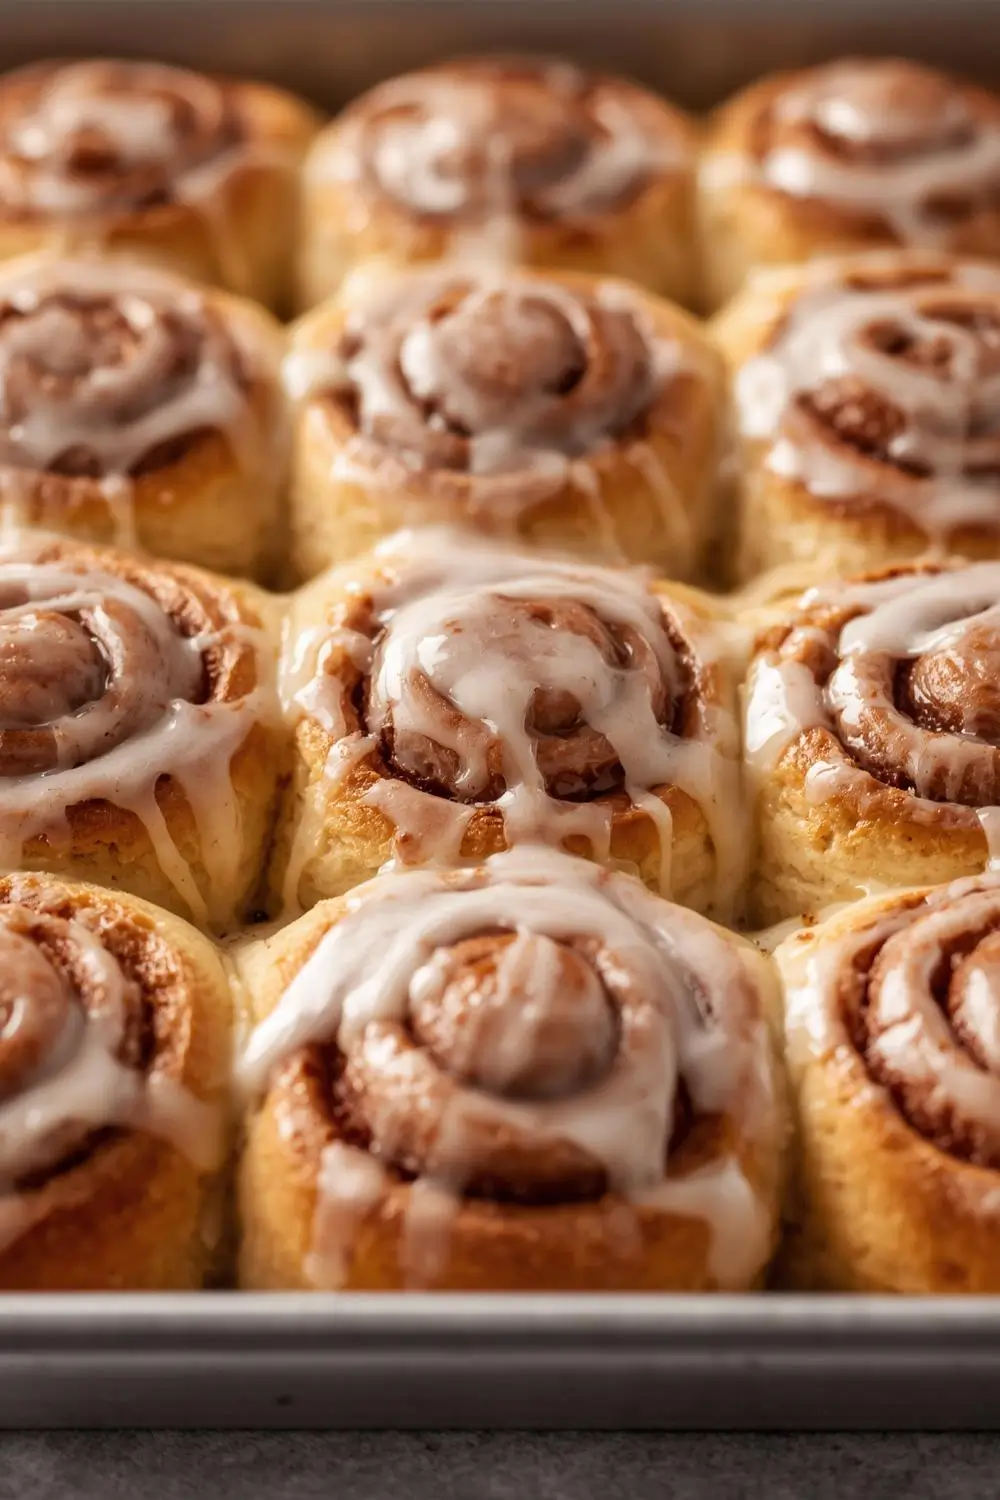
13. Glaze & Serve: As soon as the rolls come out of the oven, spread or drizzle the vanilla glaze generously over the hot rolls. The heat helps the glaze melt slightly and soak in a bit, creating that perfect glossy finish. Let them cool for 5-10 minutes before diving in. Serve warm for maximum enjoyment!
Variations & Substitutions: Making it Your Own
- Different Fillings: Swap the cinnamon-sugar for a chocolate-hazelnut spread (like Nutella), a simple brown sugar & butter swirl, or even a pumpkin-spiced filling for fall.
- Glaze Options: Try a cream cheese glaze (as above), a simple powdered sugar & milk glaze, or a maple glaze for a different twist.
- Dough Variations: Use bread flour for a slightly chewier texture. Substitute 1 cup of the flour with whole wheat flour for a heartier option (may require a tiny extra liquid). For a richer dough, replace 1/4 cup of the milk with heavy cream.
- Vegan Option: Use plant-based milk (soy or oat work well), vegan butter, and a flax egg (1 tbsp ground flaxseed + 3 tbsp water, mixed and rested 5 mins) in place of the regular egg. Ensure your yeast is vegan-friendly.
Storage & Reheating: Keeping the Magic Alive
- Room Temperature: Store cooled rolls in an airtight container at room temperature for up to 2 days. Reheat individually in the microwave for 15-20 seconds or in a warm oven (300°F / 150°C) for a few minutes.
- Refrigerator: For longer storage (up to 5 days), wrap cooled rolls tightly in plastic wrap and store in the fridge. Reheat as above.
Freezing: Freeze baked, cooled* rolls in a single layer on a baking sheet until solid (about 1 hour). Transfer to a freezer bag or airtight container. Freeze for up to 3 months. To reheat, thaw overnight in the fridge and then reheat as above, or bake frozen rolls straight from the freezer at 325°F (160°C) for 15-20 minutes, then glaze.
Common Mistakes to Avoid: Baking Smarter
- Killing the Yeast: Using milk that’s too hot (above 110°F / 43°C) is the most common mistake. Test the milk temperature with your finger or a thermometer.
- Over-Kneading: While kneading is important, over-kneading can make the dough tough. Knead just until smooth and elastic (8-10 minutes is usually enough).
- Under-Proofing: If the dough doesn’t rise enough before baking, the rolls will be dense. Ensure your rising spot is warm and draft-free, and give it the full time.
- Over-Baking: Watch the color! They should be golden brown, not dark brown. They continue to cook slightly after coming out of the oven.
- Glaze Too Thick/Thin: Adjust the consistency by adding a tiny bit of milk (a teaspoon at a time) if too thick, or a bit more powdered sugar if too thin. The heat from the rolls helps set it.
FAQs: Your Burning Questions Answered
- Can I make these ahead of time? Absolutely! You can make the dough through the first rise, punch it down, shape the rolls, and let them rise again in the pan overnight in the fridge. Bake them in the morning as usual.
- Why didn’t my yeast foam? Your yeast is likely expired. Always check the expiration date. If it’s old, it won’t activate.
- My dough is too sticky. What do I do? Add flour very* sparingly, a tablespoon at a time, while kneading. Don’t add too much! The dough should be soft and slightly tacky, not dry.
- Can I use a stand mixer? Yes! Use the dough hook on low speed for kneading (about 8-10 minutes). Be careful not to overmix.
- How do I know when the rolls are done baking? They should be a deep golden brown on top and sound hollow when tapped on the bottom. The internal temperature should be around 190-200°F (88-93°C) if you have a thermometer.
- Can I use instant yeast instead of active dry? Yes! You can use the same amount. You don’t need to proof it first; just add it directly to the dry ingredients with the flour.
- What if my kitchen is cold? Find a warmer spot for rising, like near a sunny window or on top of the refrigerator. You can also place the covered bowl inside a cold oven with the light on.
- Can I use a different pan? A 9×13 inch pan is standard. A 9-inch round pan will make slightly thicker rolls. Ensure it’s lightly greased.
- How do I prevent the rolls from sticking to the pan? Generously grease the pan with butter or non-stick spray. You can also line the pan with parchment paper for easy removal.
- Can I add nuts or raisins? Yes! Fold 1/2 cup of chopped pecans, walnuts, or raisins into the cinnamon-sugar filling before rolling.
Conclusion: The Joy of Homemade
Creating these cinnamon rolls from scratch is a rewarding journey, especially when you see the joy on your family’s faces as they savor the first warm, gooey bite. The process, from the initial yeast activation to the final golden glaze, teaches patience and the simple magic of baking. Remember, the key is gentle handling, a warm rising spot, and not rushing the process. Each batch you make will bring you closer to cinnamon roll perfection. So, gather your ingredients, embrace the process, and enjoy the incredible aroma and taste of success. Happy baking!


