Table of Contents
- 1 Why Dehydrated Candied Orange Slices Are Special
- 2 Ingredients You’ll Need
- 3 Equipment & Tools
- 4 Step‑by‑Step Instructions
- 5 Tips & Tricks for Best Results
- 6 Creative Uses for Dehydrated Candied Orange Slices
- 7 Storage & Shelf Life
- 8 Common Problems & Troubleshooting
- 9 Frequently Asked Questions
- 10 Why This Method Works
- 11 Final Thoughts
If you love the idea of candied orange slices but want them crisp, low‑moisture, and ready to snack or decorate, dehydrated candied orange slices are your answer. By candying first and then dehydrating, you get both sweet citrus flavor and a nice crisp texture. Use them on charcuterie boards, gift jars, winter décor, cake toppers, or simply enjoy them as a bright, tangy snack.
This recipe will walk you through the process from start to finish — with ovens, air fryer, and even dehydrator options — along with tips and common pitfalls so your slices come out perfect.
Why Dehydrated Candied Orange Slices Are Special
Dual process: candying infuses sweetness; dehydration removes excess moisture so they keep crispness.
Longer shelf life: less moisture means less risk of spoilage.
Versatility: use them as snack, garnish, décor, or in drinks.
Aesthetic appeal: translucent edges, bright color, candy glaze + crisp bite.
Better handling: easier to pack, wrap, ship, or layer in jars without sticking.
Ingredients You’ll Need
3 to 4 oranges (seedless varieties preferred)
2 cups granulated sugar
2 cups water
Optional: pinch of sea salt
Optional: spices for infusion — e.g. cinnamon stick, cloves, vanilla, star anise
All ingredients are naturally gluten-free, vegan, and simple.
Equipment & Tools
Sharp knife or mandoline (for even slicing)
Saucepan or wide pot
Slotted spoon or tongs
Baking sheets or trays
Parchment paper or silicone liners
Wire rack (if available)
Air fryer (if using that method)
Oven with low‑temperature capability
Dehydrator (optional)
Airtight containers for storage
Step‑by‑Step Instructions
1. Wash and Slice Oranges
Rinse the oranges thoroughly to remove any wax or residue.
Using a sharp knife or mandoline, slice them into even rounds ~1/8 inch (≈ 3 mm). Uneven thickness leads to uneven drying.
Remove visible seeds carefully (they can create holes or weak spots).
2. Blanch to Reduce Bitterness (Optional but helpful)
Bring a pot of water to a boil.
Add orange slices and blanch for 1–2 minutes.
Drain and rinse with cold water immediately.
Blanching helps remove some of the bitterness from the peel and primes the slices to absorb more sugar.
3. Candy the Orange Slices
In a saucepan, combine water + sugar and heat until sugar dissolves, forming a simple syrup.
Add optional spices or salt if desired.
Lay the orange slices in the syrup, ensuring they are submerged.
Reduce heat to low and gently simmer for 30–45 minutes, flipping occasionally.
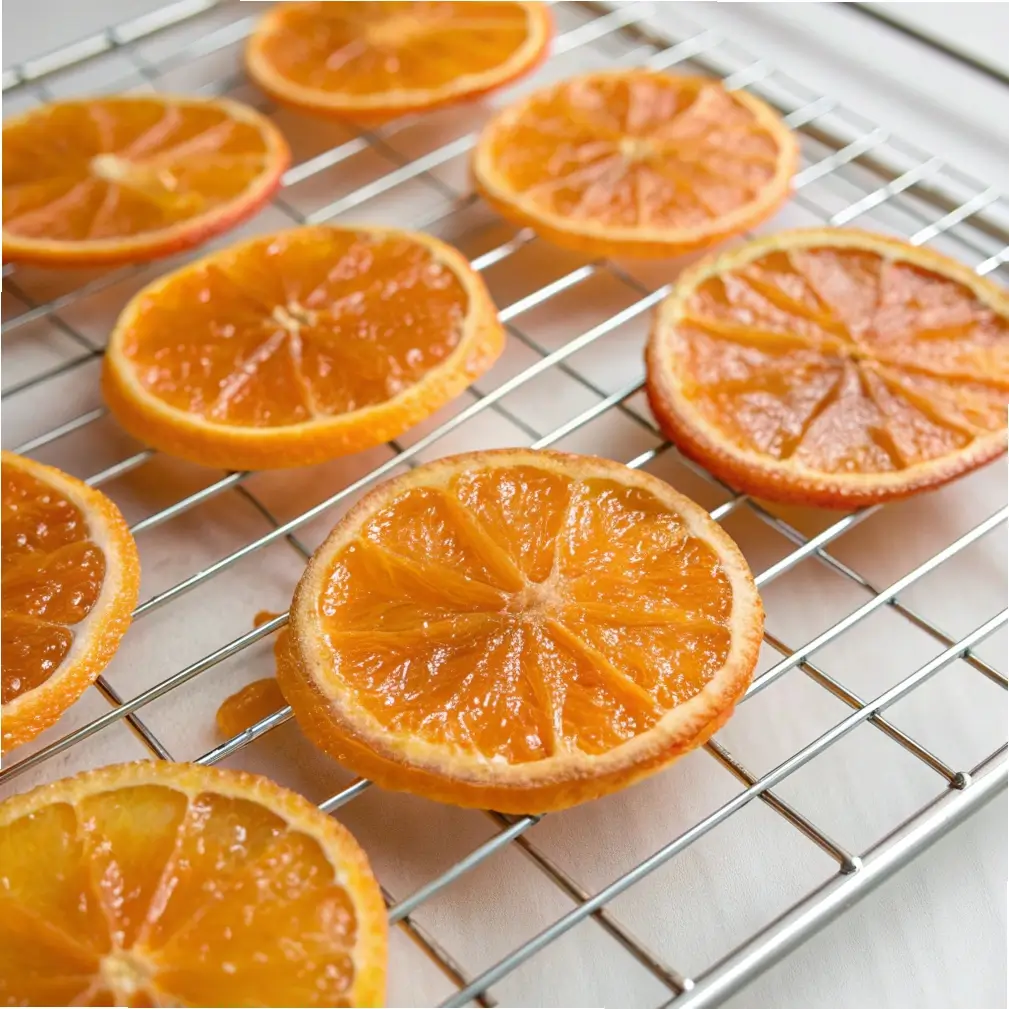
You’ll know it’s done when the slices become slightly translucent and the syrup has thickened marginally.
Use a slotted spoon or tongs to transfer them to a wire rack or parchment‑lined tray to drain briefly.
4. Drying / Dehydrating
Once candied, you dehydrate them. There are several ways:
A. Oven Method
Preheat your oven to its lowest setting (e.g. ~ 170°F / 75–80°C or lower). Some go as low as 140–175°F.
Place slices in a single layer on parchment or silicone mats, or on a wire rack over a baking sheet.
Leave the oven door slightly ajar (propping it) to allow moisture to escape.
Bake/dry for 3 to 4 hours, flipping slices every 30 to 60 minutes so both sides dry evenly.
Monitor closely near the end; slices should lose gloss, feel leathery/crisp, and not be sticky.
B. Air Fryer Method
Preheat the air fryer to a low temperature (e.g. ~ 180°F if your model allows)
Place slices in a single layer in the basket (avoid overcrowding).
Dry for 1 to 1.5 hours, flipping every 30 minutes.
Check for dryness: slices should break or crack slightly, not bend or feel sticky.
C. Dehydrator Method (if available)
Set to ~135°F (57°C) fruit setting.
Lay slices on trays without overlap.
Dehydrate for 6 to 12 hours, checking and flipping occasionally.
5. Cool & Test
After drying, let slices rest on a rack until they fully cool.
Test texture: they should be crisp (or at least not sticky) and hold shape.
If some slices are still soft or tacky, return them to dry longer.
Tips & Tricks for Best Results
Uniform slices: For best drying, thickness should be even across all slices.
Low and slow: Raising temperature to speed things will risk browning or burning.
Flip slices regularly to dry both sides evenly.
Propping the oven door helps air circulation and moisture escape.
Remove slices as they finish; not all will dry at exactly the same time.
Sugar infusion adds glaze and sweetness, but too much syrup retention can slow drying — drain slices well.
Avoid crowding slices; each slice needs airflow around it.
Store fully dry slices, because residual moisture leads to mold or stickiness.
Creative Uses for Dehydrated Candied Orange Slices
Snacking: Crisp, tangy, sweet citrus snack.
Garnish for drinks: Use in mocktails, sparkling water, iced teas.
Cake & dessert topping: Add to cheesecakes, cupcakes, tarts.
Decorative accents: In holiday wreaths, garlands, dried flower arrangements.
Gift jars: Layer slices with ribbons in mason jars.
Chocolate dipped treats: Half-dip slices in melted dark chocolate for extra decadence.
Storage & Shelf Life
Store in airtight containers (glass jars or sealed jars).
Keep in a cool, dry place — avoid humidity.
If fully dried, they can last several months (6–12 months) when stored properly.
If you notice any stickiness, moisture, or mold, discard and dry a new batch.
Use desiccant packets if available to absorb residual moisture.
Common Problems & Troubleshooting
| Problem | Cause | Fix / Prevention |
|---|---|---|
| Slices remain sticky or “floppy” | Not dried long enough or too thick | Return to oven/dehydrator and dry further |
| Bitter peel | Not blanched or peel too thick | Blanch slices; use thinner peel or better orange variety |
| Some slices brown or burn | Too high heat or uneven slicing | Drop temp, monitor, and flip frequently |
| Slices curl at edges | Uneven thickness | Slice uniformly; discard or trim overly thin edges |
| Mold or spoilage in storage | Residual moisture or improper seal | Ensure full dryness, use airtight containers, store dry |
Frequently Asked Questions
Do I have to candy them first?
Yes — candying helps infuse sweetness and flavor. Drying plain orange slices gives dried citrus chips but lacks the glaze.
Can I do this without oven or air fryer (only dehydrator)?
Yes — use a dehydrator at ~135°F and dry 6–12 hours or until crisp.
Can I reduce the sugar?
You can lower sugar a bit, but candying depends on sucrose infusion — too low, and slices won’t glaze well.
Do I remove all peel (pith)?
No — you keep the full slice (peel, pith, and flesh) after candying, unless you prefer peel-only variants.
Are they fully edible?
Yes — once candy + dehydration process is done, all parts are firm and edible.
What temperature is ideal for the oven?
Lowest your oven can go (140–175°F is common). Use the lowest possible, with air venting (door ajar).
Why This Method Works
The two-step process (candying + dehydration) ensures slices absorb sweet citrus flavor and then lose excess water to become crisp and shelf-stable. Unlike simply drying, the candy step gives brightness and glaze which retains color and taste. Dehydrating afterwards ensures longevity and textural integrity.
Final Thoughts
Dehydrated candied orange slices combine the best of candied citrus and dried fruit: sweet, bright, and crisp. With some patience, even a basic kitchen (oven or air fryer) can produce slices that are beautiful, flavorful, and highly versatile. Whether for snacks, décor, or garnishes, mastering these will give you a signature citrus treat to impress.


