Table of Contents
The Easiest Weeknight Dinner You’ll Ever Make
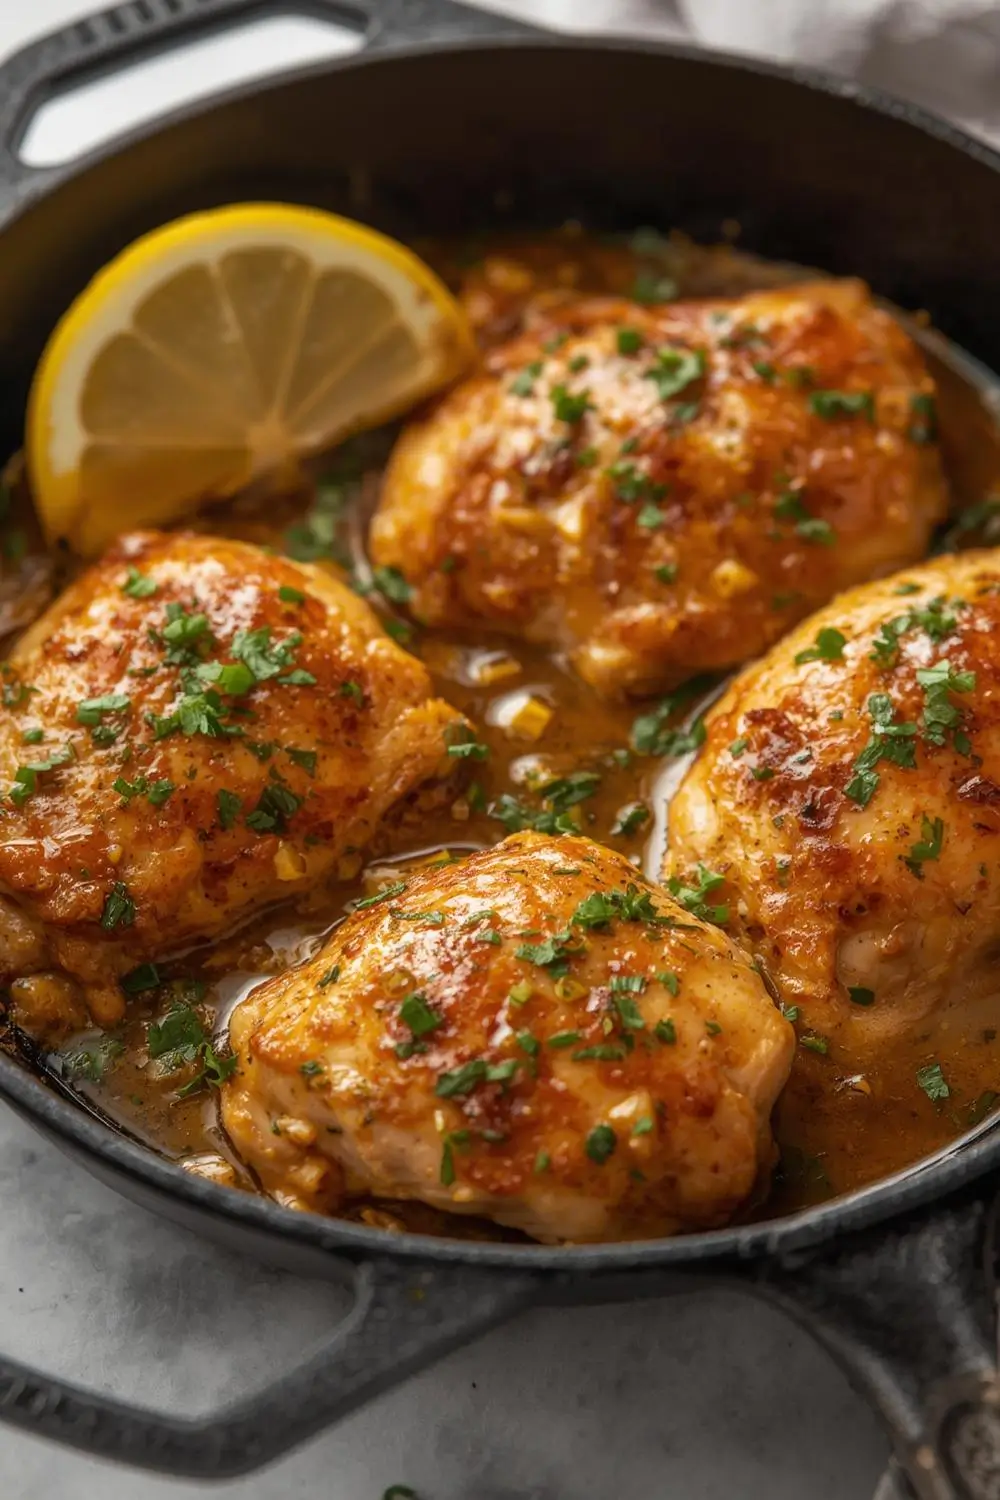
Picture this: golden chicken thighs sizzling in a pan, bathed in a glossy sauce that perfectly balances sweet honey with pungent garlic, all brought together with rich butter. This creamy honey garlic butter chicken skillet isn’t just another recipe – it’s your new secret weapon against boring weeknight dinners.
What makes this dish truly special? It comes together in about 30 minutes using just one skillet, creates minimal cleanup, and tastes like something from your favorite restaurant. Whether you’re cooking for picky eaters, trying to impress date night, or simply craving comfort food, this recipe delivers every single time. The magic happens when simple ingredients transform into a luxuriously creamy sauce that clings to every nook and cranny of juicy chicken.
Why This Recipe Will Become Your Go-To
Busy cooks adore this recipe because it delivers maximum flavor with minimum effort. Unlike complicated dishes that require constant attention, this skillet meal gives you time to prep sides or help kids with homework while it simmers. The sauce – oh, that sauce! – starts with basic pantry staples but finishes like a gourmet creation.
Chicken thighs work beautifully here because they stay moist even if slightly overcooked, making them forgiving for novice chefs. When paired with the sweet-savory sauce and served over fluffy rice or buttery mashed potatoes, you’ve got a meal that satisfies every craving. Plus, leftovers (if you’re lucky enough to have any) taste even better the next day!
Gathering Your Ingredients
Let’s talk about what you’ll need to create this masterpiece. These quantities serve 4 generously:
Main Components
• 2 lbs boneless, skinless chicken thighs (about 6-8 pieces) – thighs stay juicier than breasts
• 1/3 cup honey – pure, not flavored syrup
• 4 tbsp unsalted butter – divided
• 6 garlic cloves – minced (about 1.5 tbsp)
• 2/3 cup chicken broth – low sodium preferred
• 1/2 cup heavy cream – for luxurious texture
• 1 tbsp olive oil – for searing
Flavor Enhancers
• 1 tbsp apple cider vinegar – brightens the sauce
• 1 tsp smoked paprika – adds depth
• 1/2 tsp red pepper flakes – optional for heat
• 1 lemon – juice and zest
• Fresh parsley – for garnish
• Salt and pepper – to taste
Ingredient Spotlight: Why These Work
Using chicken thighs creates a more forgiving dish compared to breasts, which can dry out quickly. Honey provides natural sweetness that caramelizes beautifully when reduced, while apple cider vinegar cuts through the richness without alcohol. Heavy cream gives that signature velvety texture, and the combination of fresh garlic with smoked paprika builds layers of savory flavor.
Essential Tools
• 12-inch cast iron or heavy-bottomed skillet
• Tongs for flipping chicken
• Whisk for smooth sauce
• Microplane for zesting lemon
• Cutting board and chef’s knife
Step-by-Step Cooking Instructions
Follow these directions carefully for perfect results every time:
1. Prepping the Chicken
Pat chicken thighs completely dry with paper towels – this is crucial for proper browning. Trim excess fat if desired. Season both sides generously with salt, pepper, and smoked paprika. Let sit at room temperature while you prep other ingredients (about 10 minutes).
2. Achieving the Perfect Sear
Heat olive oil in skillet over medium-high heat until shimmering. Add chicken thighs in a single layer, not overcrowding the pan (cook in batches if needed). Sear undisturbed for 5-6 minutes until deeply golden brown. Flip using tongs and cook another 4-5 minutes. Transfer to a clean plate – chicken won’t be fully cooked yet.
3. Building the Magic Sauce
Reduce heat to medium. Add 2 tbsp butter to pan drippings – it will foam immediately. Add minced garlic and sauté 30 seconds until fragrant but not browned. Quickly whisk in honey, chicken broth, apple cider vinegar, lemon zest, and red pepper flakes (if using). Scrape any browned bits from pan bottom – that’s flavor gold!
4. Simmering to Perfection
Return chicken to skillet along with any accumulated juices. Reduce heat to maintain a gentle simmer. Cook uncovered for 10-12 minutes, turning chicken occasionally, until sauce thickens slightly and chicken reaches 165°F internally.
5. The Creamy Finish
Remove skillet from heat. Stir in heavy cream and remaining 2 tbsp butter until incorporated and glossy. Squeeze fresh lemon juice over top. Taste and adjust seasoning – you might need more salt or a pinch of sugar if your honey was very floral.
Pro Tips for Best Results
• Resist moving chicken while searing – it needs uninterrupted contact to develop crust
• Use fresh garlic instead of jarred for brighter flavor
• Sauce too thin? Simmer 2-3 more minutes. Too thick? Add broth 1 tbsp at a time
• For extra gloss, finish with a pat of cold butter while sauce is hot
Serving Suggestions That Wow
Presentation matters – here’s how to make it beautiful:
Arrange chicken on a platter or serve directly from skillet. Spoon generous amounts of sauce over each piece. Garnish with chopped parsley and lemon wedges. Some serving ideas:
• Classic: Fluffy jasmine rice or mashed potatoes soak up sauce beautifully
• Lighter Option: Cauliflower rice or zucchini noodles keep it low-carb
• Vegetable Love: Roasted broccoli or garlic green beans complement the flavors
• Bread Situation: Your favorite crusty bread for mopping up every drop
Customizing the Recipe
This recipe adapts easily to different preferences and dietary needs:
Protein Variations
• Turkey cutlets: Reduce cooking time to avoid drying out
• Shrimp: Add during last 5 minutes of cooking
• Chickpeas: Great vegetarian option (add with sauce)
• Tofu: Use extra-firm, pressed blocks – sear same as chicken
Sauce Modifications
• Dairy-Free: Substitute coconut cream for heavy cream
• Lower Sugar: Use 1/4 cup honey + 1 tbsp maple syrup
• More Veggies: Add spinach or mushrooms with garlic
• Extra Creamy: Stir in cream cheese with heavy cream
Flavor Twists
• Mediterranean: Add sun-dried tomatoes and artichokes
• Herby: Stir in fresh thyme or rosemary with garlic
• Spicy: Double red pepper flakes or add hot sauce
• Umami Boost: 1 tsp fish sauce or Worcestershire
Storing and Reheating Like a Pro
Proper storage keeps leftovers tasting fresh:
• Refrigerator: Store in airtight container up to 4 days
• Freezer: Freeze portions up to 3 months (sauce may separate slightly)
• Reheating Stovetop: Warm gently in skillet over low heat with a splash of broth
• Microwave: Use 50% power in 30-second intervals, stirring between
• Important: Always reheat to 165°F and don’t refreeze previously frozen portions
Reviving Leftover Sauce
If sauce thickens too much overnight, whisk in warm broth 1 tbsp at a time when reheating. For frozen meals, thaw in refrigerator 24 hours before reheating. If cream appears grainy after freezing, blend briefly with an immersion blender.
Common Mistakes to Sidestep
Avoid these pitfalls for the best results:
Browning Blunders
• Overcrowding the pan: Leads to steaming instead of searing
• Moving chicken too soon: Prevents crust formation
• Heat too low: Results in pale, soggy chicken
Sauce Sabotage
• Burning garlic: Becomes bitter if cooked too long
• Boiling cream: Causes curdling – remove from heat before adding
• Over-thickening: Sauce continues thickening off heat
Timing Troubles
• Cutting chicken to check doneness: Loses precious juices
• Skipping resting time: Letting chicken sit 5 minutes before serving keeps it juicy
• Rushing reduction: Sauce needs simmering time to develop flavor
Troubleshooting Table
| Issue | Solution |
|---|---|
| Sauce too sweet | Add splash of vinegar and pinch of salt |
| Sauce too thin | Simmer longer or add cornstarch slurry (1 tsp cornstarch + 1 tbsp water) |
| Chicken tough | Simmer longer covered to tenderize |
| Bitter aftertaste | You may have burned garlic – start fresh |
Frequently Asked Questions
1. Can I use chicken breasts instead?
Absolutely! Reduce cooking time by 20-30% as breasts cook faster. Pound thicker pieces to even thickness for consistent doneness. Monitor internal temperature closely – remove from heat at 160°F (carryover cooking will reach 165°F).
2. How can I make this gluten-free?
The recipe is naturally gluten-free as written! Always check labels on chicken broth and spices to ensure no cross-contamination. For thickening, use cornstarch instead of flour if needed.
3. What if I don’t have heavy cream?
Substitute with half-and-half or whole milk for lighter versions. For dairy-free, coconut cream works beautifully. Avoid using skim milk as it may curdle. If using milk, add at the very end off heat.
4. Can I prep this ahead?
Yes! Sear chicken and make sauce through step 4. Cool completely and refrigerate separately up to 24 hours. When ready, reheat sauce, add chicken, and proceed with step 5 (adding cream). This actually deepens the flavors!
5. Is this recipe kid-friendly?
Most children adore the sweet-savory flavors! Omit red pepper flakes if sensitive to spice. For picky eaters, serve sauce on the side. Cutting chicken into bite-sized pieces before cooking makes it easier for little ones.
6. Why is my sauce separating?
This happens if added cream is too cold or sauce is boiling. Always remove from heat before adding cream. If separation occurs, whisk vigorously off heat or blend briefly with immersion blender.
Why This Recipe Deserves a Spot in Your Rotation
In the realm of weeknight dinners, this creamy honey garlic butter chicken skillet truly stands apart. It takes ordinary pantry ingredients and transforms them into something extraordinary – all within the time it takes to watch a sitcom episode. The sauce alone, with its perfect balance of sweet, savory, and rich, will have everyone asking for seconds.
What I love most about this dish is its versatility. Whether you’re meal prepping lunches, need an impressive-but-easy dinner party main, or simply crave comfort food without the fuss, this recipe rises to every occasion. It’s the kind of dish that sparks joy when you pull it sizzling from the oven and see faces light up around the table.
So next time you’re staring into the fridge wondering what to make, remember this flavor-packed skillet wonder. Keep the ingredients stocked, and you’ll always be 30 minutes away from a meal that feels like a hug on a plate. Trust me – your future self will thank you every time this lifesaver recipe hits the table!