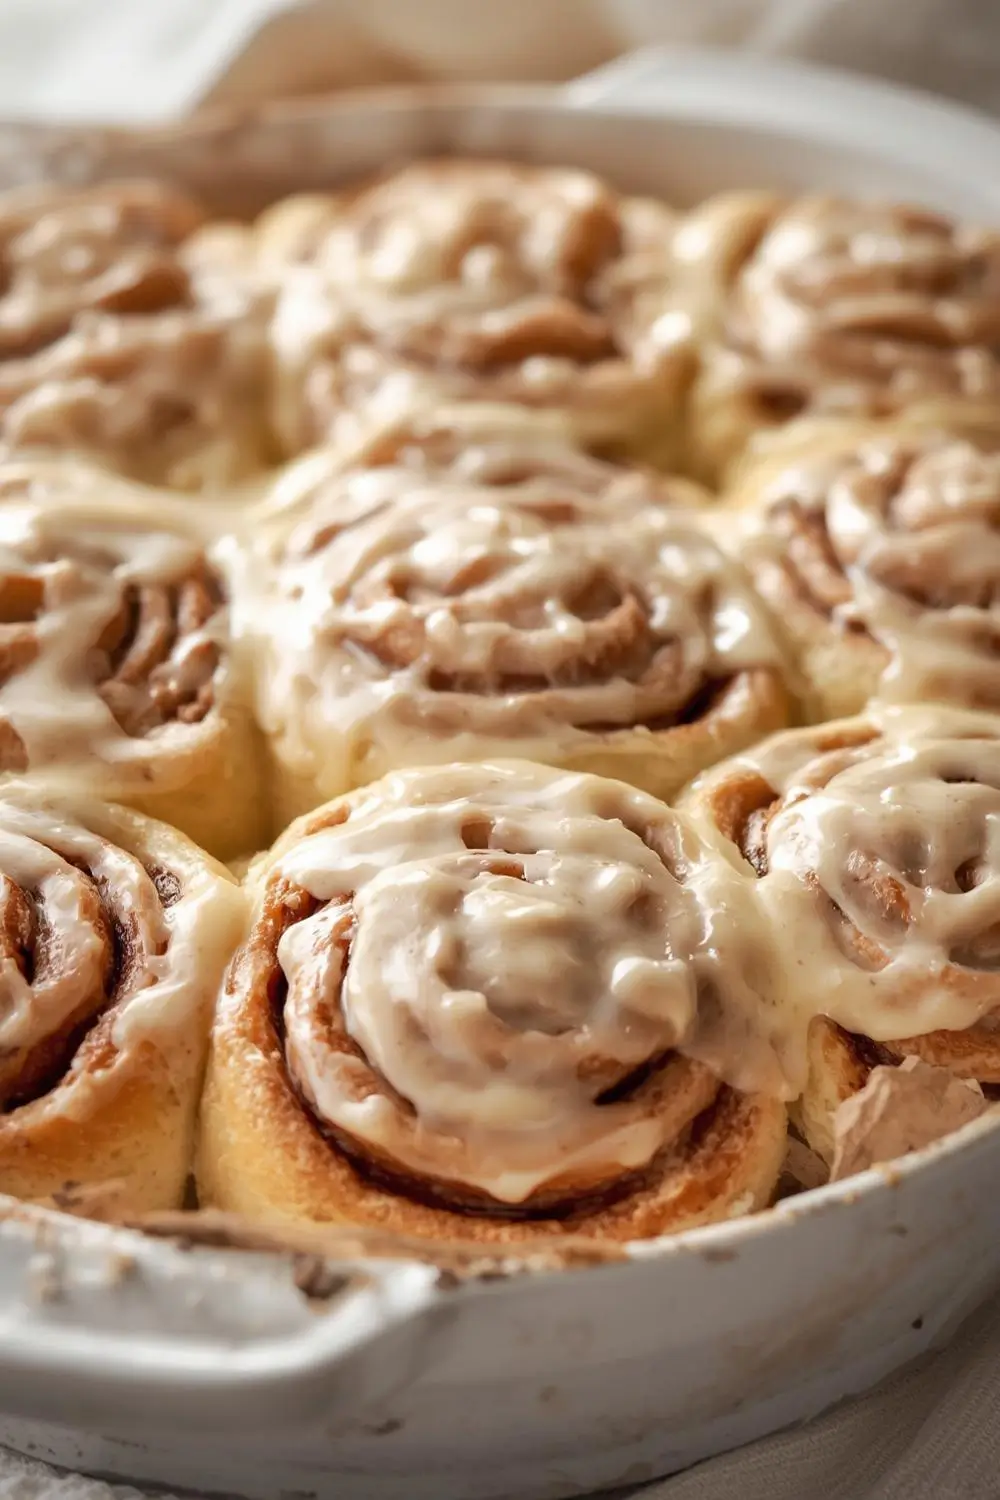
Imagine waking up to the most heavenly aroma filling your kitchen. Picture tender, pillowy rolls, infused with warm cinnamon and sugar, their surfaces glistening with a silky, dreamy icing that melts into every soft, buttery swirl. These aren’t just cinnamon rolls; they’re Cloud Soft Cinnamon Rolls with Creamy Icing, a recipe designed to deliver pure, unadulterated comfort in every single bite. Forget dense, dry rolls; this is about achieving that elusive, melt-in-your-mouth texture that makes you sigh with pure contentment. Perfect for a lazy Sunday brunch, a special breakfast, or simply a moment of pure indulgence, these rolls are your new baking obsession.
Why These Rolls Rise to the Top
What sets these Cloud Soft Cinnamon Rolls apart? It’s all in the technique and the ingredients. We’re using a combination of bread flour for structure and all-purpose flour for tenderness, a generous amount of butter for richness, and a touch of milk powder to boost flavor and tenderness. The secret weapon? A warm milk mixture that activates the yeast perfectly, creating a dough that’s incredibly pliable and forgiving. The filling is simple – just brown sugar, cinnamon, and more butter – allowing the pure, warm spice flavor to shine through. The icing isn’t just poured on; it’s a smooth, spreadable cream cheese-based glaze that seeps into the rolls as they cool, creating that signature melt-in-your-mouth experience. This recipe is beginner-friendly, requiring no fancy equipment, just patience and a little love.
Gathering Your Cloud Soft Cinnamon Roll Ingredients
Before you begin, ensure you have everything ready. This list covers all the essentials for the dough, filling, and icing. Don’t worry if you don’t have every single item listed; we’ll cover substitutions later.
For the Dough:
- Warm Milk (1 cup / 240ml): Whole milk is ideal for richness, but 2% or even skim will work. Ensure it’s warm (about 110°F / 43°C) – not hot, or it will kill the yeast.
- Instant Dry Yeast (2 1/4 tsp / 1 standard packet): This is crucial for quick rising. Make sure it’s fresh!
- Granulated Sugar (1/4 cup / 50g): Feeds the yeast and adds a touch of sweetness.
- Salt (1 1/2 tsp): Balances the sweetness and enhances flavor.
- Large Egg (1, room temperature): Adds richness, structure, and helps with browning.
- Unsalted Butter (1/2 cup / 113g), melted and slightly cooled: Provides incredible tenderness and flavor. Do not use margarine.
- Bread Flour (3 1/2 – 4 cups / 420-480g): The primary structure builder. All-purpose flour can be used, but bread flour yields a slightly chewier texture.
- All-Purpose Flour (1/4 cup / 30g): Added to the bread flour for a touch of tenderness. Can be omitted if using only bread flour.
For the Filling:
- Brown Sugar (3/4 cup / 150g): Packed firmly. Adds moisture and deep caramel notes.
- Ground Cinnamon (2 tbsp): The heart of the flavor. Use a good quality brand.
- Unsalted Butter (1/3 cup / 75g), softened: Creates the gooey, spreadable filling. Softened means pliable but not melted.
For the Creamy Icing:
- Cream Cheese (4 oz / 113g), softened: Full-fat is best for the richest flavor and texture.
- Unsalted Butter (2 tbsp / 28g), softened: Adds richness and helps the icing spread smoothly.
- Powdered Sugar (2 cups / 240g): Sifted for a lump-free glaze. Adjust for desired sweetness and thickness.
- Vanilla Extract (1 tsp): Pure vanilla extract is recommended for the best flavor.
- Heavy Cream or Milk (2-4 tbsp): Used to adjust the icing consistency. Start with 2 tbsp.
Essential Equipment:
- Stand mixer with dough hook (highly recommended) OR a large mixing bowl and sturdy wooden spoon/spatula.
- Clean work surface for kneading.
- Large bowl for dough rising (lightly oiled).
- Plastic wrap or damp kitchen towel.
- Rolling pin.
- 9-inch or 10-inch round cake pan or square baking dish.
- Small saucepan (for warming milk).
- Whisk or electric hand mixer (for icing).
Step-by-Step: Crafting Your Cloud Soft Cinnamon Rolls
Now, let’s transform these ingredients into those heavenly rolls. This process is detailed but manageable, especially with the tips provided.
1. Warming the Milk & Activating the Yeast (5 mins):
* Pour the warm milk into a small saucepan. Warm it gently over low heat until it reaches about 110°F (43°C). It should feel comfortably warm, like a baby’s bottle, not hot to the touch. Remove from heat.
* Stir in the granulated sugar and instant yeast. Give it a gentle stir. Let it sit undisturbed for 5-10 minutes. You’ll see it become foamy on top – this means your yeast is active and ready to work its magic! If it doesn’t foam, your yeast might be expired, and you’ll need fresh yeast.
2. Combining the Wet Ingredients (2 mins):
* In a large bowl (or the bowl of your stand mixer), whisk together the melted butter, room-temperature egg, and salt.
* Pour in the activated yeast mixture and whisk until fully combined.
3. Incorporating the Flours (5-7 mins):
* Add the bread flour and all-purpose flour (if using) to the wet mixture. Using a sturdy wooden spoon or the dough hook on low speed, mix until a shaggy dough forms. It will be sticky at first.
* Tip: If using a stand mixer, switch to the dough hook. If kneading by hand, turn the dough out onto a lightly floured surface. Knead for 5-7 minutes. The dough is ready when it becomes smooth, elastic, and springs back when you gently poke it. It should be soft and slightly tacky but not sticky enough to cling excessively to your hands or the surface. Add a tiny bit more flour (1-2 tsp at a time) only if absolutely necessary during kneading.
4. First Rise (1-2 hours):
* Lightly oil a large bowl. Place the kneaded dough ball into the bowl, turning it once to coat it lightly with oil.
* Cover the bowl tightly with plastic wrap or a damp kitchen towel.
* Place it in a warm, draft-free spot (like an oven with the light on, or near a sunny window). Let it rise until doubled in size. This usually takes 1 to 1.5 hours, but time can vary depending on room temperature. The dough is ready when it looks puffy and springs back slowly when poked.
5. Preparing the Filling & Rolling (10 mins):
* While the dough rises, make the filling: In a small bowl, whisk together the brown sugar and cinnamon. Set aside.
* Lightly flour your clean work surface. Gently punch down the risen dough to release air bubbles. Turn it out onto the floured surface.
* Using a rolling pin, roll the dough into a large rectangle, roughly 12 inches by 18 inches. Aim for an even thickness, about 1/4 to 1/2 inch thick. The exact size isn’t critical, just ensure it’s large enough to roll up tightly.
6. Adding the Filling & Rolling Up (5 mins):
* Spread the softened butter evenly over the entire surface of the rolled dough, leaving a 1/2-inch border along one of the longer edges.
* Sprinkle the brown sugar and cinnamon mixture evenly over the butter, pressing it gently into the surface.
Starting from the long edge opposite* the uncovered border, carefully roll the dough up tightly into a log. Pinch the seam closed firmly to seal. Trim the ends if they look very uneven.
7. Cutting & Second Rise (30-45 mins):
* Using a sharp knife or dental floss (for cleaner cuts), cut the log into 12 equal pieces (about 1.5 inches thick each). Place them cut-side up in the lightly greased 9-inch or 10-inch round cake pan or square baking dish, leaving a little space between them. They will expand.
* Cover the pan loosely with plastic wrap or a damp towel.
* Let the rolls rise again in a warm spot until they look puffy and have nearly doubled in size, about 30-45 minutes. They should look much fuller than before.
8. Baking to Golden Perfection (20-25 mins):
* Preheat your oven to 350°F (175°C) during the last 10 minutes of the second rise.
* Bake the rolls for 20-25 minutes, or until they are a deep golden brown on top and sound hollow when tapped gently on the bottom. The edges should look set, and the centers should be cooked through. Avoid overbaking, as you want them soft and pillowy inside.
9. Making the Creamy Icing (5 mins):
* While the rolls bake, make the icing. In a medium bowl, beat the softened cream cheese and softened butter together with an electric mixer or whisk until smooth and creamy.
* Gradually add the sifted powdered sugar, beating well after each addition until fully incorporated.
* Beat in the vanilla extract.
* Add the heavy cream or milk, 1 tablespoon at a time, beating well after each addition, until you reach your desired spreading consistency. It should be smooth, creamy, and slightly thick but pourable.
10. The Grand Finale: Glazing & Serving (5 mins):
* As soon as the rolls come out of the oven, spread or drizzle the warm icing generously over the tops of the hot rolls. The heat from the rolls will help the icing melt and seep into every crevice, creating that signature melt-in-your-mouth experience.
* Let the rolls cool in the pan for 5-10 minutes before serving. This allows the icing to set slightly and makes them easier to handle. Serve warm and enjoy the incredible aroma and flavor!
Variations & Substitutions: Making it Your Own
- Add-Ins: Fold in 1/2 cup of chopped pecans, walnuts, or chocolate chips into the filling before rolling. Sprinkle a few extra nuts on top before baking.
- Different Icing: Swap the cream cheese icing for a classic vanilla glaze (powdered sugar + milk + vanilla) or a maple glaze (powdered sugar + maple syrup + milk). For a tangier twist, use a lemon glaze (powdered sugar + lemon juice + lemon zest).
- Flavor Boost: Add 1 tsp of pure vanilla extract to the dough or 1/2 tsp of ground nutmeg to the filling for extra depth.
- Flour Swap: If you only have all-purpose flour, use 4 1/2 cups total (3 1/2 cups bread flour + 1 cup all-purpose flour). The texture will be slightly less chewy.
- Dairy-Free: Use almond milk or oat milk warmed for the liquid. Replace butter with a high-quality dairy-free butter alternative (ensure it’s soft). Use a dairy-free cream cheese alternative for the icing. Adjust powdered sugar slightly if needed for consistency.
- Egg-Free: Replace the egg with 1/4 cup unsweetened applesauce or 1/4 cup plain yogurt. The texture may be slightly less rich.
Storage & Reheating: Keeping the Magic Alive
- Room Temperature: Store cooled rolls in an airtight container at room temperature for up to 2 days. Reheat gently in the microwave for 10-15 seconds or in a low oven (300°F / 150°C) for 5-7 minutes to restore softness.
- Refrigeration: Store cooled rolls in an airtight container in the refrigerator for up to 5 days. Reheat as above.
- Freezing: Freeze individual rolls (without icing) in a single layer on a baking sheet until solid, then transfer to a freezer bag or airtight container. Freeze for up to 3 months. Thaw overnight in the refrigerator, then reheat gently. Add icing after thawing and reheating.
Common Mistakes to Avoid: Ensuring Cloud-Like Perfection
- Hot Milk: Using milk that’s too hot (above 110°F / 43°C) will kill the yeast, preventing the rolls from rising.
- Old Yeast: Expired yeast won’t activate, leading to flat rolls. Always check the expiration date and proof it if unsure.
- Over-Kneading: Overworking the dough makes it tough. Knead just until smooth and elastic. The dough should be soft, not stiff.
- Under-Kneading: Under-kneading results in a dough that doesn’t hold together well and rolls that don’t rise properly.
- Over-Baking: Baking too long dries out the rolls. They should be golden brown but still soft inside. Check for doneness by tapping the bottom – it should sound hollow.
- Icing Too Thick: If your icing is too thick, add more cream or milk, a teaspoon at a time, until it’s smooth and spreadable. If too thin, add a little more sifted powdered sugar.
Icing Too Cold: Adding icing to cold* rolls won’t allow it to melt and seep in. Always ice warm rolls straight from the oven for the best effect.
Frequently Asked Questions (FAQs)
- Q: Can I make these rolls the night before?
A: Yes! Prepare the dough through step 7 (cutting and placing in the pan). Cover tightly and refrigerate overnight. The next morning, let them come to room temperature for about 30-45 minutes while preheating the oven. Then bake as directed. They might need a few extra minutes in the oven.
- Q: Why are my rolls dense and not fluffy?
A: This is often due to under-proofing (not rising long enough) or over-kneading. Ensure the dough rises until doubled, and knead just until smooth. Also, check your yeast is fresh.
- Q: Can I use a bread machine?
A: Yes! Add all the dough ingredients to your bread machine in the order recommended by the manufacturer (usually liquids first, then dry ingredients, with yeast last). Select the dough cycle. Once the cycle finishes, proceed with shaping, rising, and baking as directed.
- Q: How do I know when the dough has doubled in size?
A: Gently press two fingers about 1/2 inch into the dough. If the indentation springs back slowly (taking a few seconds), it’s ready. If it springs back immediately, it needs more time. If it stays indented, it’s over-proofed (still okay, just bake a bit longer).
- Q: Can I freeze the baked rolls?
A: Absolutely! Let them cool completely. Wrap individually in plastic wrap or place in a freezer bag. Freeze for up to 3 months. Reheat as described above.
- Q: What’s the best way to reheat frozen rolls?
A: Thaw overnight in the refrigerator. Then reheat gently in the microwave for 10-15 seconds or in a low oven (300°F / 150°C) for 5-7 minutes. Add icing after reheating for the best texture.
- Q: Can I use self-rising flour?
A: No, self-rising flour contains leavening agents that aren’t needed here and would affect the texture and rise. Stick to all-purpose or bread flour.
- Q: Why is my icing runny?
A: You might have added too much liquid (milk/cream) or used warm ingredients. Start with less liquid and add gradually. Ensure your cream cheese and butter are softened, not melted.
- Q: Can I make these rolls without a mixer?
A: Yes! You can knead the dough by hand. It just takes a bit more elbow grease (about 10 minutes). Use a sturdy wooden spoon initially, then turn the dough out onto a lightly floured surface and knead vigorously.
- Q: How do I get the rolls to be perfectly round?
A: While they won’t be perfectly round, you can make them more uniform by using a sharp knife or dental floss to cut clean slices. Place them evenly in the pan with a little space between them.
The Final Bite: A Cloud of Comfort
There’s something profoundly satisfying about pulling a warm, cloud-soft cinnamon roll from the oven, the scent of cinnamon and butter filling the air, and spreading that silky, creamy icing over its surface. These rolls are more than just a breakfast treat; they’re a celebration of simple ingredients transformed into pure, comforting bliss. The tender crumb, the warm spice, the melt-in-your-mouth icing – it’s a recipe that promises to become a cherished tradition in your home. So, gather your ingredients, embrace the process, and prepare to create a batch of these heavenly Cloud Soft Cinnamon Rolls. Your taste buds (and your family) will thank you. Enjoy every heavenly bite!