
Table of Contents
- 1 The Fun and Flavorful Orange Fish Cookies Recipe
- 2 Ingredients for Orange Fish Cookies Recipe
- 3 Step-by-Step Instructions for Making Orange Fish Cookies Recipe
- 4 Shaping and Baking the Orange Fish Cookies Recipe
- 5 Decorating Orange Fish Cookies
- 6 Storing and Preserving Your Orange Fish Cookies
- 7 Variations on the Orange Fish Cookies Recipe
- 8 Healthier Alternatives to the Orange Fish Cookies Recipe
- 9 Fun Facts About Fish and Cookies
Have you ever tried a cookie that’s not just delicious but also fun to make and decorate? The Orange Fish Cookies Recipe is exactly that—a delightful treat that combines the zesty freshness of oranges with a playful fish shape, making it the perfect addition to any party, kids’ event, or simply as a fun baking project. These cookies are not only bursting with citrus flavor but are also easy to make, requiring just a few simple ingredients and minimal equipment.
Whether you’re a baking newbie or an experienced pro, this recipe will have you making perfect fish-shaped cookies in no time. From the basics of getting the dough just right to tips on decorating with vibrant royal icing, we’ll cover everything you need to know to create these adorable and delicious treats. Ready to dive in? Let’s start with the essentials: the ingredients!
Making the Orange Fish Cookies Recipe is easier than it sounds. You’ll need a handful of common ingredients that you likely already have in your kitchen. But what really makes these cookies stand out is the addition of fresh orange zest and orange juice, which gives the dough a vibrant citrus flavor that pairs perfectly with the sweetness of the cookie.
Basic Ingredients
Let’s begin with the basics—the core ingredients for the dough.
- Flour: All-purpose flour is the best option here to create a light yet sturdy dough that holds its shape when cut into the fish shape.
- Sugar: Granulated sugar will provide the sweetness that balances out the tartness of the orange.
- Butter: For a soft and rich texture, butter is a must! It makes the dough smooth and easy to roll out.
- Eggs: Eggs help bind everything together and give the cookies that perfect crumbly texture.
- Orange Zest and Juice: The star of the show! Fresh orange zest will give the cookies a punch of citrusy fragrance, while the juice adds moisture and an extra layer of flavor.
Optional Ingredients for Flavor and Decoration
These are the optional ingredients that you can use to elevate the flavors or make your cookies even more visually stunning.
- Orange Extract: If you’re craving an even stronger orange flavor, a few drops of orange extract will do the trick.
- Food Coloring: For a vibrant and fun fish shape, add a bit of orange food coloring to the dough to make them pop.
- Sprinkles or Candy Eyes: To make these cookies even cuter, add colorful sprinkles or candy eyes to turn each fish into an adorable character.
- Royal Icing: A simple royal icing (made with powdered sugar and egg whites) is perfect for decorating. It sets hard and gives the cookies that glossy finish.
- Chopped Nuts: If you like a little crunch, feel free to chop up some nuts (like pistachios or almonds) and sprinkle them on top for a textured finish.
These ingredients will give you the perfect base to start making your Orange Fish Cookies Recipe. The real fun begins when you start decorating and bringing these fishy treats to life! Ready to get started? Keep reading to learn how to mix your dough and shape your cookies into adorable little fish!
Once you have all your ingredients ready, it’s time to get your hands in the dough and start shaping those fun fish cookies. The process is simple, and the end result is totally worth the effort. Here’s how to do it:
Preparing the Dough
The dough for these Orange Fish Cookies Recipe is quick and easy to make. Follow these steps, and you’ll have a smooth, flavorful dough ready to chill in no time!
- Step 1 – Mix the Dry Ingredients
Start by whisking together your flour and baking powder in a medium bowl. This ensures that your dry ingredients are well combined, giving your cookies a consistent texture when baked. - Step 2 – Cream Butter and Sugar
In a large bowl, beat the butter and sugar together until it’s light and fluffy. This process will take about 2-3 minutes with a hand mixer or stand mixer. It helps to incorporate air into the dough, making your cookies soft and delicate. Once creamy, add the eggs and mix well. - Step 3 – Add Orange Zest and Juice
Here’s where the magic happens. Add the freshly grated orange zest and orange juice to your butter mixture. You’ll instantly notice the citrus aroma filling the kitchen. If you want a stronger orange flavor, feel free to add a bit of orange extract too. - Step 4 – Combine Wet and Dry Ingredients
Gradually add your dry ingredients to the wet ingredients, mixing on low speed. Once it starts coming together, finish mixing by hand to form a smooth dough. If the dough feels too sticky, you can sprinkle a little more flour on it until it’s manageable.
Chilling the Dough
Once your dough is ready, divide it into two equal portions. Wrap each portion in plastic wrap and refrigerate for at least 30 minutes (or up to 1 hour). Chilling the dough makes it easier to roll out and helps prevent the cookies from spreading too much during baking.
Now that the dough is chilled and firm, it’s time to shape your cookies into cute little fish! The best part about making these cookies is getting creative with the shapes and decorating them once they’re baked. Here’s how to shape and bake your Orange Fish Cookies Recipe:
Shaping the Fish Cookies
- Step 5 – Roll Out the Dough
Once the dough is chilled, take it out of the fridge and place it on a lightly floured surface. Using a rolling pin, roll the dough to about ¼-inch thickness. Be gentle; you don’t want to overwork it or it could become tough. If you prefer a thinner cookie, feel free to roll it out a bit more. - Step 6 – Cut Out the Fish Shapes
Using a fish-shaped cookie cutter (or any cutter of your choice!), cut the dough into cute fish shapes. If you don’t have a fish cutter, a simple oval or round cutter will work too, and you can always use a knife to carefully cut the dough into fish shapes freehand. Once you’ve cut out your fish cookies, carefully transfer them onto a baking sheet lined with parchment paper or a silicone baking mat.
Baking the Cookies
- Step 7 – Preheat and Bake
Preheat your oven to 350°F (175°C). Bake the cookies for about 8-10 minutes, depending on the size of the cookies. Keep an eye on them to make sure they don’t overbake; they should be golden at the edges, but still soft in the center. Let them cool on the baking sheet for a few minutes before transferring them to a wire rack to cool completely.
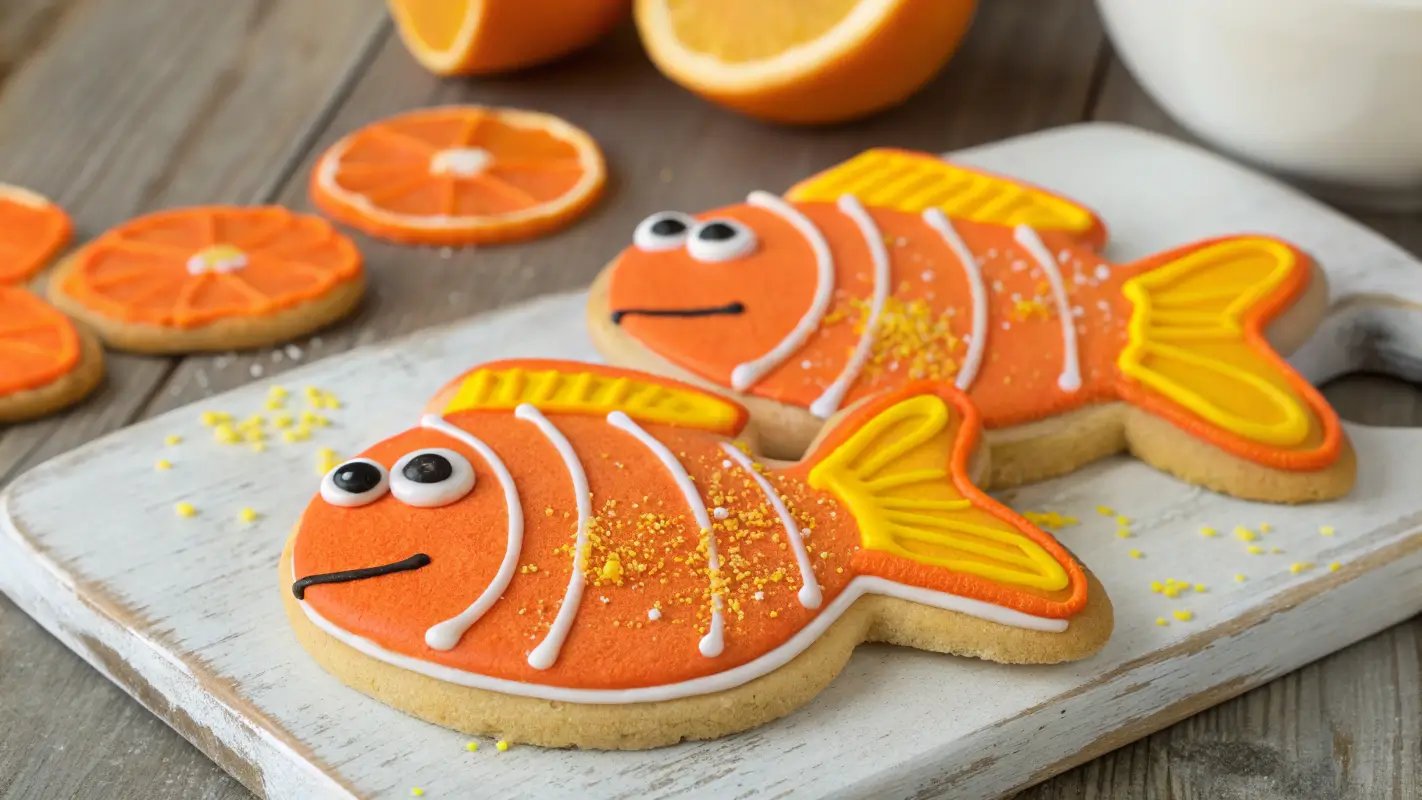
Once your Orange Fish Cookies have cooled down, it’s time for the fun part—decorating! The best part about these cookies is the opportunity to get creative with colors, textures, and details. Here’s how to bring your fish cookies to life:
How to Decorate with Royal Icing
- Step 1 – Prepare Royal Icing
To make royal icing, mix powdered sugar with egg whites (or meringue powder) and a little lemon juice or water. The consistency should be thick enough to hold its shape when piped but soft enough to spread easily. Divide the icing into smaller bowls and color each one with food coloring. - Step 2 – Pipe the Icing
Using a piping bag or a ziplock bag with the tip cut off, outline the fish shapes with icing. You can make the outline as simple or intricate as you like. For a fun, colorful fish look, pipe orange icing along the edges and then fill in with different colors. - Step 3 – Add Fun Details
Once the base layer of icing is dry, you can add fun details like candy eyes or sprinkles for extra texture. If you’re feeling artistic, use contrasting colors to create scale-like patterns on the fish or add fins, tails, and little smiles to make each fish cookie more adorable.
Creative Alternatives for Decoration
- Step 4 – Try Chocolate or Nuts
Instead of royal icing, you can drizzle some melted chocolate over the cookies and sprinkle with chopped nuts like almonds or pistachios for a different texture. If you’re looking for a less sugary decoration, chocolate chips make excellent eyes, and the fish outline can be piped using dark or white chocolate. - Step 5 – Add Edible Glitter
For an extra sparkle, you can dust your fish cookies with edible glitter or shimmer dust. This adds a touch of whimsy, especially if you’re preparing these cookies for a celebration or party!
With all these decorating options, you can let your creativity shine, making each Orange Fish Cookies Recipe as unique and beautiful as the last! Just be sure to let the icing dry completely before stacking them, so they don’t smudge.
Find a detailed guide on making royal icing for cookie decorating.
Now that you’ve created these adorable and delicious Orange Fish Cookies Recipe, you’ll want to make sure they stay fresh and tasty for as long as possible. Proper storage is key to keeping your cookies crispy and flavorful. Here’s how you can store and preserve your cookies for later enjoyment:
How to Store Baked Orange Fish Cookies
To keep your cookies fresh, it’s essential to store them properly after they’ve cooled completely. Here are the best storage methods:
- Airtight Containers
Place the cooled cookies in an airtight container to prevent them from drying out. Be sure to layer the cookies with parchment paper if you’re stacking them. This helps avoid any smearing or sticking of the royal icing or decorations. - Storing in a Cool, Dry Place
Store the cookies in a cool, dry place, away from direct sunlight and heat sources. If stored correctly, they can last for up to 1-2 weeks at room temperature.
Freezing Orange Fish Cookies
If you want to preserve your cookies for a longer period, freezing is a great option. Here’s how:
- Freezing the Cookies Before Decorating
For the best results, freeze the cookies before decorating. Once they’re fully cooled, place them in a single layer on a baking sheet and freeze for 1-2 hours. After that, you can transfer them to an airtight container or a ziplock bag and store them in the freezer for up to 3 months. When ready to decorate, simply thaw the cookies at room temperature. - Freezing Decorated Cookies
If your cookies are already decorated, you can still freeze them. Just be sure to place them in a single layer on a baking sheet and freeze them until they’re solid. Then, move the cookies to an airtight container with parchment paper between layers to protect the decorations. These can be frozen for up to 2 months.
With these storage tips, your Orange Fish Cookies will stay fresh and delicious, ready for you to enjoy at any time!
The Orange Fish Cookies Recipe is incredibly versatile, and you can customize it to suit different tastes and occasions. Whether you want to experiment with new flavors, shapes, or fillings, here are some creative variations to try:
Flavor Variations
- Add Lemon for a Citrus Twist
If you love the citrus flavor but want something a little different, you can substitute the orange zest with lemon zest. The lemon adds a refreshing zing that pairs wonderfully with the sweetness of the cookies. You can even mix both orange and lemon zest for a combined citrus punch! - Spices for a Warm Flavor
For a more autumnal twist, try adding a pinch of cinnamon, nutmeg, or ginger to the dough. These warm spices complement the citrus flavor perfectly and can add a cozy aroma to your kitchen while baking. - Chocolate Orange Fish Cookies
Combine the rich flavor of chocolate with the bright citrus of orange by adding cocoa powder to the dough or dipping the finished cookies in melted chocolate. A bit of orange extract mixed into the chocolate will amplify the flavor, giving you a delightful chocolate-orange combination.
Find a detailed guide on making Best Chocolate Chip Cookies.
Shape and Decoration Variations
- Fish-shaped Cookies with Creative Shapes
If you want to mix things up, try different cookie cutters. Instead of fish, you could make starfish, dolphins, or even under-the-sea animals like octopuses. You could even shape the cookies into waves, shells, or seaweed for an entire ocean-themed cookie collection. - Glazed and Sugared Fish Cookies
Instead of royal icing, you can create a simple glaze by mixing powdered sugar with a little bit of milk or orange juice. This glaze will give your cookies a glossy finish and a softer texture. Add some coarse sugar on top for a sparkling effect, or use colored sugar crystals to create a textured look.
Themed Cookies for Special Occasions
Why not personalize your cookies for a special event? For a birthday party, baby shower, or even a fun ocean-themed event, you can use different food coloring to make the cookies match the theme. You can also add edible glitter or edible pearls for a fancy, festive touch.
With these variations, you can tailor the Orange Fish Cookies Recipe to any taste or occasion, making them even more special!
If you’re looking for a healthier twist on the classic Orange Fish Cookies Recipe, you can make a few simple substitutions to reduce the sugar content, fat, and calories while still maintaining the delicious citrus flavor. Here are some ideas to make a lighter version of these cookies:
Substituting Ingredients for Healthier Options
- Use Whole Wheat Flour
Instead of all-purpose flour, you can use whole wheat flour to increase the fiber content of your cookies. This will give your cookies a slightly nutty flavor, but it works wonderfully with the orange zest. You can also use a combination of whole wheat and all-purpose flour to balance texture and flavor. - Replace Butter with Coconut Oil or Applesauce
If you’re looking for a dairy-free option or want to cut down on fat, you can replace the butter with coconut oil or unsweetened applesauce. These substitutes will still help bind the dough while offering a different texture and flavor. - Sweeten with Honey or Maple Syrup
Instead of granulated sugar, you can swap in natural sweeteners like honey or maple syrup. These sweeteners add a rich flavor to the cookies while also providing a more natural source of sweetness. Keep in mind that using liquid sweeteners may require adjusting the amount of flour slightly to keep the dough consistency right.
Reducing Sugar in Royal Icing
If you want to cut down on sugar but still want to decorate, you can make a healthier royal icing by reducing the powdered sugar and using stevia or monk fruit sweetener instead. These sugar alternatives are great for those looking to reduce their sugar intake without sacrificing flavor or texture.
These simple swaps will help you enjoy a slightly healthier version of your Orange Fish Cookies Recipe without compromising too much on taste or fun!
To wrap up our delightful journey into the world of Orange Fish Cookies Recipe, let’s take a quick dive into some fun facts about fish and cookies that will make your baking experience even more interesting!
Fun Facts About Fish
- Fish in Mythology and Culture
Fish have been symbols of prosperity, good luck, and abundance across many cultures. In ancient Egypt, fish were revered as sacred, and in many other cultures, they were seen as symbols of fertility. So, why not bake a batch of Orange Fish Cookies Recipe to bring good fortune? - Fish and the Ocean
Fish are the heart and soul of the ocean ecosystem, and they have adapted in amazing ways to thrive in different environments. Just like there are endless types of fish, there are also countless variations of cookies you can bake. Your Orange Fish Cookies Recipe can be as unique as the ocean’s fish!
Fun Cookie Facts
- Cookies: A Global Delight
Did you know that cookies date back as far as the 7th century? The word “cookie” comes from the Dutch word “koekje,” meaning “small cake.” Cookies have since evolved into one of the most popular treats worldwide. - Why Fish-Shaped Cookies?
Fish-shaped cookies have become especially popular around Easter and other holiday celebrations, symbolizing good fortune and prosperity. Whether you’re baking for a holiday or just for fun, these cookies make an impact!
Baking these Orange Fish Cookies Recipe not only connects you with tradition and culture but also adds a fun, whimsical element to your kitchen. So, enjoy the process and the delicious results!