Table of Contents
- 1 The Sweet History of Fudge
- 2 Why Fudge is a Popular Treat
- 3 Essential Ingredients for Making Fudge Recipe
- 4 Necessary Equipment for Fudge Recipe Making
- 5 Stovetop vs. Microwave Fudge
- 6 Classic Fudge Recipes
- 7 Creative Fudge Ideas
- 8 How to Properly Store Fudge
- 9 Serving Suggestions for Fudge
- 10 Troubleshooting Your Fudge
- 11 Frequently Asked Questions About Making Fudge
Fudge: it’s more than just a sweet treat; it’s a journey into the heart of dessert-making. From its rich history to the myriad of ways you can tweak the recipe to suit your taste buds, fudge embodies the spirit of homemade confections. Whether you’re a seasoned pro or new to the kitchen, making fudge recipe offers a delightful exploration of flavors, textures, and culinary creativity. This article serves as your ultimate guide, taking you step by step through the process of crafting the most delicious fudge you’ve ever tasted. Ready to dive into the world of easy homemade fudge? Let’s get the pots on the stove and the chocolate melting!
Introduction to Fudge
Fudge is more than just a dessert; it’s a piece of culinary artistry that has been sweetening our lives for generations. Originating in the late 19th century, fudge has evolved from a happy accident to a beloved treat enjoyed by millions around the globe. Its creamy texture, rich flavor, and sheer versatility make it a favorite among sweet tooths and dessert connoisseurs alike.
The Sweet History of Fudge
Let’s take a moment to appreciate the origins of this delightful dessert. The first recorded mention of fudge dates back to the 1880s in the United States, where it was sold at a local college. The term “fudge” is thought to have come from the phrase “fudging it,” meaning to put together something in a hurry. This is fitting, considering fudge is indeed something magical whipped up from a few simple ingredients.
Why Fudge is a Popular Treat
There’s no denying the universal appeal of fudge. It’s a treat that crosses cultural boundaries and brings people together. One reason for its popularity is its simplicity. With just a few ingredients—sugar, butter, and chocolate—you can create a dessert that’s both sophisticated and utterly delicious. Moreover, fudge is incredibly versatile. From the classic chocolate to more innovative flavors like peanut butter or cookies and cream, there’s a fudge variation to suit every palate.
Fudge isn’t just about taste; it’s also about the memories it creates. Whether it’s making fudge with your grandma during the holidays or enjoying a piece of fudge by the seaside, this sweet treat is often associated with warmth, comfort, and nostalgia.
As we dive deeper into the world of fudge making, remember that this isn’t just about following a recipe. It’s about experimenting, making mistakes, and ultimately creating something that brings joy to you and those you share it with. So, grab your saucepan and your sweet tooth—it’s time to make some fudge.
Ingredients and Equipment
Diving into the world of fudge making is akin to embarking on a culinary adventure, one where the right tools and ingredients are your best allies. Let’s explore the essentials you’ll need to whip up this sweet, creamy delight.
Essential Ingredients for Making Fudge Recipe
At its core, fudge is a simple concoction, but the quality of ingredients can make or break the final product. Here’s what you’ll need:
- White Granulated Sugar: The backbone of any fudge, providing sweetness and texture.
- Butter: Opt for high-quality butter. It adds richness and helps achieve that creamy, melt-in-your-mouth consistency we all crave.
- Chocolate Chips or Cocoa Powder: Whether you’re a fan of dark, milk, or white chocolate, choosing high-quality chocolate is key to getting that deep, luxurious flavor.
- Milk or Cream: Full-fat versions lend a silky texture to your fudge. For a dairy-free version, coconut milk is a fabulous alternative.
- Vanilla Extract: Just a dash can elevate the flavor profile of your fudge, giving it a warm, aromatic quality.
Adding marshmallows or condensed milk can simplify the fudge-making process, offering a shortcut to that desired smooth texture without the need for a candy thermometer.
Necessary Equipment for Fudge Recipe Making
Now, onto the tools of the trade. Having the right equipment can transform the fudge making process from a frantic stir-fest to a smooth, enjoyable experience.
- Heavy Bottom Saucepan: A must-have for even heat distribution, preventing the sugar from scorching.
- Candy Thermometer: Essential for getting your fudge to just the right temperature. A digital one can make your life even easier.
- Wooden Spoon: Perfect for stirring, as it doesn’t conduct heat and has a comfortable grip for those lengthy stirring sessions.
- Baking Dish: Lined with parchment paper, it’s where your fudge will cool down and take shape. An 8×8 inch pan is ideal for standard recipes.
Remember, the magic of fudge making lies not just in following the recipe to the letter, but in using your senses and instincts. The smell of melting chocolate, the feel of the mixture thickening under your spoon, and the sight of glossy fudge pouring into the pan—these are the signs that you’re on the right path.
As we continue this journey into fudge mastery, remember: every batch tells a story. Whether it’s your first or fiftieth time making fudge, there’s always something new to discover. So, keep your ingredients fresh, your equipment ready, and your heart open to the sweet possibilities.
Fudge Making Techniques
Crafting the perfect Fudge Recipe is akin to conducting a symphony—the right techniques can harmonize simple ingredients into a masterpiece of flavors and textures. Let’s delve into the art of fudge making, exploring both traditional and modern methods to suit your style and taste.
Stovetop vs. Microwave Fudge
At the heart of fudge making are two primary methods: the stovetop and the microwave. Each has its merits, offering different paths to that sweet, creamy finish.
- Stovetop Fudge: The traditional route, requiring patience, constant stirring, and a keen eye on the candy thermometer. This method allows for more control over the cooking process, leading to a rich, complex flavor profile.
- Microwave Fudge: A modern twist, perfect for those seeking a quick and easy way to satisfy their fudge cravings. While it might not offer the depth of flavor achieved through stovetop cooking, it’s remarkably foolproof and produces delicious results in a fraction of the time.
How To Make Fudge on the Stovetop
- Prepare Your Ingredients: Measure out everything beforehand to ensure a smooth cooking process.
- Melt the Sugar: Combine your sugar, milk (or cream), and butter in the saucepan. Heat gently, stirring until the sugar dissolves.
- Boil to Perfection: Once the sugar is dissolved, crank up the heat and bring the mixture to a boil. This is where your candy thermometer comes in—aim for the soft ball stage (234-240°F or 112-115°C).
- Cool and Beat: After reaching the desired temperature, remove the pan from the heat. Let it cool slightly, then add vanilla and beat until the fudge thickens and loses its sheen.
- Set and Slice: Pour the mixture into your prepared dish, let it set, then cut into squares. Voilà—stovetop fudge!
How To Make Fudge in the Microwave
- Combine Ingredients: In a microwave-safe bowl, mix the chocolate chips with condensed milk (or your sugar and milk mixture).
- Microwave in Bursts: Heat in short bursts, stirring in between, until the mixture is smooth and fully combined.
- Add Flavors: Stir in vanilla or any other flavorings once the chocolate has melted.
- Chill and Enjoy: Pour into a dish, let it cool and set, then slice into your preferred size.
The Art of Perfect Fudge
Regardless of the method you choose, the key to perfect fudge lies in attention to detail—the precise temperature, the thorough mixing, and the patient setting. Each step is a building block towards that final, delectable piece that melts in your mouth, leaving a trace of sweetness and a desire for just one more bite.
As we continue our exploration into the world of fudge, remember that making fudge is more than just a culinary process—it’s an opportunity to create, experiment, and share the joy of homemade treats. Whether you’re perfecting the classic fudge preparation or experimenting with quick fudge making, the journey is just as sweet as the destination.
Stay tuned as we dive into the delightful world of Fudge Variations next, where creativity in flavors knows no bounds. For a classic dessert experience that pairs wonderfully with homemade fudge, explore the elegant layers of an Opera Cake in this detailed guide at OperaCook, where tradition meets taste in every bite.
Fudge Variations
The versatility of the Fudge Recipe is what makes it such a beloved treat across the globe. From the deep, rich flavors of classic chocolate to innovative concoctions that tease the palate with a mix of savory and sweet, fudge offers endless possibilities for creative expression. Let’s explore some delicious variations that will elevate your fudge-making game.
Classic Fudge Recipes
Before venturing into the realm of creative fudge-making, mastering the classics is essential. These foundational recipes serve as the perfect springboard for all your fudge explorations:
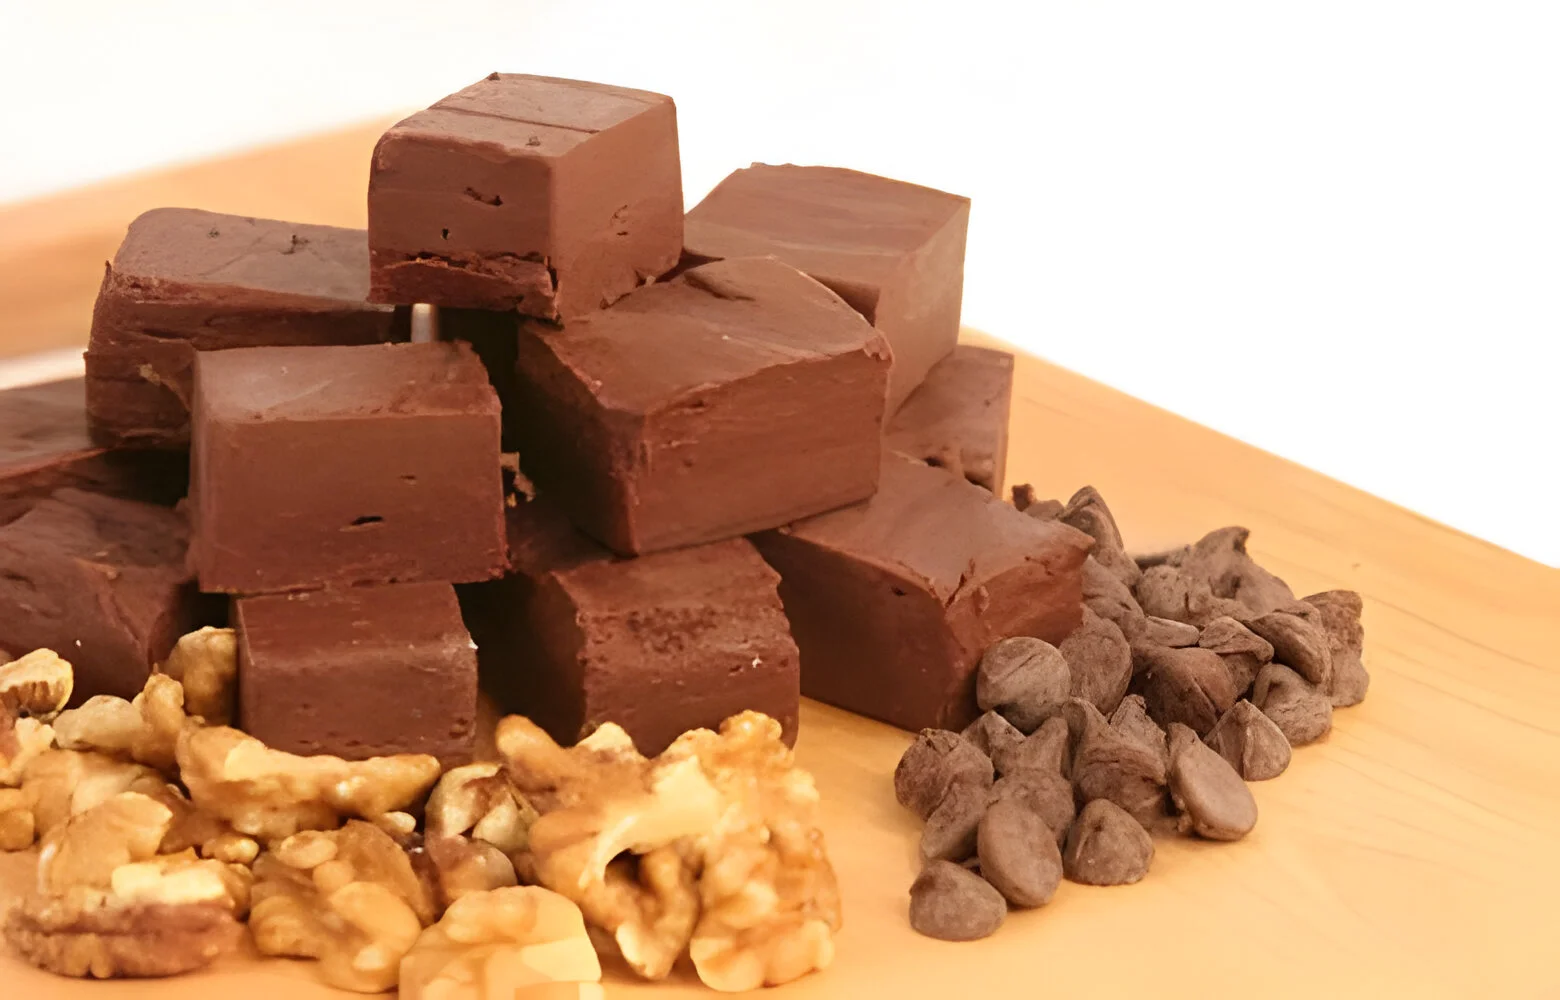
- Chocolate Fudge: The cornerstone of fudge recipes, boasting a velvety smooth texture and a richness that can only come from high-quality chocolate. A dash of vanilla enhances the chocolate’s depth without overpowering its natural flavors.
- Peanut Butter Fudge: A dreamy alternative for nut lovers, this recipe marries the creaminess of peanut butter with the traditional fudge base, resulting in a melt-in-your-mouth confection that’s both comforting and indulgent.
The simplicity of these recipes highlights the beauty of fudge making—transforming basic ingredients into something truly extraordinary.
Creative Fudge Ideas
Once you’ve mastered the basics, why not explore your culinary creativity? Here are some inspired Fudge Recipe variations that will surely excite your taste buds.
Firstly, consider Cookies and Cream Fudge. This playful twist on the classic includes chunks of crushed cookies in creamy white chocolate fudge. As a result, it becomes a fun, whimsical treat. Indeed, it’s bound to awaken the child within anyone.
Next, there’s Salted Caramel Fudge. This variation combines sweet and salty in a delightful dance, with rich caramel fudge meeting flaky sea salt. Consequently, it presents a sophisticated take on the traditional Fudge Recipe. Perfectly suited for those who appreciate a blend of contrasting flavors.
Then, for the coffee lovers, Mocha Fudge is a dream come true. It merges the boldness of espresso with the inherent sweetness of chocolate, providing a caffeinated boost with every bite. Thus, it becomes an indulgent option suitable for any time.
Lastly, Fruit and Nut Fudge offers a chance to mix textures and sweetness levels. By incorporating dried fruits and nuts, you introduce both crunch and natural sweetness. Whether you choose the tartness of cranberries or the earthy notes of pistachios, this variation encourages experimentation. Indeed, it allows you to discover the perfect flavor combination.
Innovation in Every Bite
These variations are just the beginning of what’s possible with a good Fudge Recipe. Feel encouraged to experiment with your favorite ingredients, whether it’s adding a splash of orange liqueur (avoiding alcohol, just a hypothetical flavor example), swirling in some raspberry puree, or even mixing in some spicy chili for a kick. The key is to balance the sweetness of the fudge with your add-ins, creating a harmonious blend that tantalizes the palate.
Storing and Serving Fudge
Congratulations, you’ve mastered the art of fudge making! Now, let’s talk about how to store and serve your delicious creations, ensuring they remain irresistible for as long as possible.
How to Properly Store Fudge
The key to fudge that stays fresh and creamy lies in proper storage. Here’s how to keep your fudge at its best:
- Airtight Containers: Once your fudge has cooled and been cut into pieces, store it in an airtight container. This prevents it from absorbing odors from the fridge or pantry and keeps it moist.
- Room Temperature vs. Refrigeration: Fudge can be stored at room temperature for up to two weeks. If you prefer your fudge a bit firmer, or if you’re in a warm climate, refrigerating it can extend its life to about three weeks. Just be sure to let it come to room temperature before serving for the best flavor and texture.
- Freezing for Longevity: For long-term storage, fudge freezes beautifully. Wrap individual pieces in wax paper, then place them in a zip-lock freezer bag or an airtight container. Frozen fudge can last for up to three months. Thaw it overnight in the refrigerator or for a few hours at room temperature when you’re ready to enjoy.
Serving Suggestions for Fudge
Fudge is versatile not just in flavor but also in how it can be served and presented. Here are a few ideas to elevate your fudge serving game:
- Dessert Platters: Combine your fudge with other sweet treats such as cookies, brownies, and candied nuts for a decadent dessert platter.
- Gift Giving: Beautifully packaged fudge makes for a thoughtful and delicious gift. Use decorative boxes, tins, or mason jars lined with parchment paper for a personal touch.
- As a Dessert Topping: Melt a piece of fudge and pour it over ice cream, cakes, or pancakes for a rich, chocolatey sauce that’s sure to impress.
Remember, serving fudge is about more than just taste; it’s an opportunity to create moments of joy and indulgence. Whether neatly stacked on a plate for a family gathering or wrapped up as a gift for a friend, fudge brings smiles to faces and warmth to hearts.
Common Fudge Making Problems and Solutions
Even the most experienced fudge makers can encounter a few hiccups along the way. But fear not! Most fudge dilemmas have simple solutions that can help you salvage your sweet efforts. Let’s troubleshoot some common fudge making problems and turn those frown moments into proud ones.
Troubleshooting Your Fudge
- Grainy Fudge: A common issue where the sugar crystallizes, resulting in a gritty texture. To prevent this, ensure the sugar is completely dissolved before the mixture boils. Stirring gently and consistently is key. If your fudge does turn grainy, don’t despair. You can try melting it down with a bit of milk, then carefully reheating and cooling it again.
- Fudge That Won’t Set: This usually happens if the fudge hasn’t reached the correct temperature. Fudge needs to hit the soft ball stage (234-240°F or 112-115°C) to set properly. If your fudge is too soft, return it to the pot, reheat to the right temperature, and pour it back into the pan to set.
- Too Hard Fudge: Overcooking is often the culprit here, causing the fudge to become hard and crumbly. To avoid this, use a candy thermometer and watch the heat closely. If you end up with hard fudge, adding a little cream and reheating the mixture slowly can help restore some of its creaminess.
- Fudge That’s Too Soft: If your fudge is too soft, it might not have cooked long enough. Ensure it reaches the soft ball stage on a candy thermometer. As a fix, you can try beating it more vigorously after it cools to encourage thickening.
The Joy of Perfecting Fudge
Remember, making fudge is as much about the journey as it is about the destination. Each batch is an opportunity to refine your technique and learn more about the delicate balance of sugar, temperature, and timing. With each attempt, you’ll come closer to perfecting your fudge recipe, creating a treat that’s sure to delight anyone who tastes it.
FAQs
Throughout our Fudge Recipe-making journey, several questions often bubble to the surface, much like the sugar and butter in our saucepan. Here are answers to some frequently asked questions about making fudge, providing you with extra nuggets of wisdom to ensure your fudge is nothing short of fabulous.
Frequently Asked Questions About Making Fudge
- Why does my fudge taste grainy? Graininess usually results from sugar crystallization. This can be prevented in your Fudge Recipe by ensuring the sugar is fully dissolved before the mixture reaches boiling point and by avoiding stirring the fudge once it starts to boil.
- Can I make fudge without a candy thermometer? Yes, although a candy thermometer is helpful for accuracy in your Fudge Recipe, the soft ball stage can be tested by dropping a small amount of fudge mixture into cold water. If it forms a soft ball, it’s ready. However, investing in a candy thermometer can take a lot of the guesswork out of the process.
- How can I add flavor to my fudge without making it too soft? Adding liquid flavorings to your Fudge Recipe can indeed make your fudge too soft. Opt for concentrated flavor extracts, and add them at the end of the cooking process. Solid add-ins like nuts or dried fruit should not affect the consistency and can be a great way to introduce new flavors and textures.
- Why didn’t my fudge set? If your fudge from the Fudge Recipe hasn’t set, it might not have been cooked to a high enough temperature. It needs to reach the soft ball stage, which is between 234-240°F (112-115°C). You can try reheating the mixture to the correct temperature and then letting it set again.
- Can I freeze fudge? Absolutely! Fudge freezes well. Wrap it tightly in plastic wrap and then place it in an airtight container or freezer bag. When you’re ready to enjoy it, let the fudge thaw in the refrigerator or at room temperature.
Conclusion and Call to Action
As our Fudge Recipe making adventure draws to a close, we hope you’re left with not just a tray of delicious fudge but also a deeper appreciation for the art of dessert making. Fudge is more than just a sweet treat; it’s a canvas for creativity, a medium for experimentation, and, above all, a source of joy and satisfaction.
We’ve stirred and simmered, tasted and tested, and through it all, we’ve discovered that the best fudge is the one made with passion and shared with love. Whether you stick to the timeless classics or venture into the realm of inventive flavors, remember that every batch is a reflection of your unique touch.
So, what are you waiting for? Grab your saucepan, your favorite ingredients, and let the magic happen. And when you’re ready to expand your culinary horizons, remember, OperaCook is just a click away, brimming with recipes, tips, and inspiration to fuel your next kitchen adventure.
Thank you for joining us on this sweet journey. Here’s to many more delicious discoveries and to the simple joy of making and sharing fudge. Happy cooking!


